PlanB
!!!必看!!! 小猫的问题不要在 TB 上讨论,聊天审核可能会封禁
!!!注意!!! 实在搞不定可以要求远程,或者加VX沟通
!!!注意!!! 或者加添加飞书沟通 
要接管全部流量,代码中运行,参考 2.5 开启 tun mode 模式
有问题可以让远程协助
0 准备
0.1 注册登录
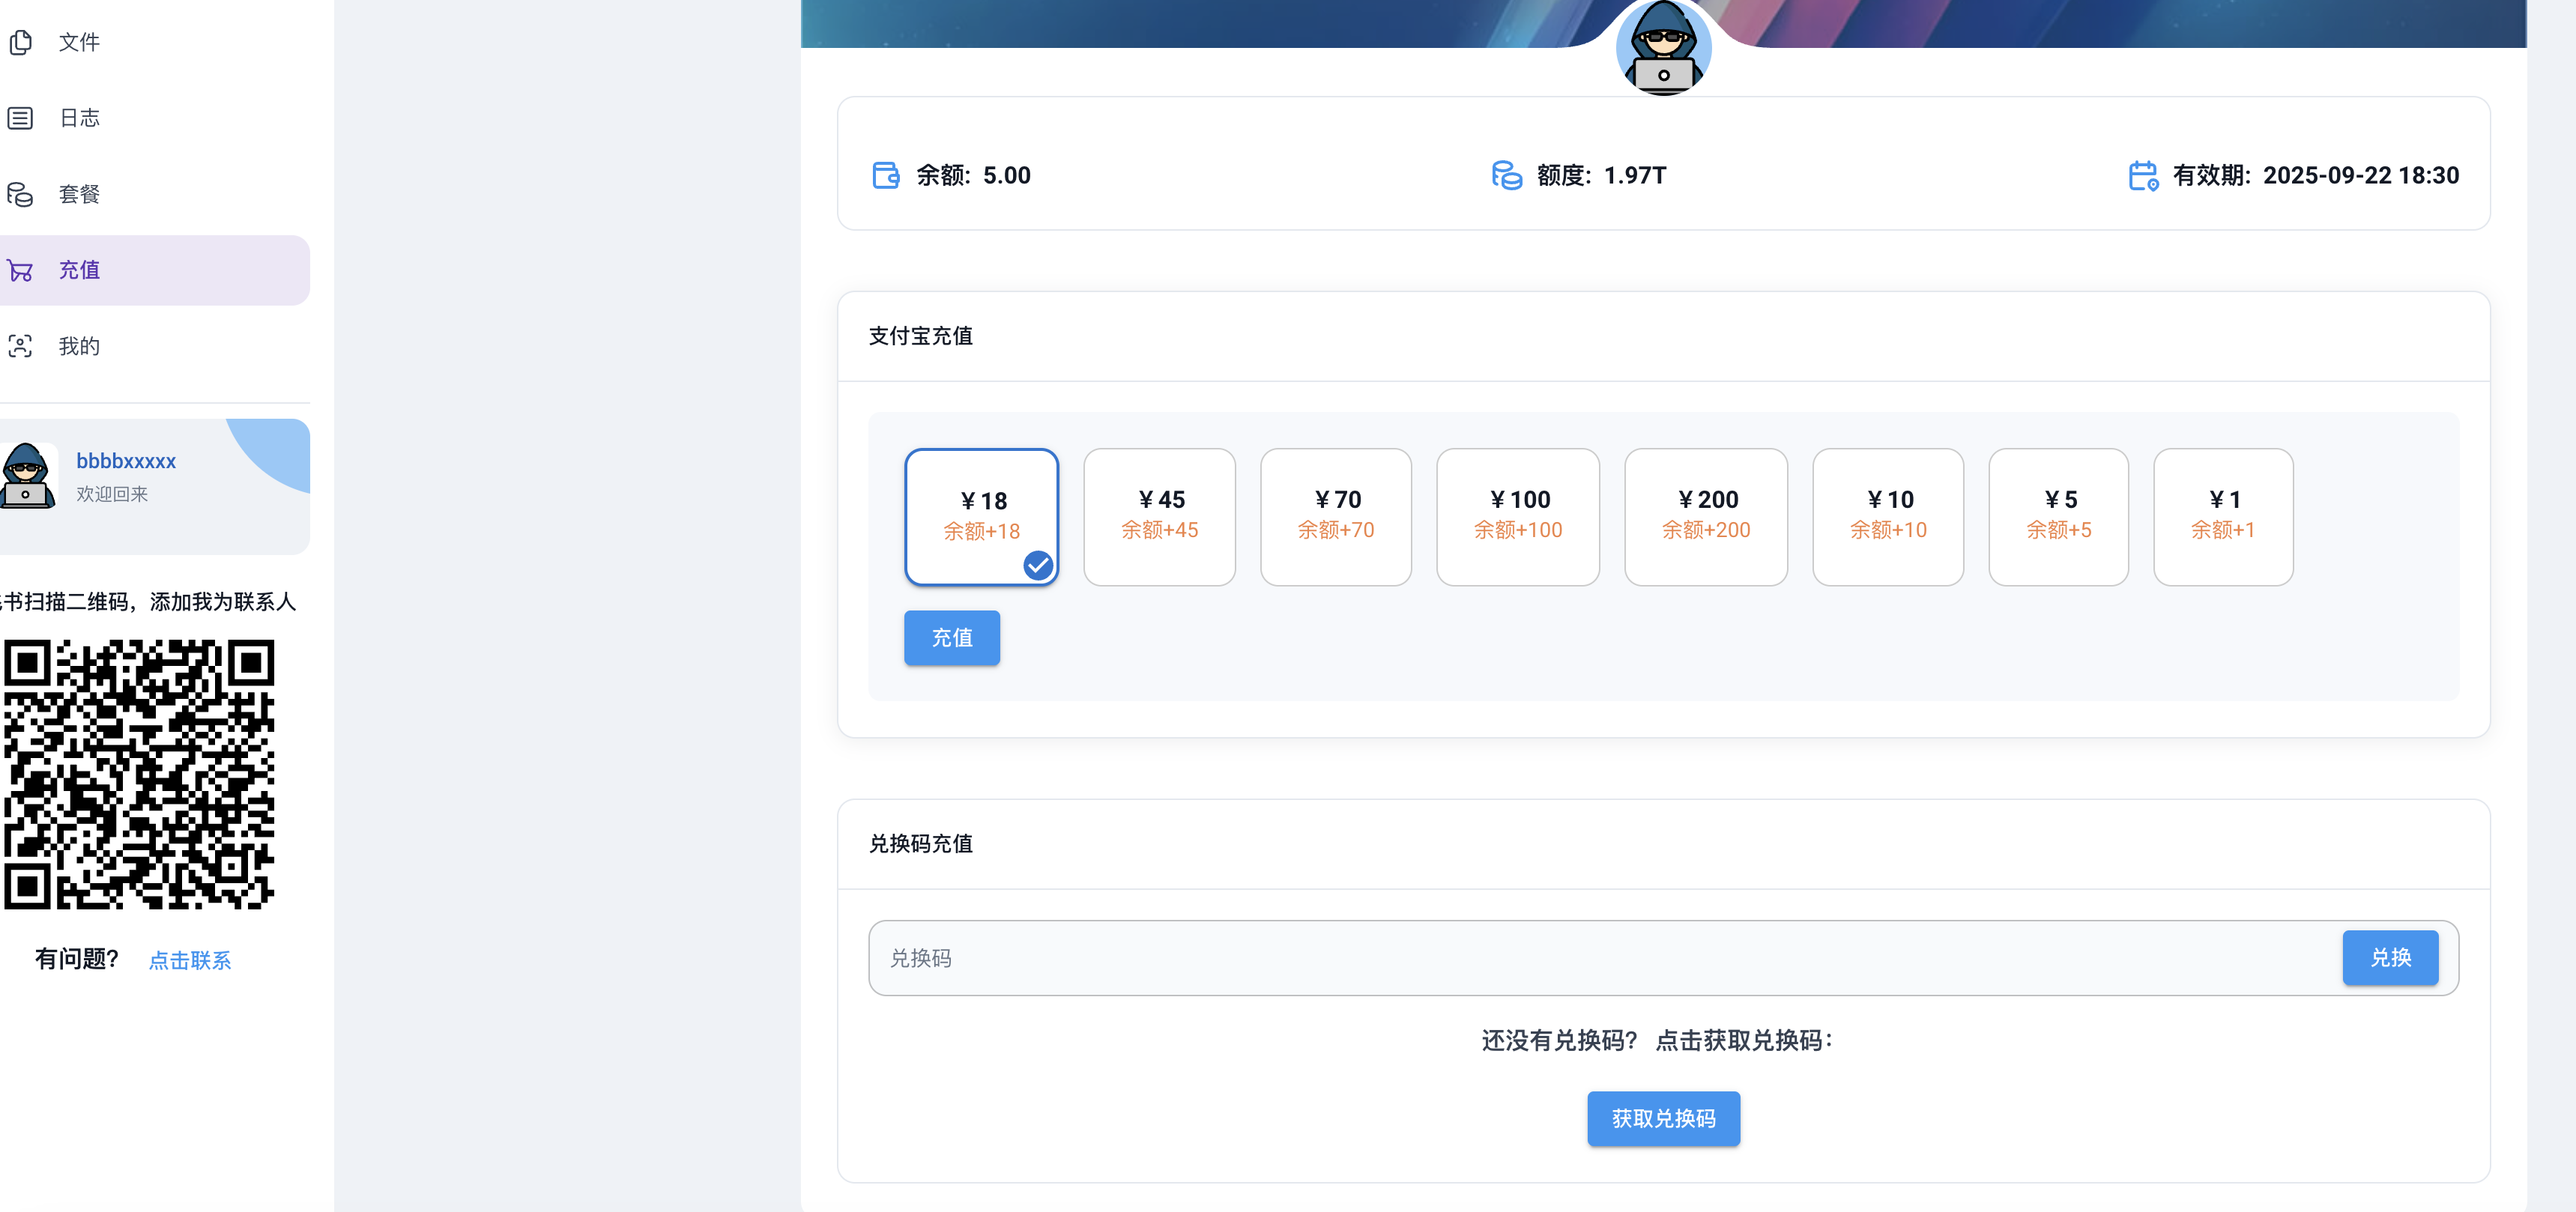
0.2 充值余额
购买的兑换码充值,或者直接支付宝扫码充值
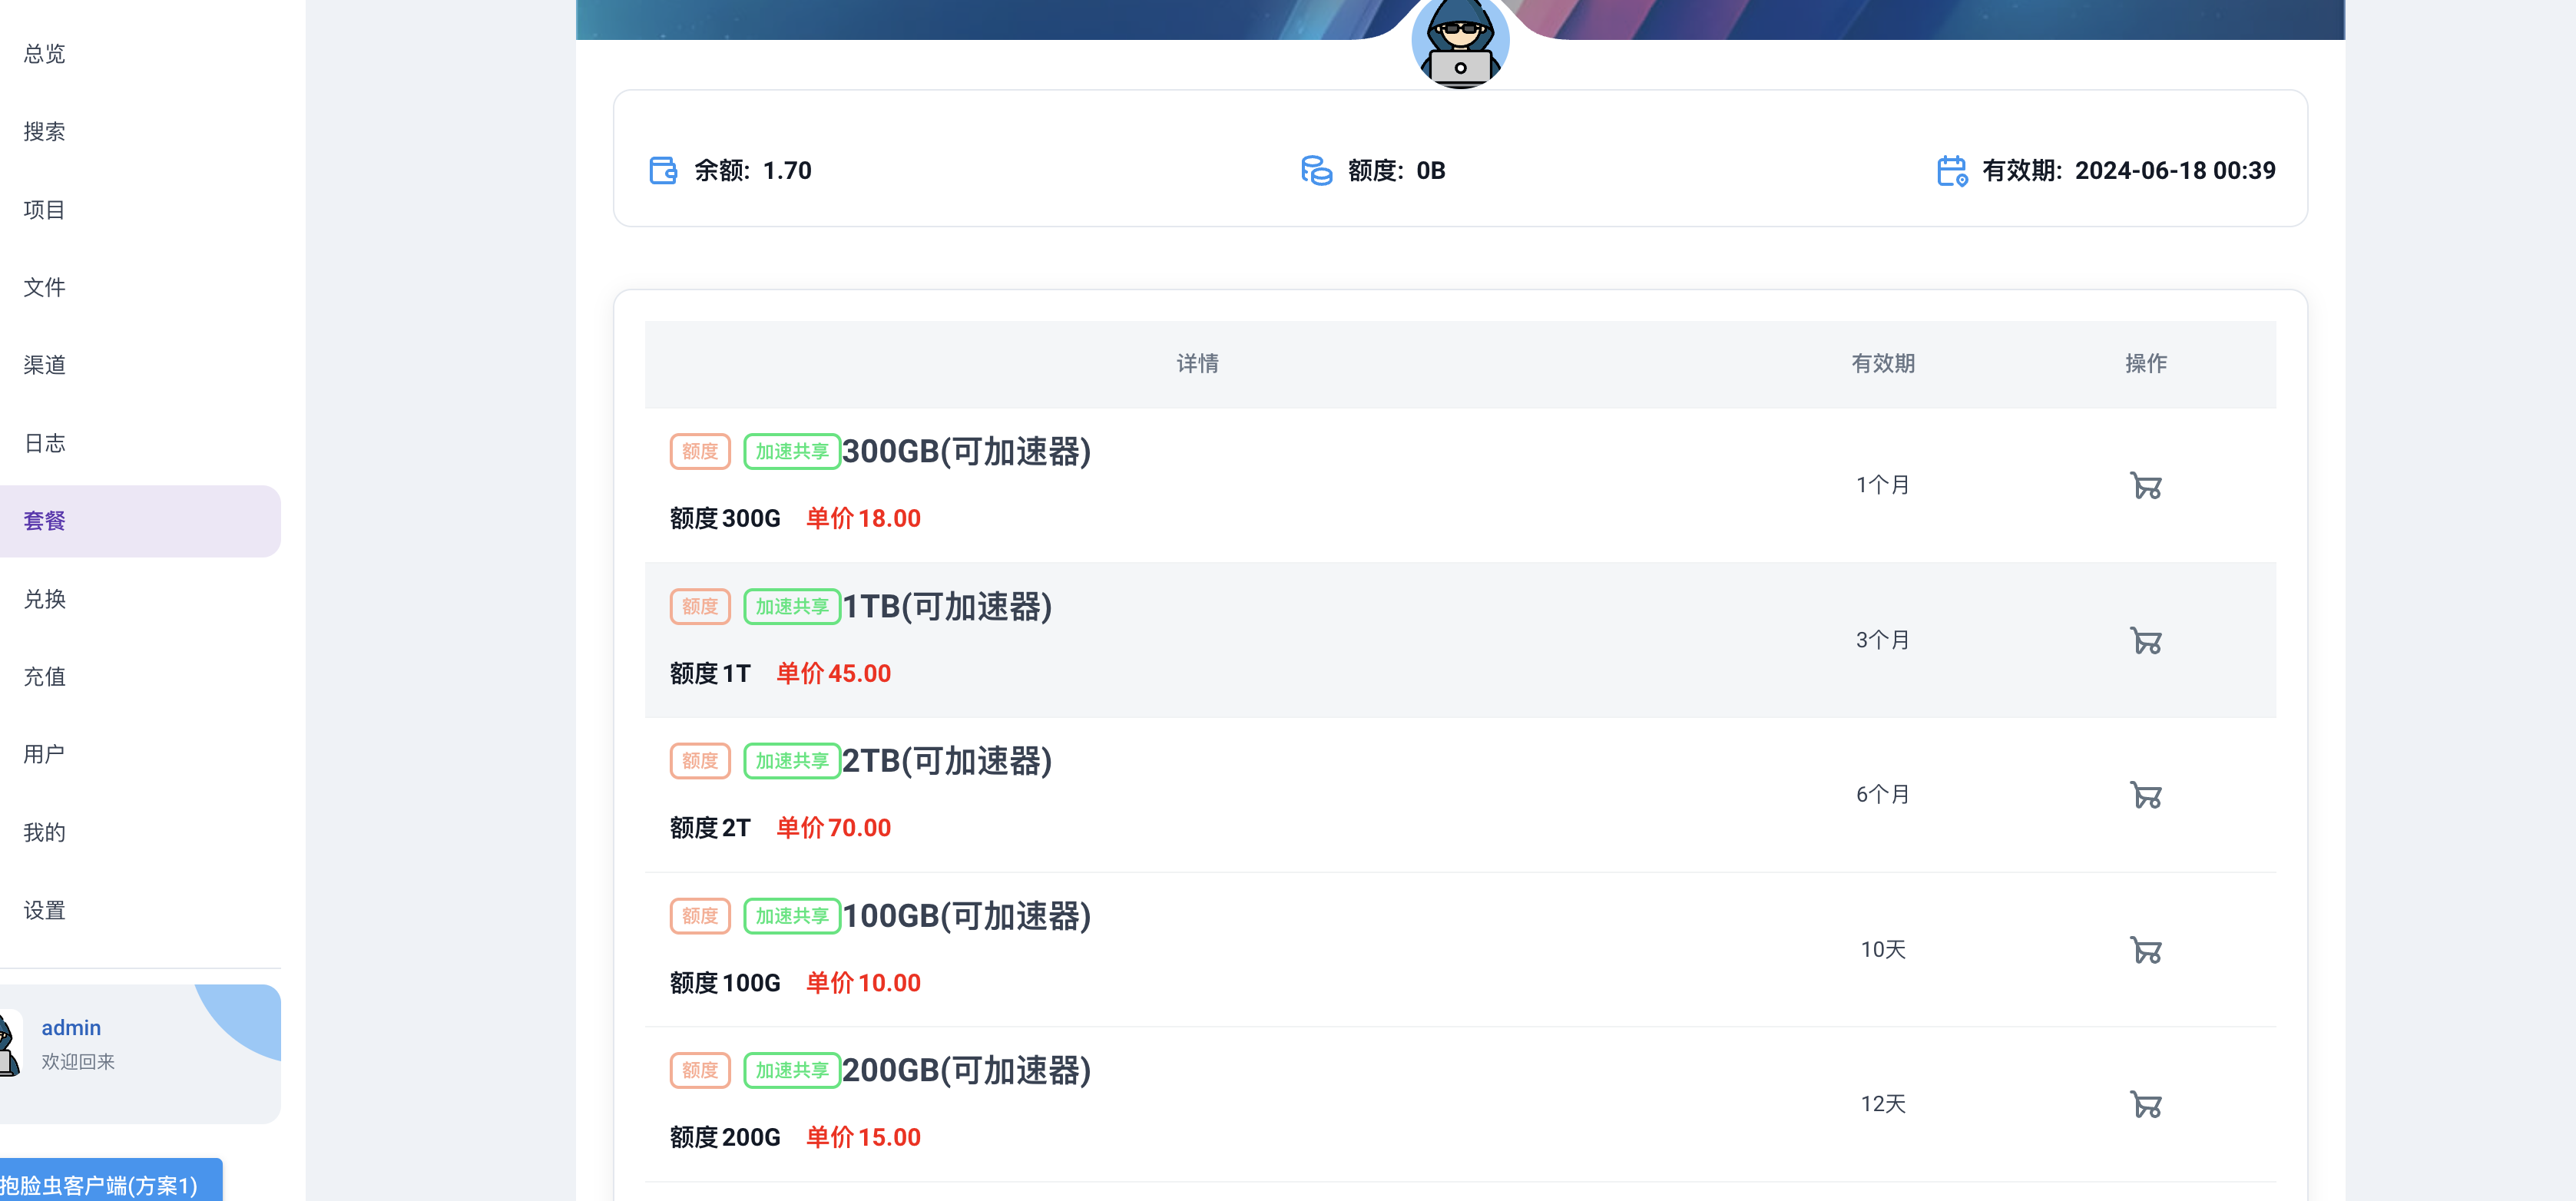
0.3 购买流量额度(必须购买支持加速共享的)
1 下载后安装
1.1 下载地址(Linux 终端版直接看步骤 7)
方案2
1.2 安装问题处理
1.2.1 MacOS 报错处理(MacOS 没有报错可以无视)
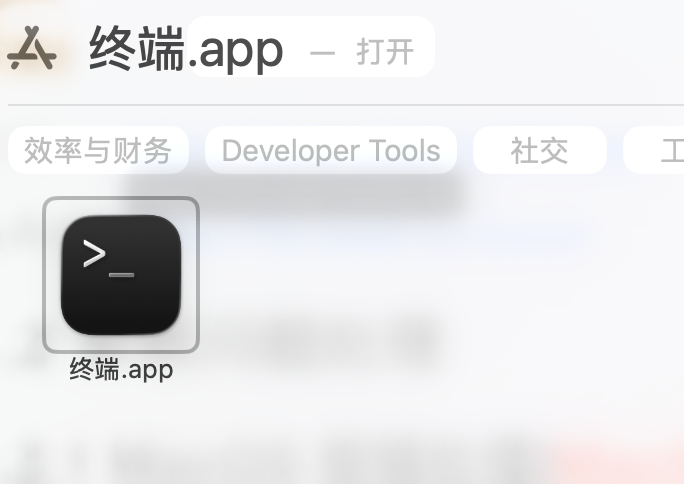
第一步 打开终端,执行
、
sudo spctl --master-disable
第二步 设置里面 改成「任何来源」
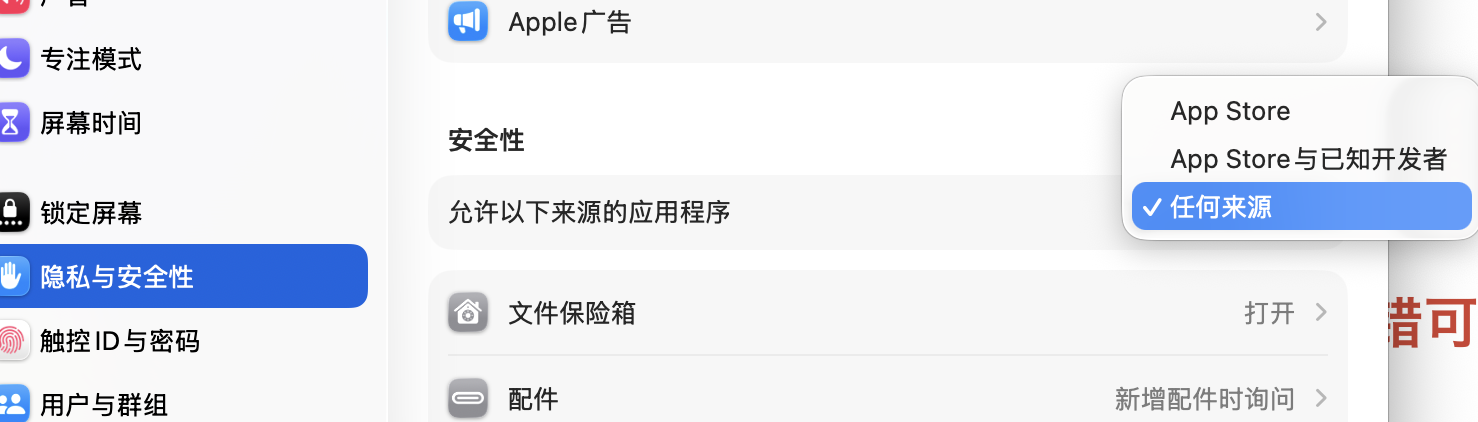 第三步 终端,执行
第三步 终端,执行js
xattr -d com.apple.quarantine /Applications/Clash\ Verge.app
1.2.2 Linux 下 安装运行以及问题解决(Window 和 MacOS 用户忽略这部分)
1.2.2.1 Linux deb 包安装,根据 deb 包文件名不同做适当调整
conf
sudo apt update
sudo apt install -fy ./Clash.Verge_2.3.0-alpha_amd64.deb
Ubuntu24.04 提示缺少库 libwebkit2gtk-4.0 看 https://blog.csdn.net/qq_33247897/article/details/139866179
使用文本编辑器 vim 或者 gedit 都可以,这里使用 gedi
conf
sudo apt install gedit
sudo gedit /etc/apt/sources.list.d/ubuntu.sources
打开之后,在里面新增以下内容
conf
Types: deb
URIs: http://br.archive.ubuntu.com/ubuntu/
Suites: jammy noble-updates noble-backports
Components: main restricted universe multiverse
Signed-By: /usr/share/keyrings/ubuntu-archive-keyring.gpg
Types: deb
URIs: http://security.ubuntu.com/ubuntu/
Suites: jammy-security
Components: main restricted universe multiverse
Signed-By: /usr/share/keyrings/ubuntu-archive-keyring.gpg
更新源,安装 libwebkit2gtk
conf
sudo apt update
sudo apt install libwebkit2gtk-4.0-dev
1.2.2.2 Linux 便携版本 AppImage,根据 AppImage 文件名不同做适当调整
conf
chmod +x mat_1.6.5_amd64.AppImage
./mat_1.6.5_amd64.AppImage
如果报错了,提示缺少 fuse 库
swift
sudo add-apt-repository universe
sudo apt install libfuse2
如果 Ubantu(<=21.10),则执行
swift
sudo apt install fuse libfuse2
sudo modprobe fuse
sudo groupadd fuse
user="$(whoami)"
sudo usermod -a -G fuse $user
Ubuntu18 等老版本报错提示找不到 GLIBC_2.28, 要执行一下命令更新到 GLIBC_2.28
conf
sudo su -c 'echo "deb http://security.debian.org/debian-security buster/updates main" >> /etc/apt/sources.list' root
sudo apt-key adv --keyserver keyserver.ubuntu.com --recv-keys 112695A0E562B32A 54404762BBB6E853
sudo apt update
sudo apt install libc6 libc6-dev -y
对于 ubuntu 24.4

conf
解决的办法有四种,第四种解决方法,一劳永逸。
1、启用用户名称空间: sudo sysctl kernel.unprivileged_userns_clone=1,但每次开机都要运行该命令。
2、给报错信息给出的文件授权:sudo chown root /chrome-sandbox && sudo chmod 4755 /chrome-sandbox,即解决网易云音乐该问题时的操作,但不适用于picgo。
3、运行的时候加上免沙箱命令:--no-sandbox
4、开机时自启动用户名称空间:echo 'kernel.unprivileged_userns_clone=1' > /etc/sysctl.d/userns.conf
该命令只适用于Debian/Ubuntu系列Linux发行版,未测试其他发行版。
2 登录账号
2.1 登录
2.1.1 点击 订阅->「新建」
Tips:如果主站无法访问,可以尝试使用备用站登录
填入账号密码后点击「保存」
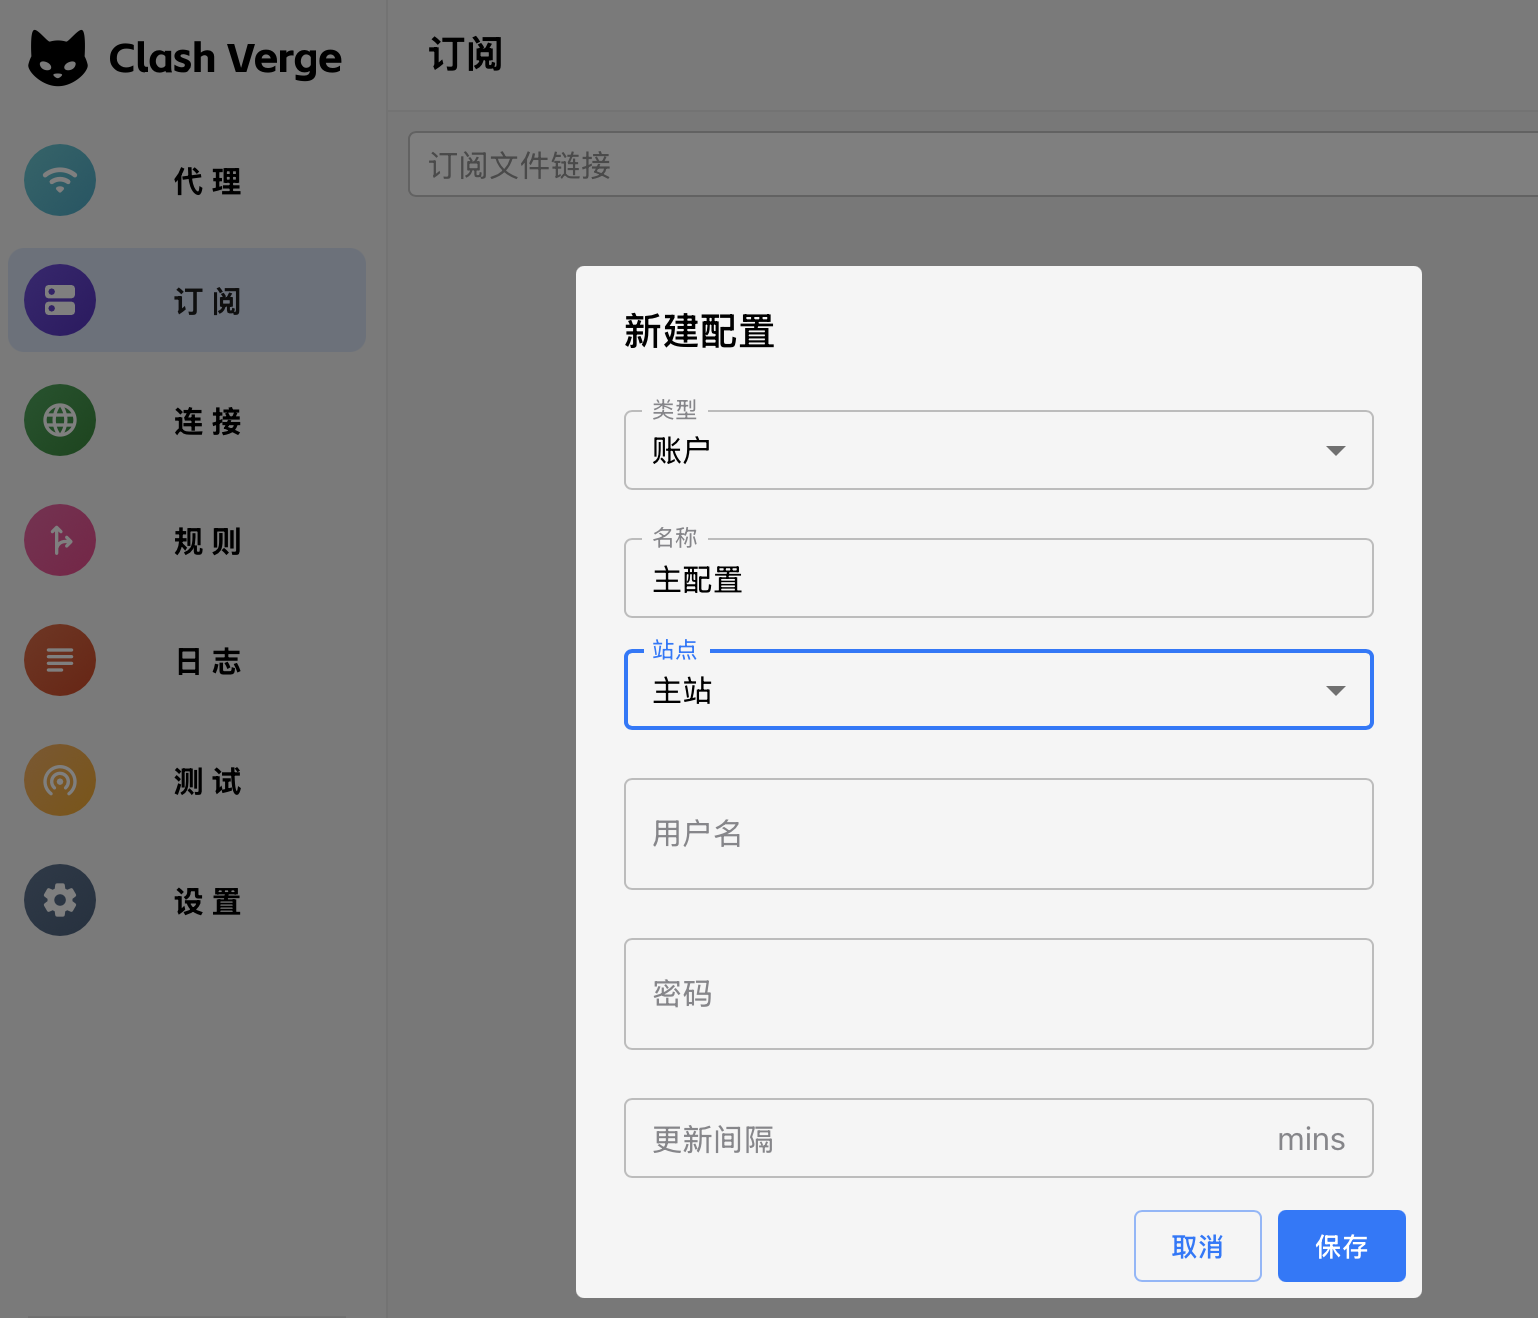
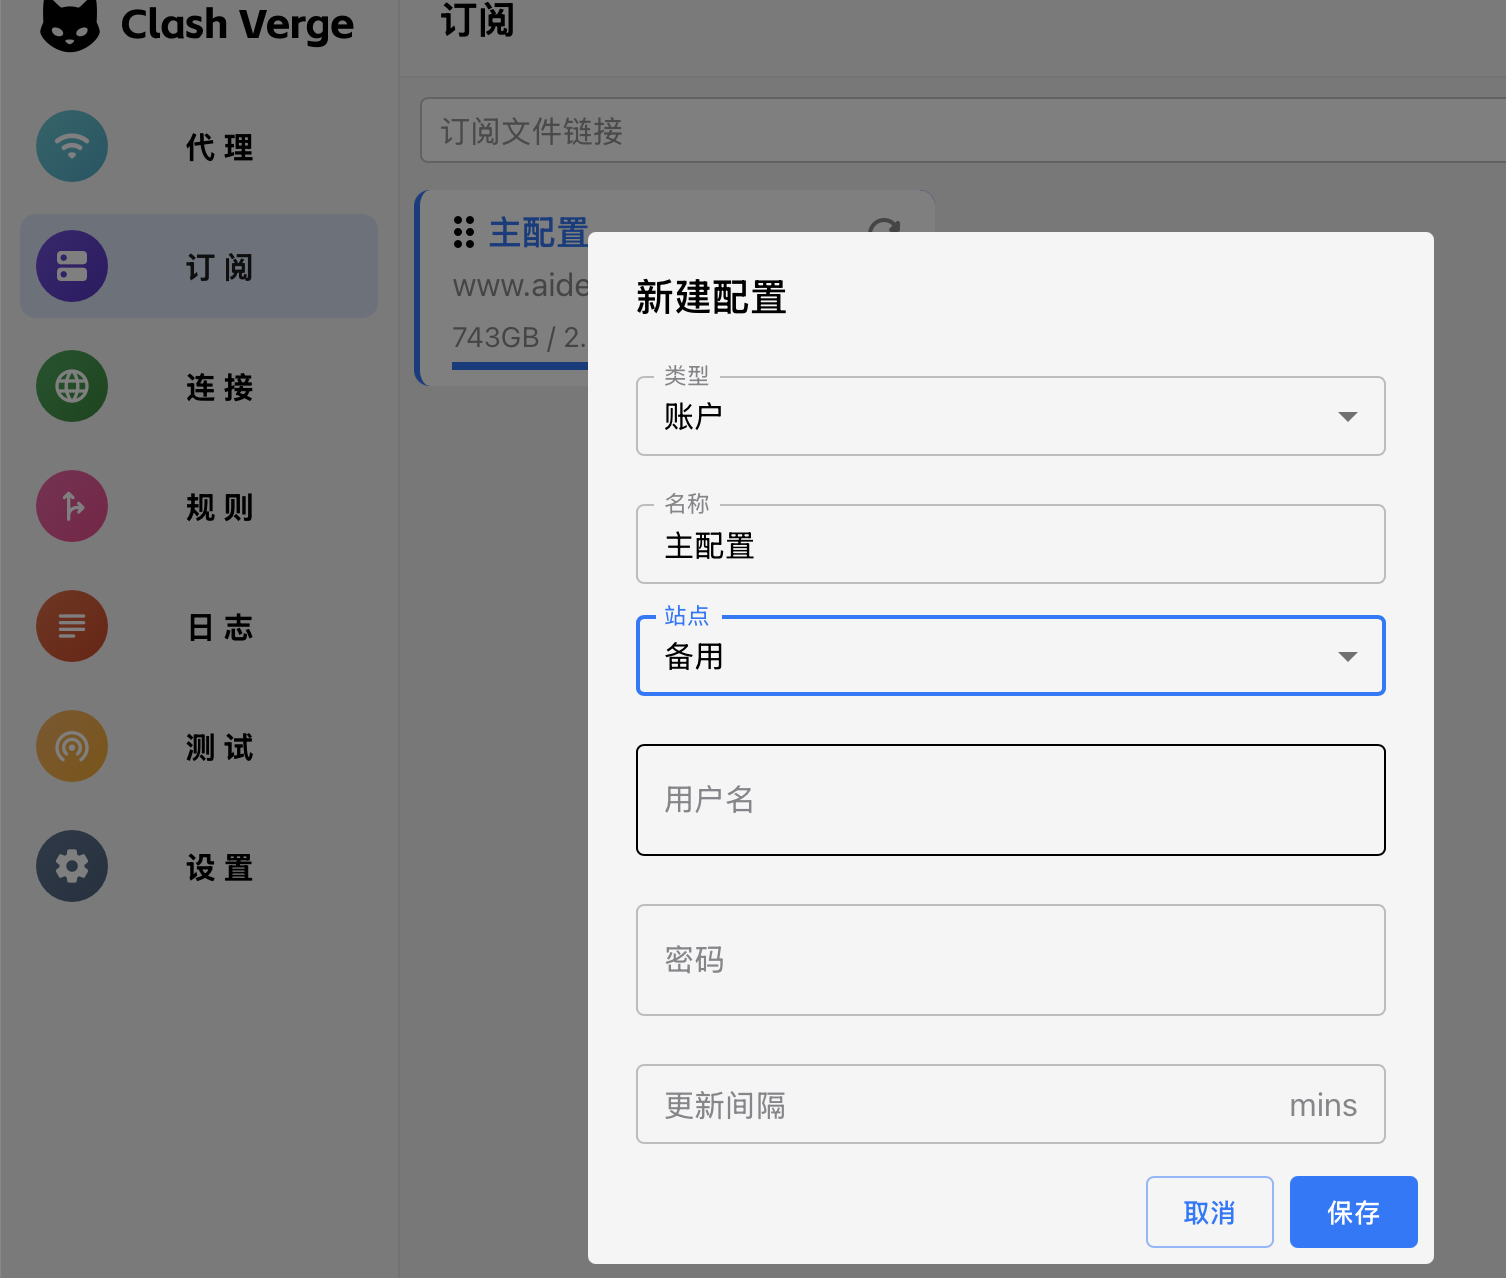
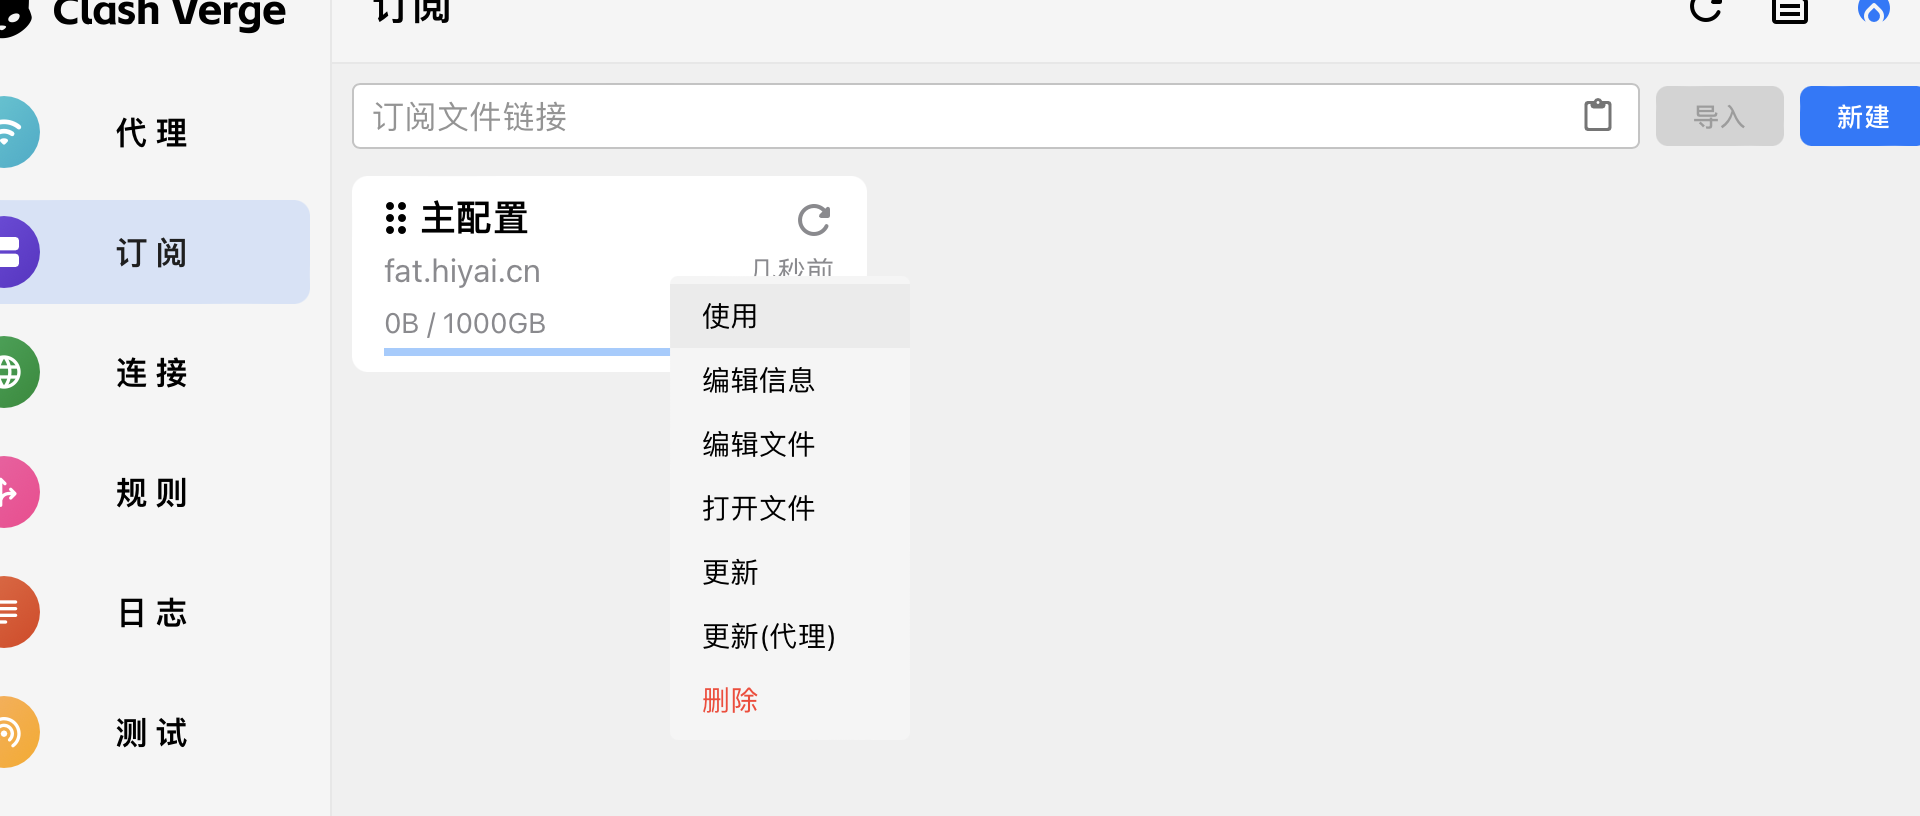
2.1.2 右键->「使用」
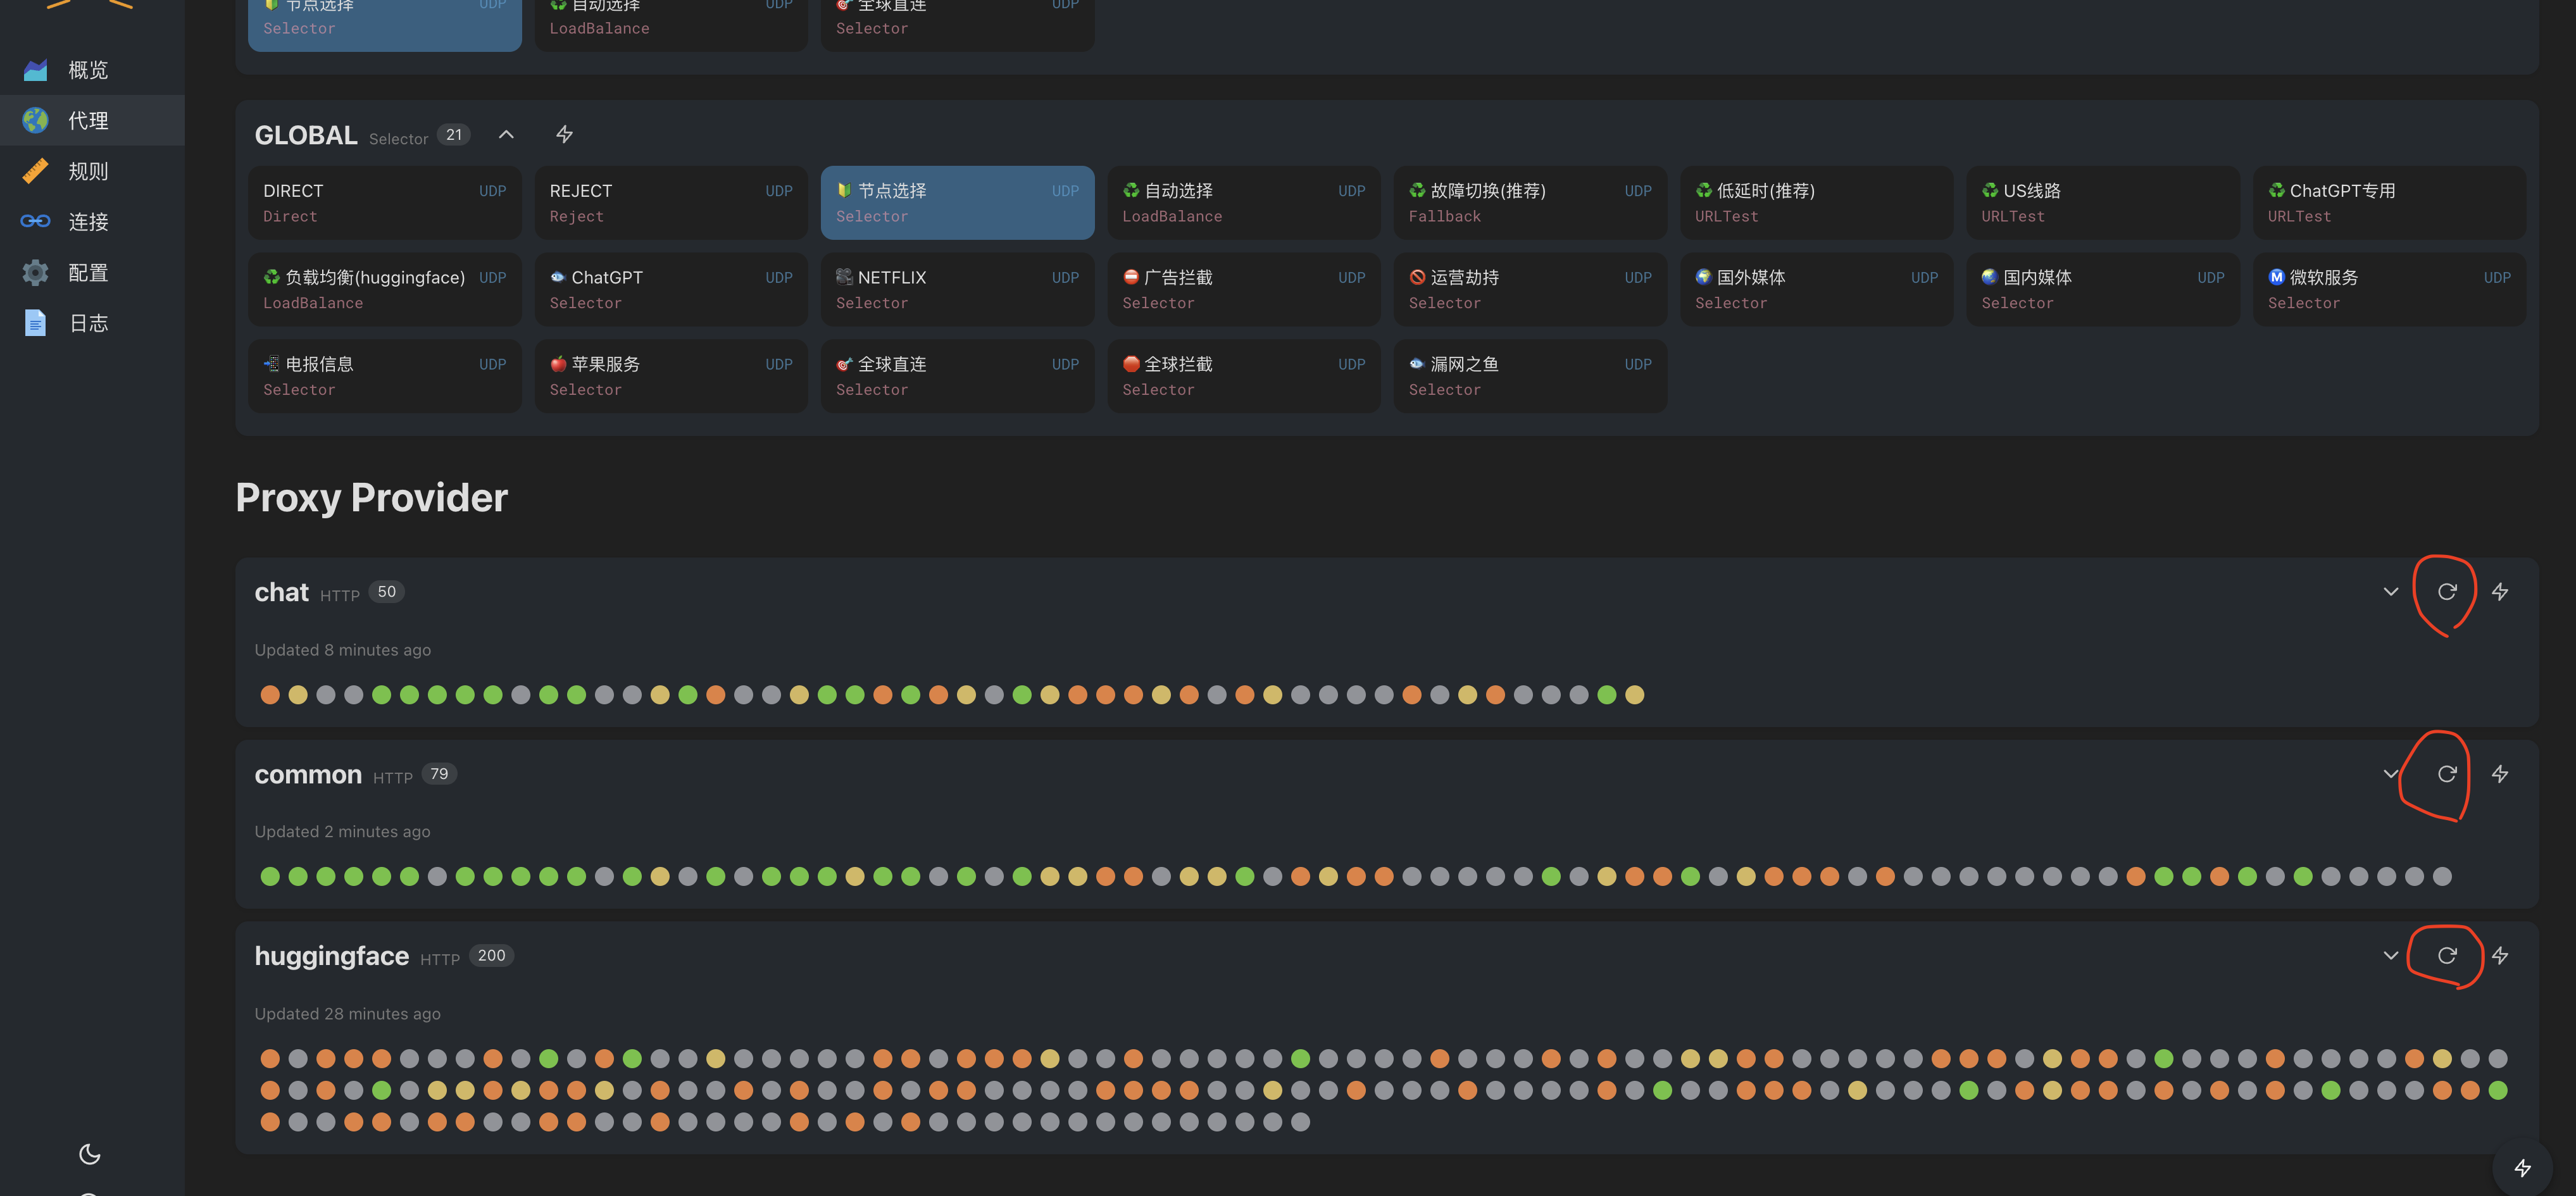
2.2 更新节点信息(非必须)
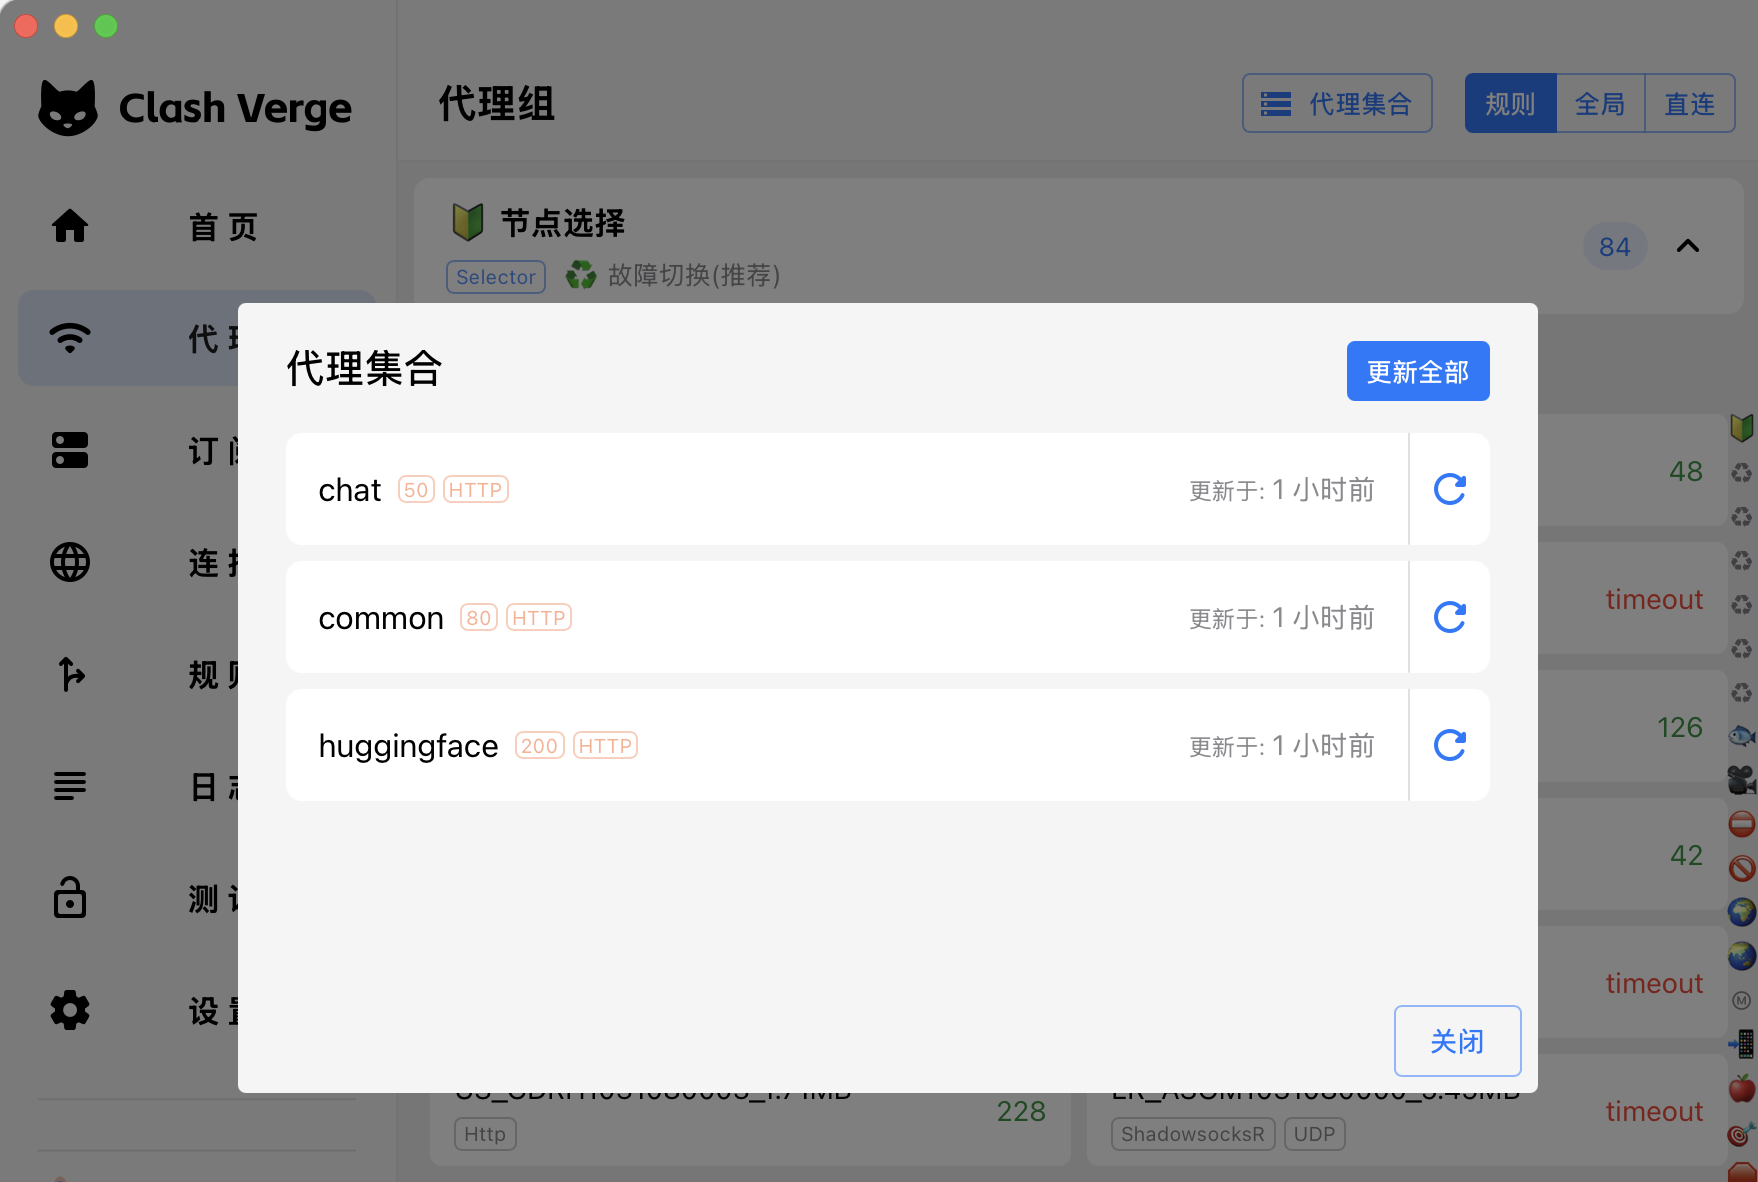
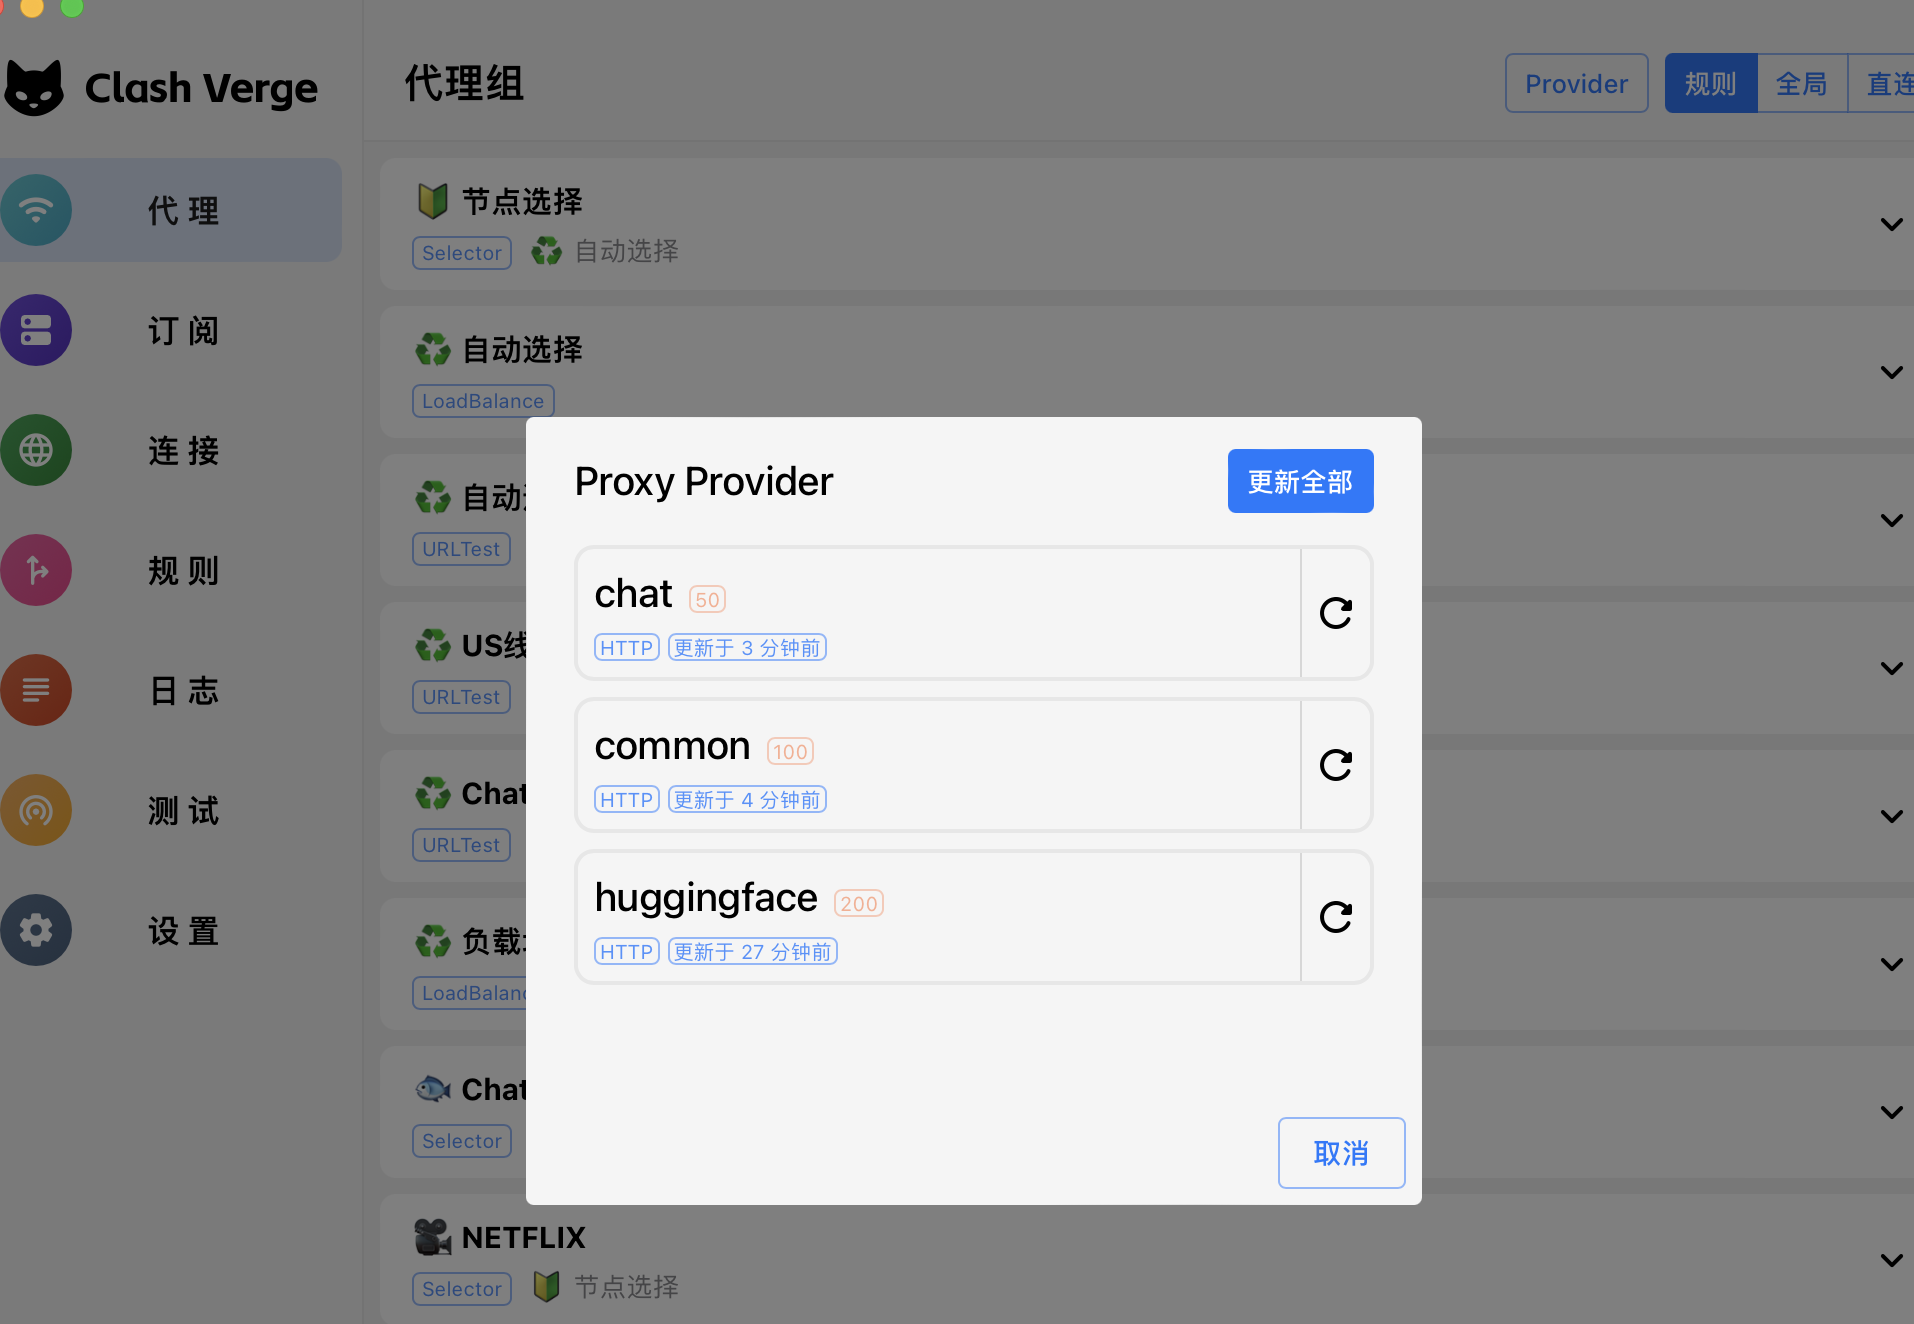
点击代理 -> Provider -> 更新全部
2.3 代理
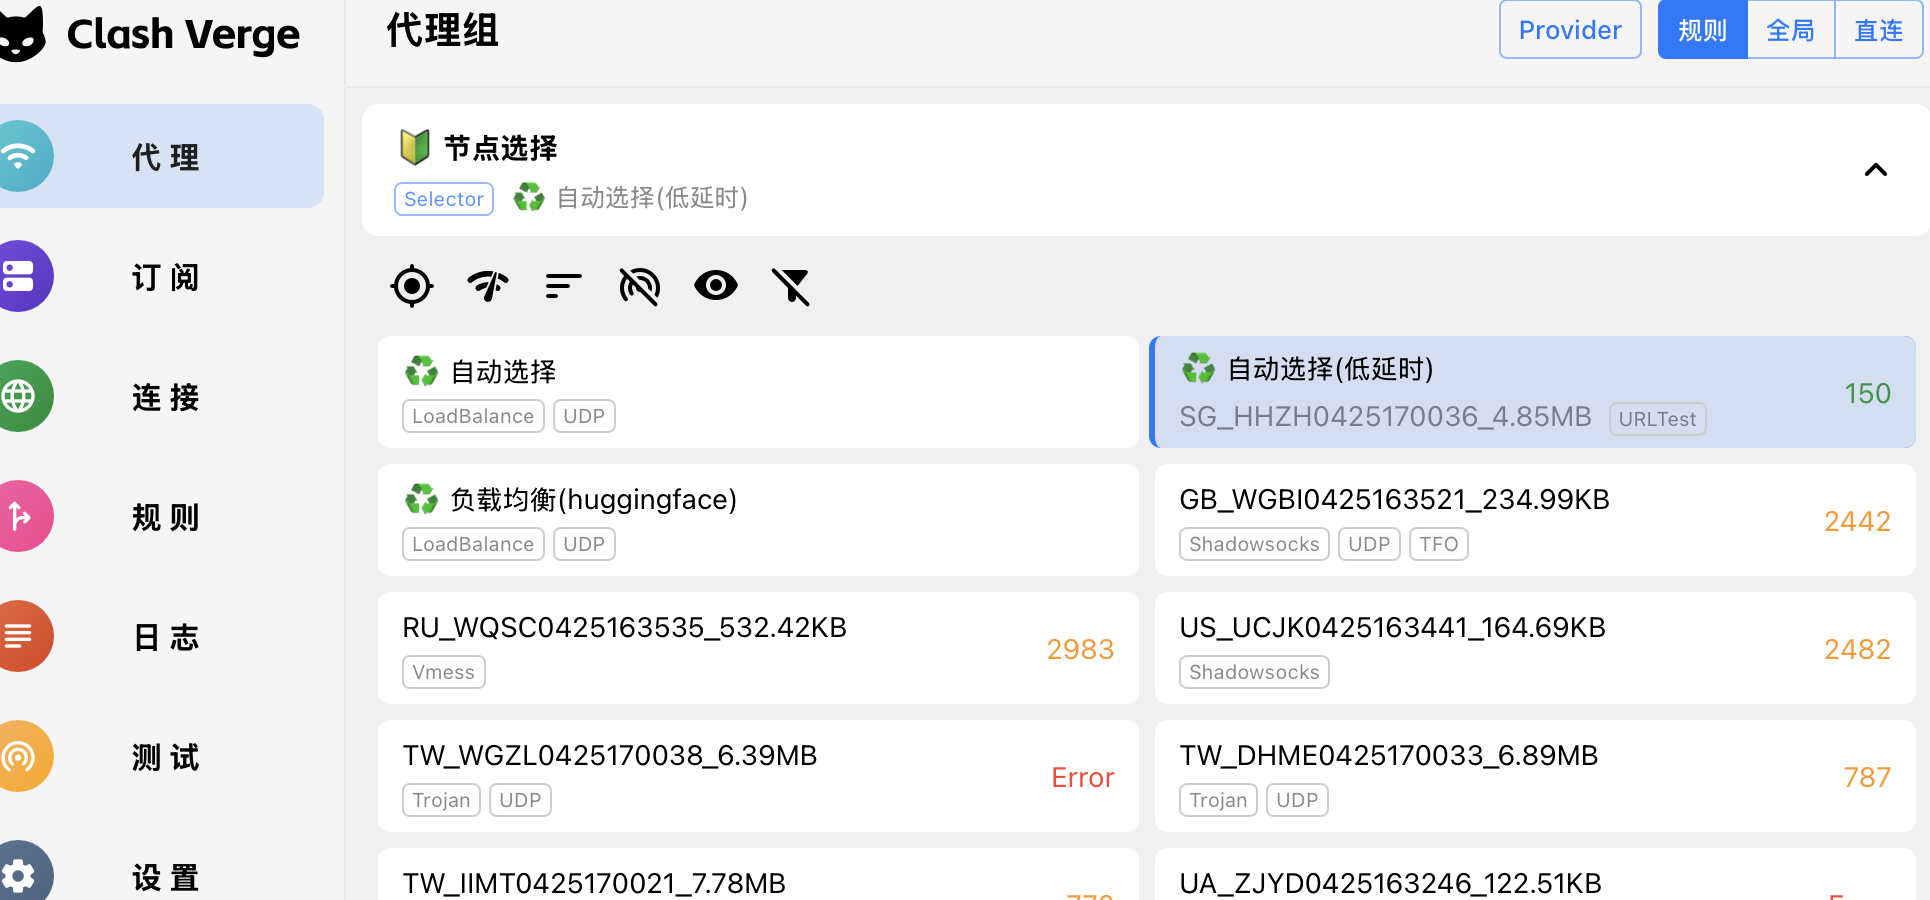
一般情况选规则-> 节点选择-> 低延时(推荐) 或 故障切换(推荐) 便可
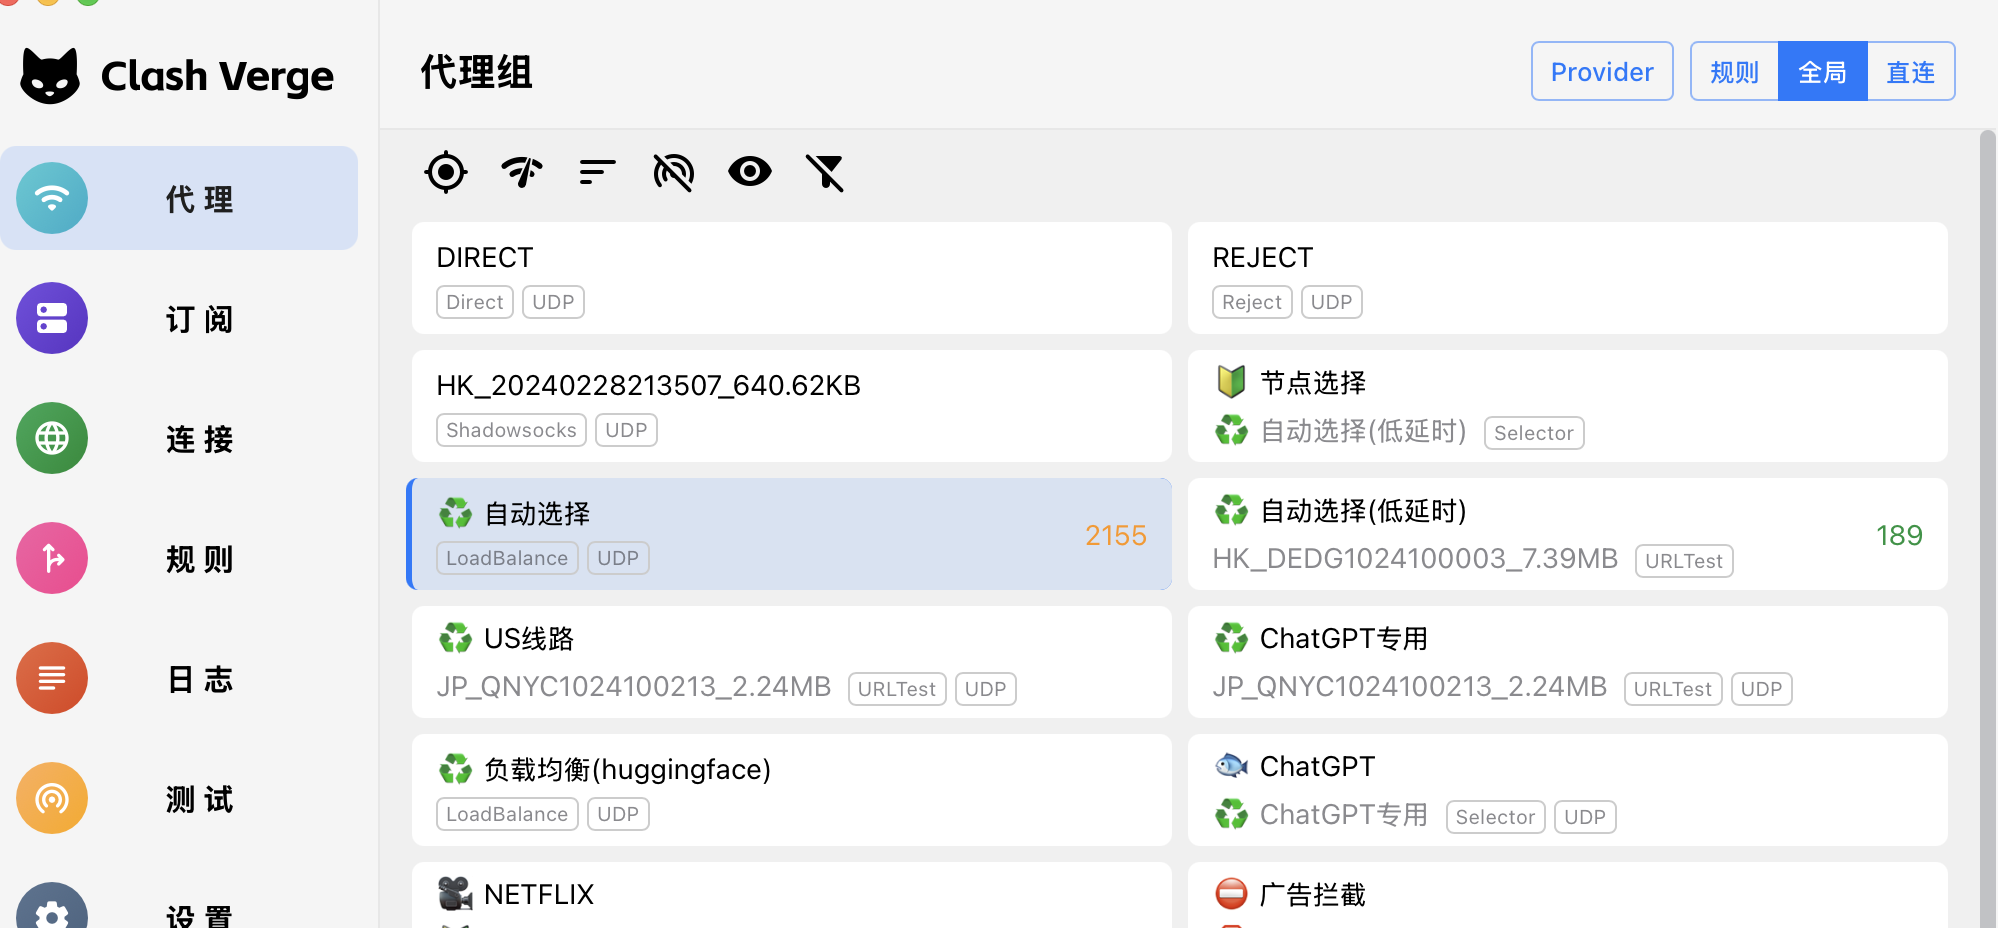
如果有些网站没有被规则涵盖,可以切换到全局(全局模式所有经过小猫的流量都会走节点,包括国内站点)
全局模式里选自动或低延时,非必须不建议用全局模式
2.4 开启系统代理,修改本地代理端口
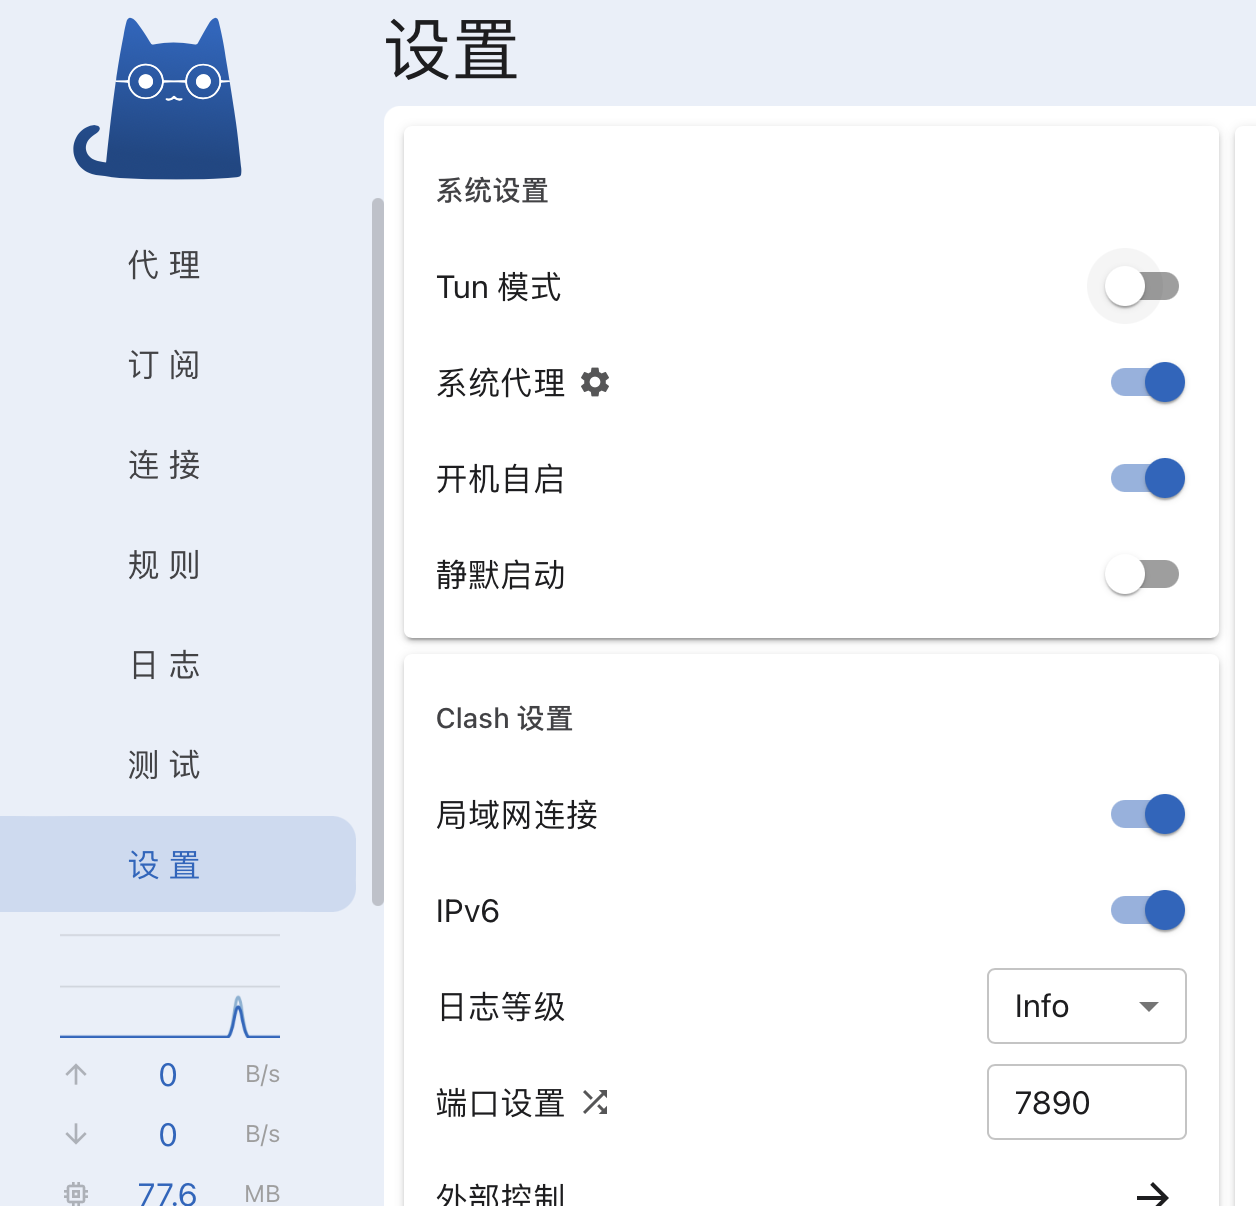
一般使用开启系统代理即可
要关闭代理可以这个页面关闭系统代理
有些软件或脚本无法使用系统代理,请开启 2.5 中的 Tun 模式
注意关闭软件,可能系统代理配置不会恢复 如果遇到不打开软件就无法上网的问题,可以手动关闭系统代理
2.5 开启 tun mode 接管网卡(非必须,看需要-> 建议一般情况下不要开启)
2.5.1 授权内核(只对MacOS和Linux有效)
点击 Clash 内核,点击授权
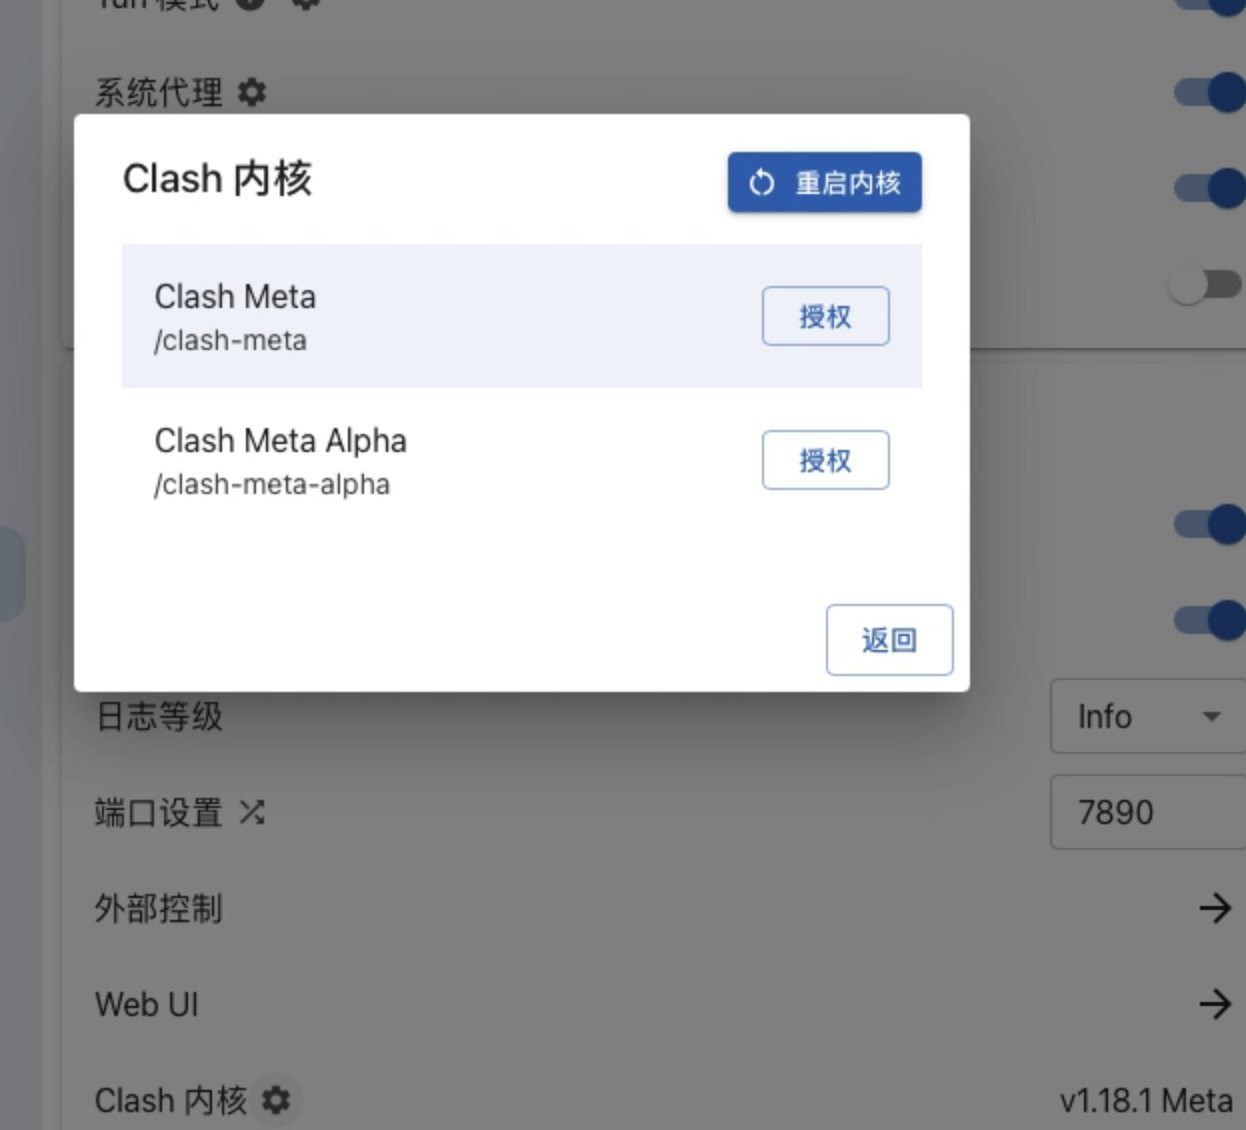
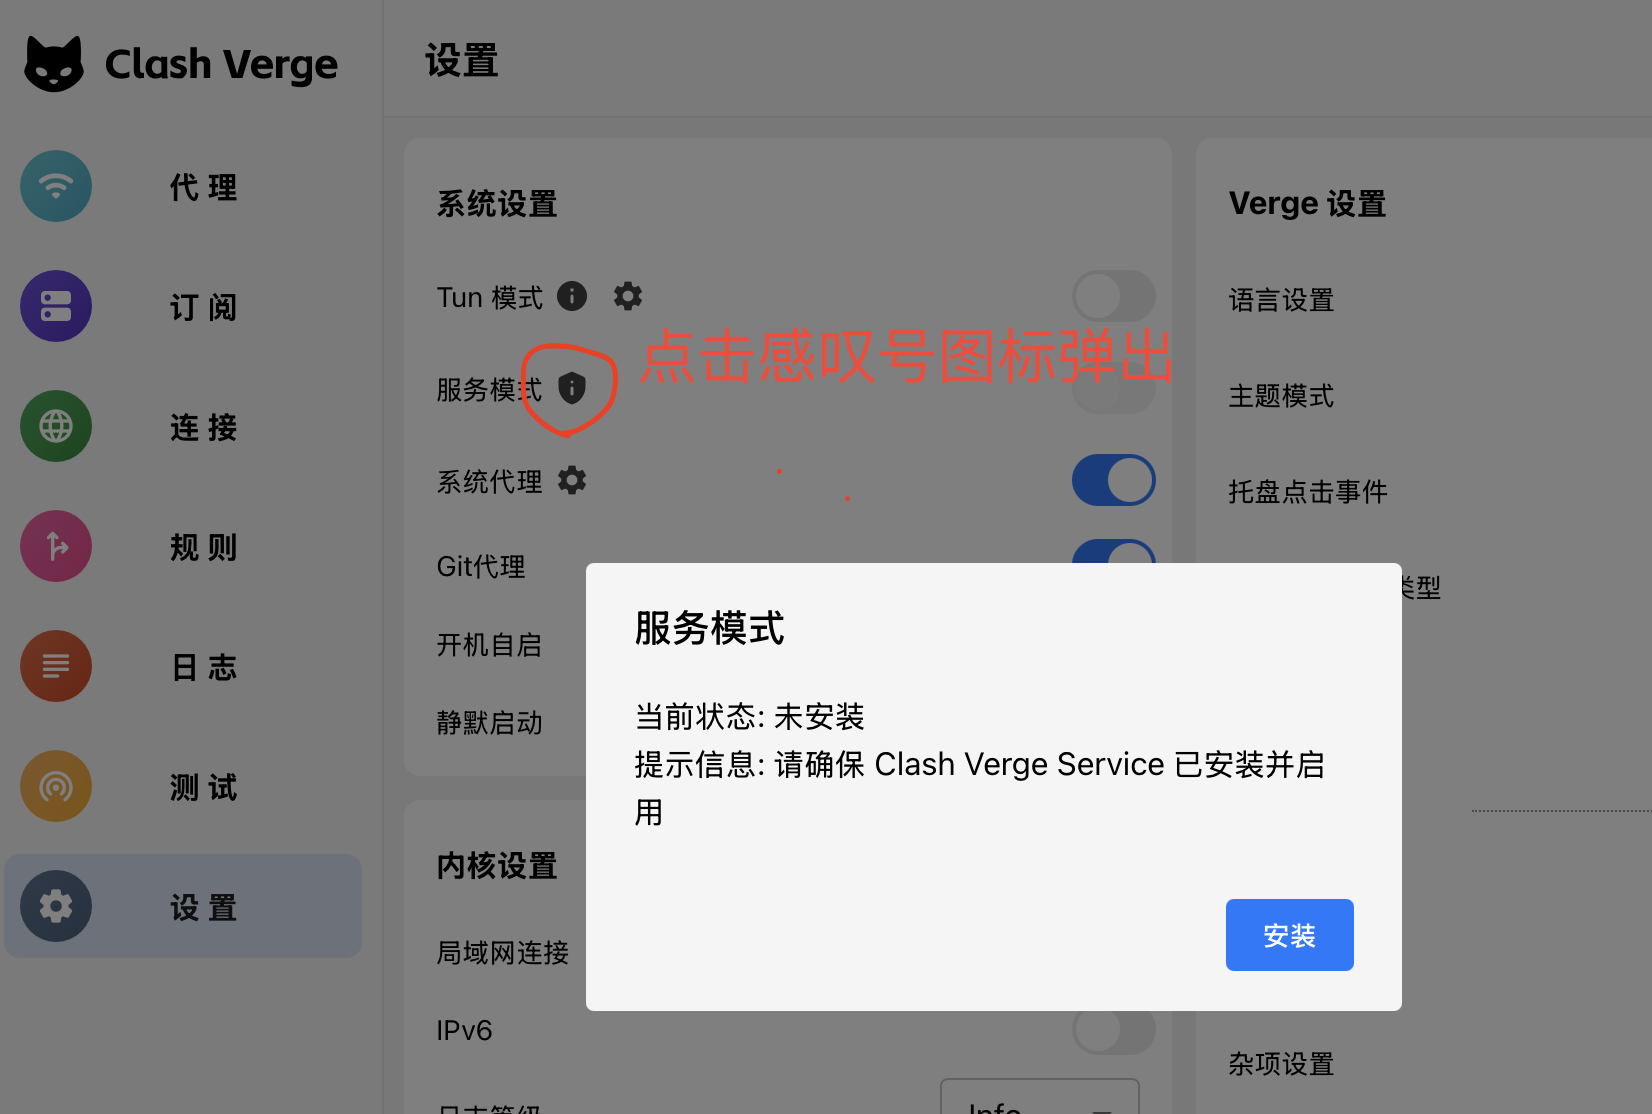
2.5.2 安装服务模式(新版本默认安装,老版本需要手动)
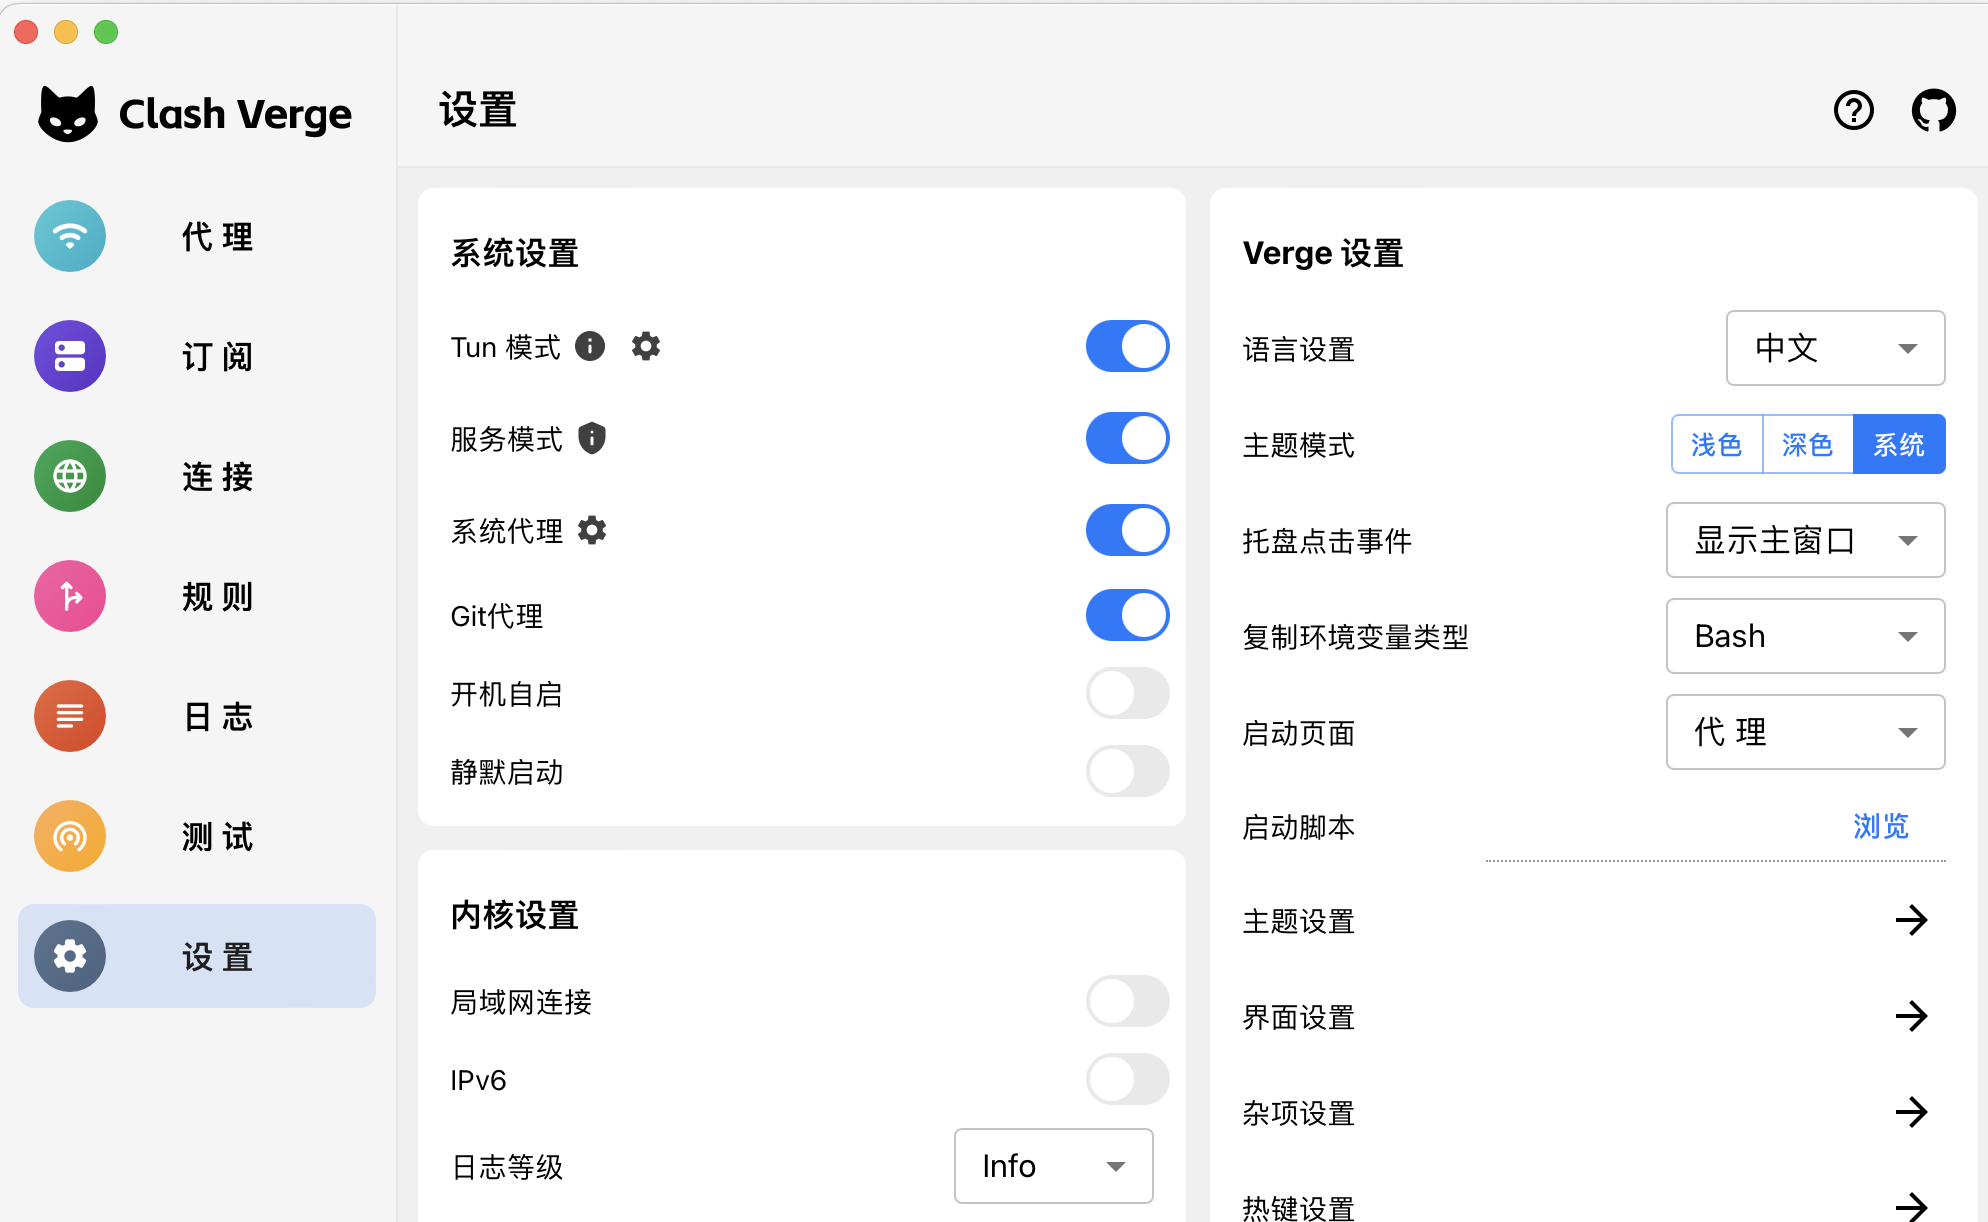
2.5.3 开启 tun 模式和服务模式(建议一般情况下不要开启,除非有些软件不能使用系统代理)
2.6 如果原来装了小猫建议先删除或者删除配置
原来的配置可能导致配置混乱,而不能配置成功
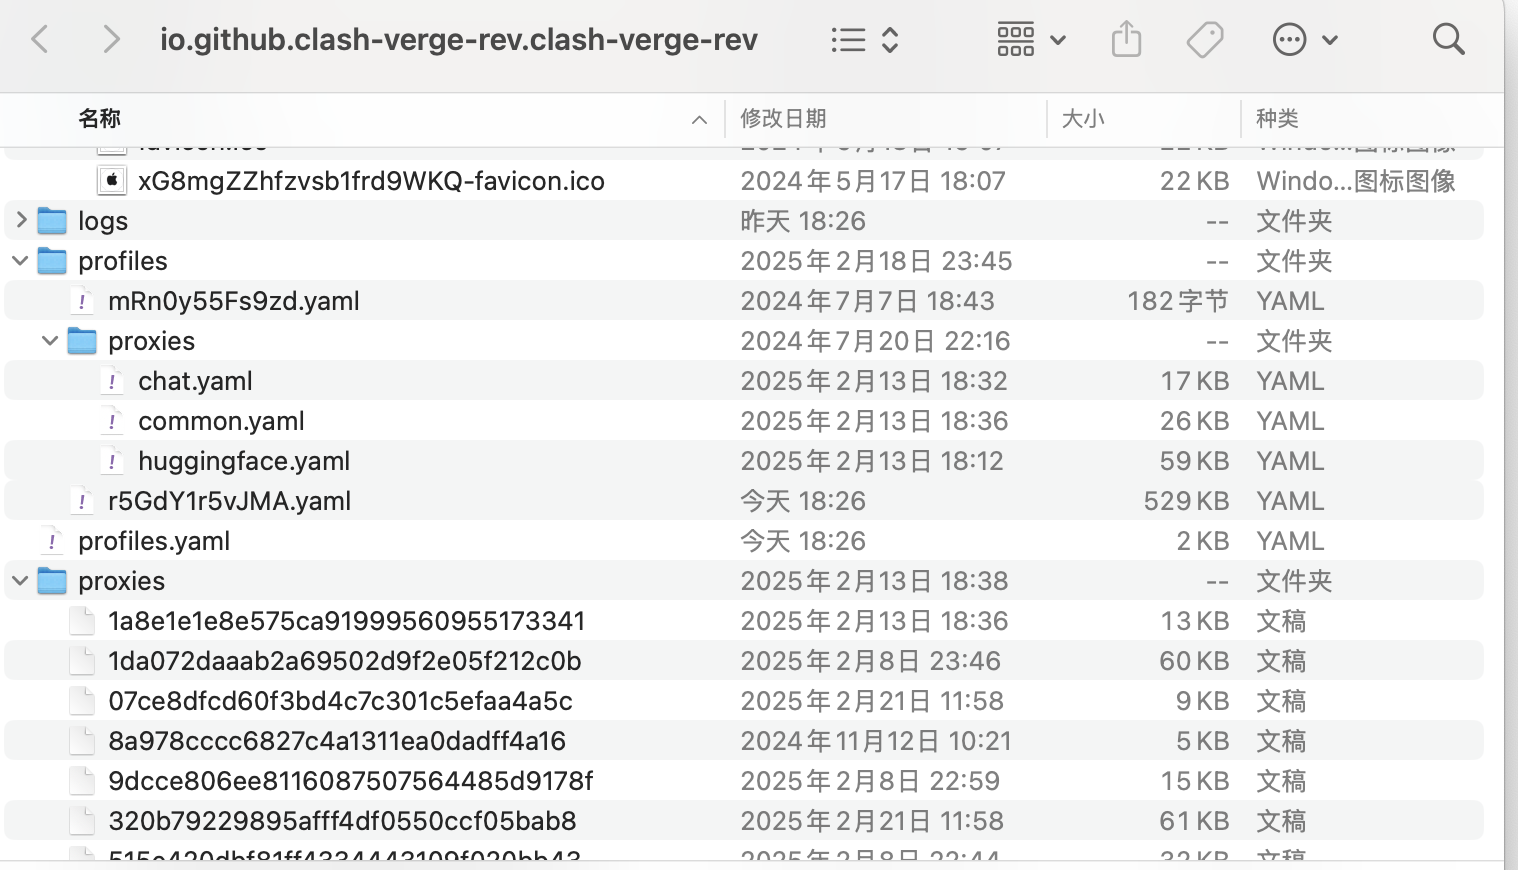
设置里面找到「应用目录」

点击箭头后打开配置的文件夹,退出小猫后,将文件夹内的文件全部删除,重启 APP,重新配置
往下内容是 huggingface 下载部分,只用小猫可以不看===> 往下内容是 huggingface 下载部分,只用小猫可以不看
往下内容是 huggingface 下载部分,只用小猫可以不看===> 往下内容是 huggingface 下载部分,只用小猫可以不看
往下内容是 huggingface 下载部分,只用小猫可以不看===> 往下内容是 huggingface 下载部分,只用小猫可以不看
3 下载工具 Motrix(适用于数量少大文件 LFS 文件)
3.1 下载安装好工具
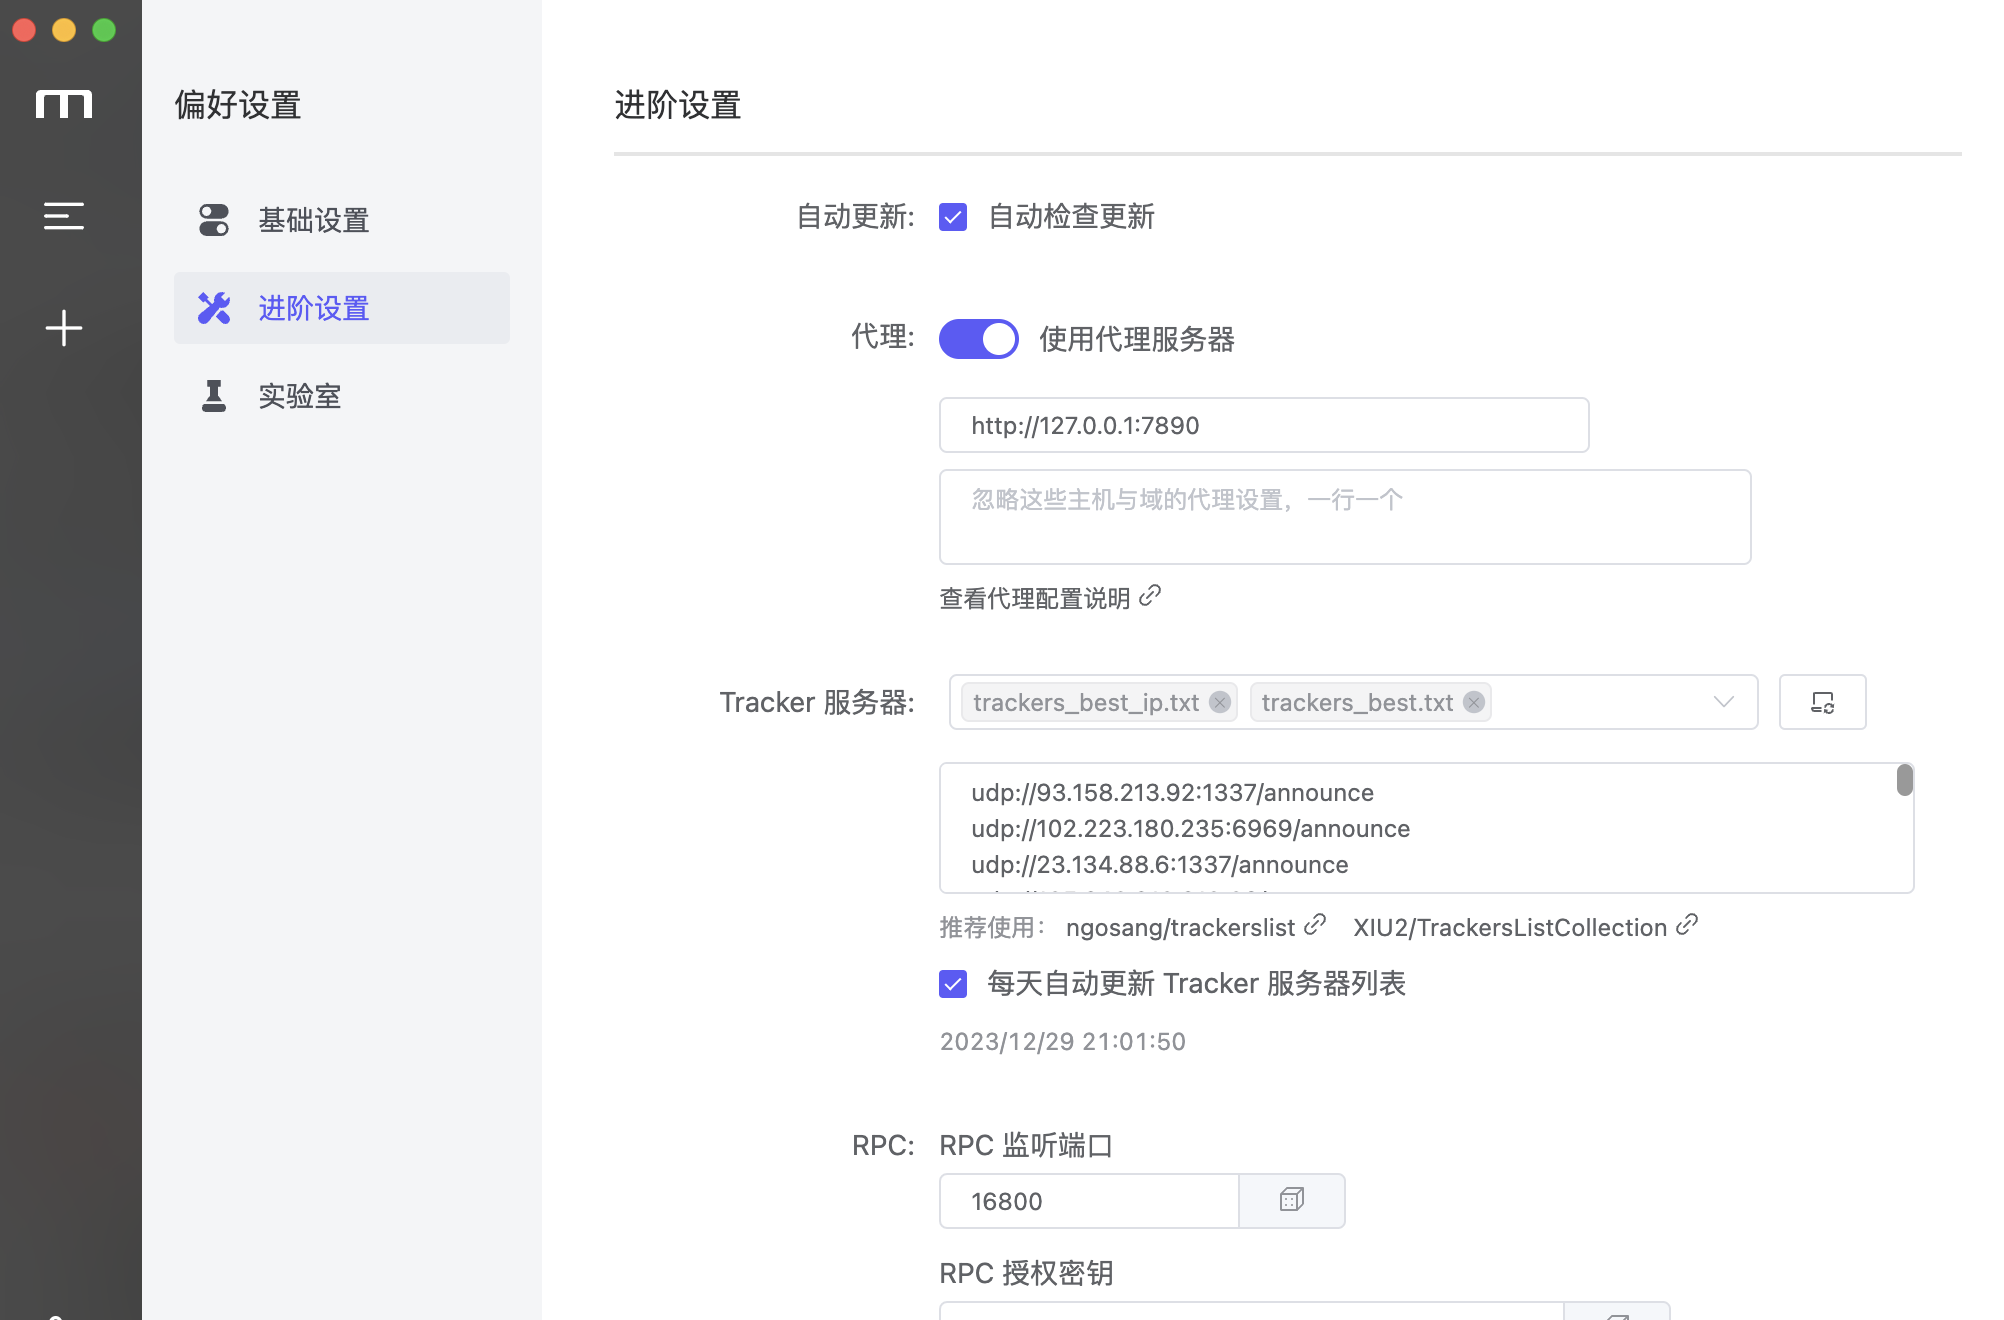
3.2 设置代理(开启了 tun mode 可以忽略)
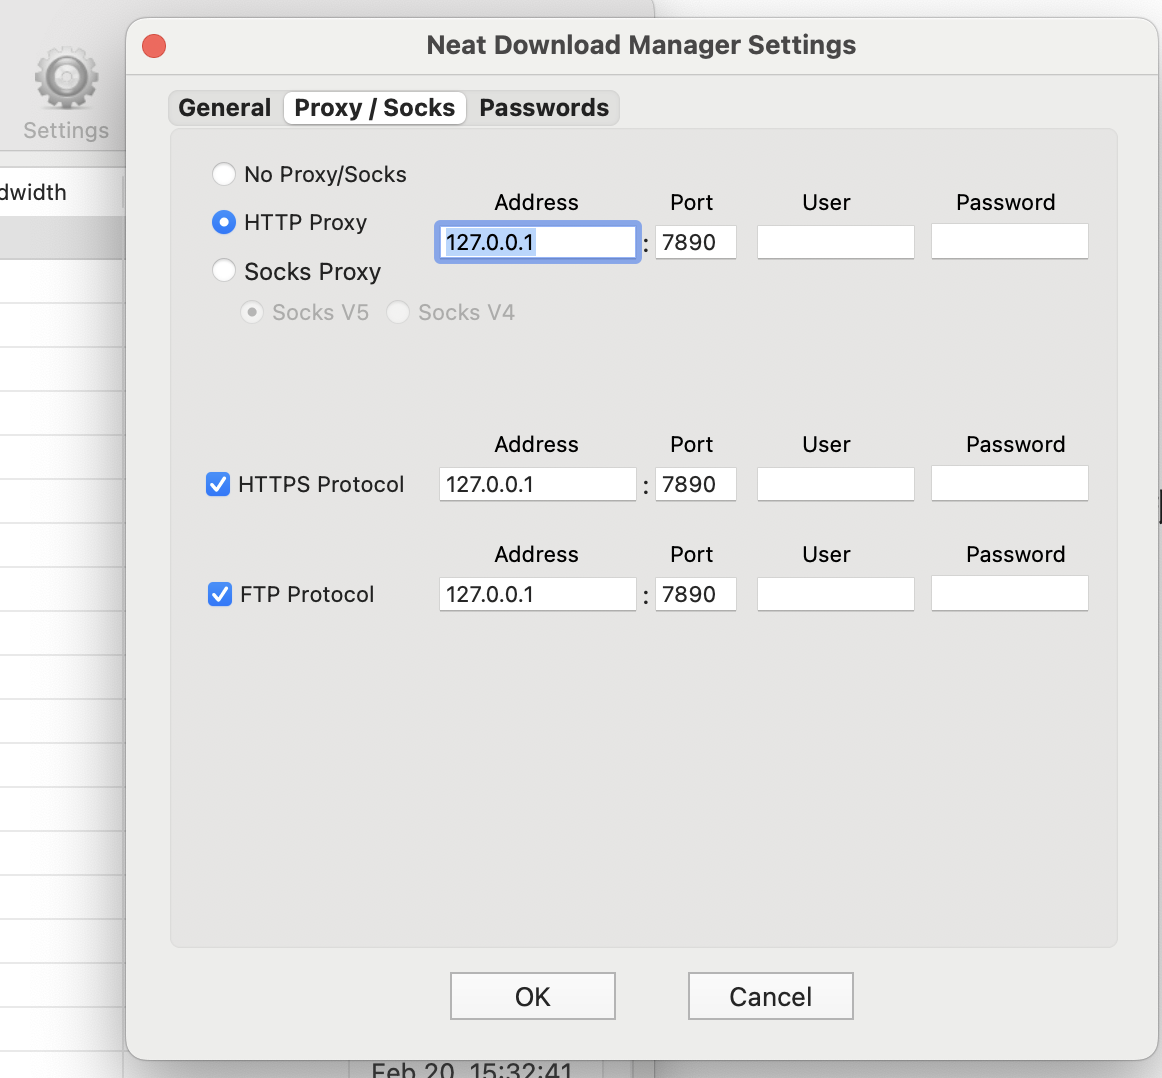
启用代理,并地址填写: http://127.0.0.1:7890
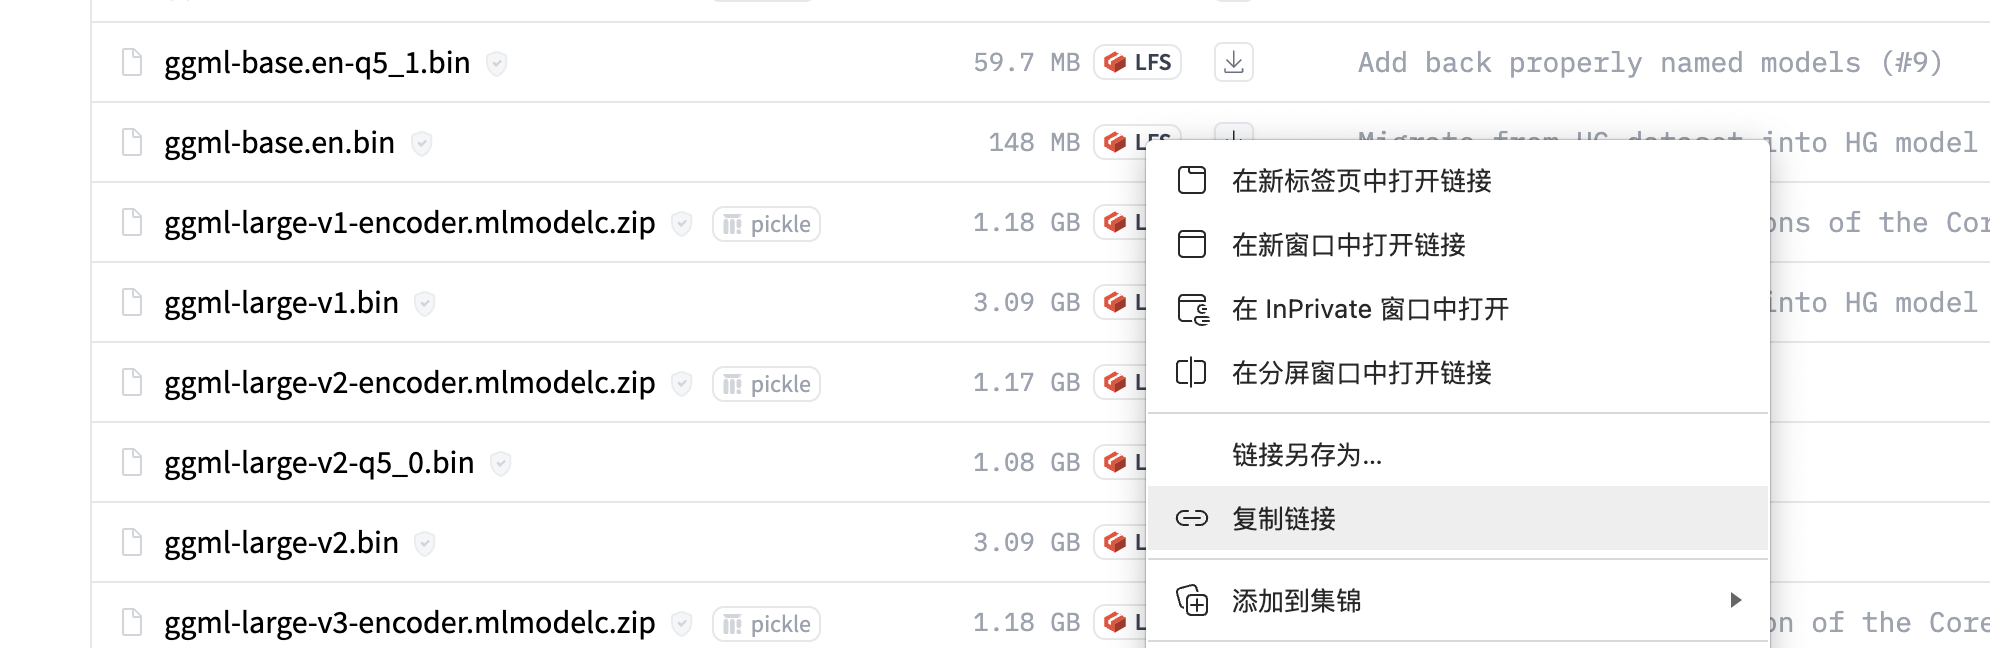
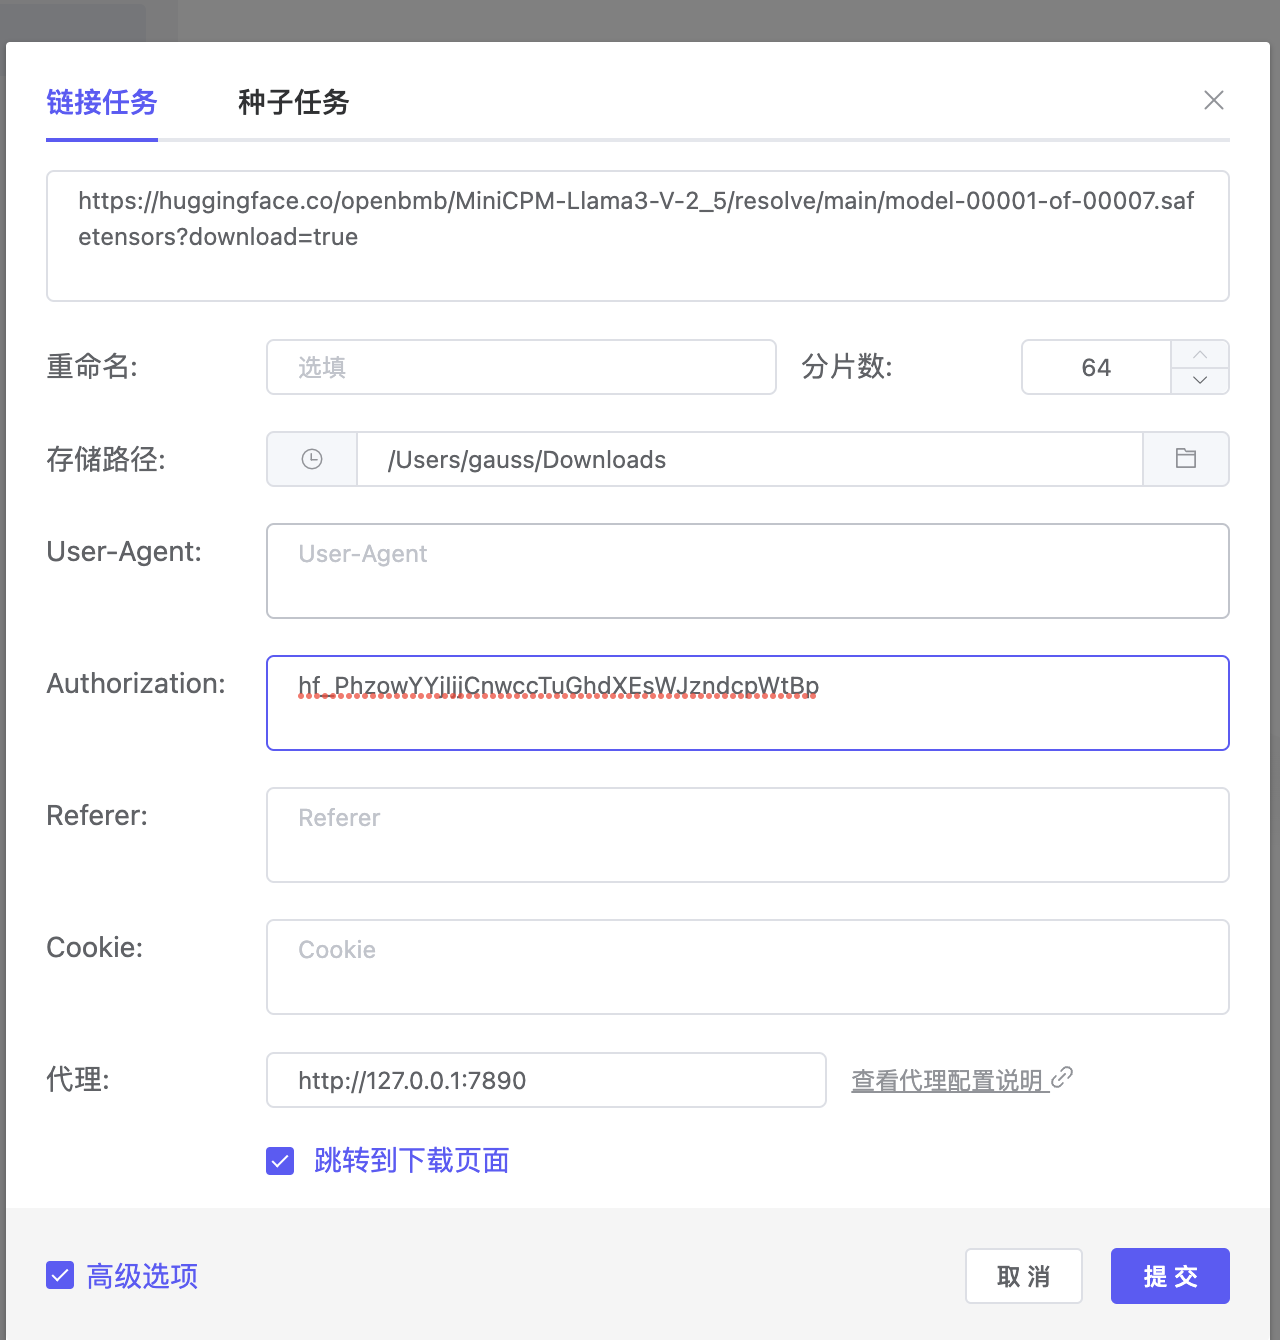
3.3 添加下载链接
注意:有些模型可能需要 token 下载,不能直接添加链接到下载工具,勾选高级,在请求头添加 token(点击获取 token)
4 批量下载
批量下载工具依赖步骤 3 中的工具 Motrix,需要该工具在开启状态,并可以正常下载
4.1 图形工具
4.1.0 基本设置(代理,Aira2 设置,储存目录,hf token)
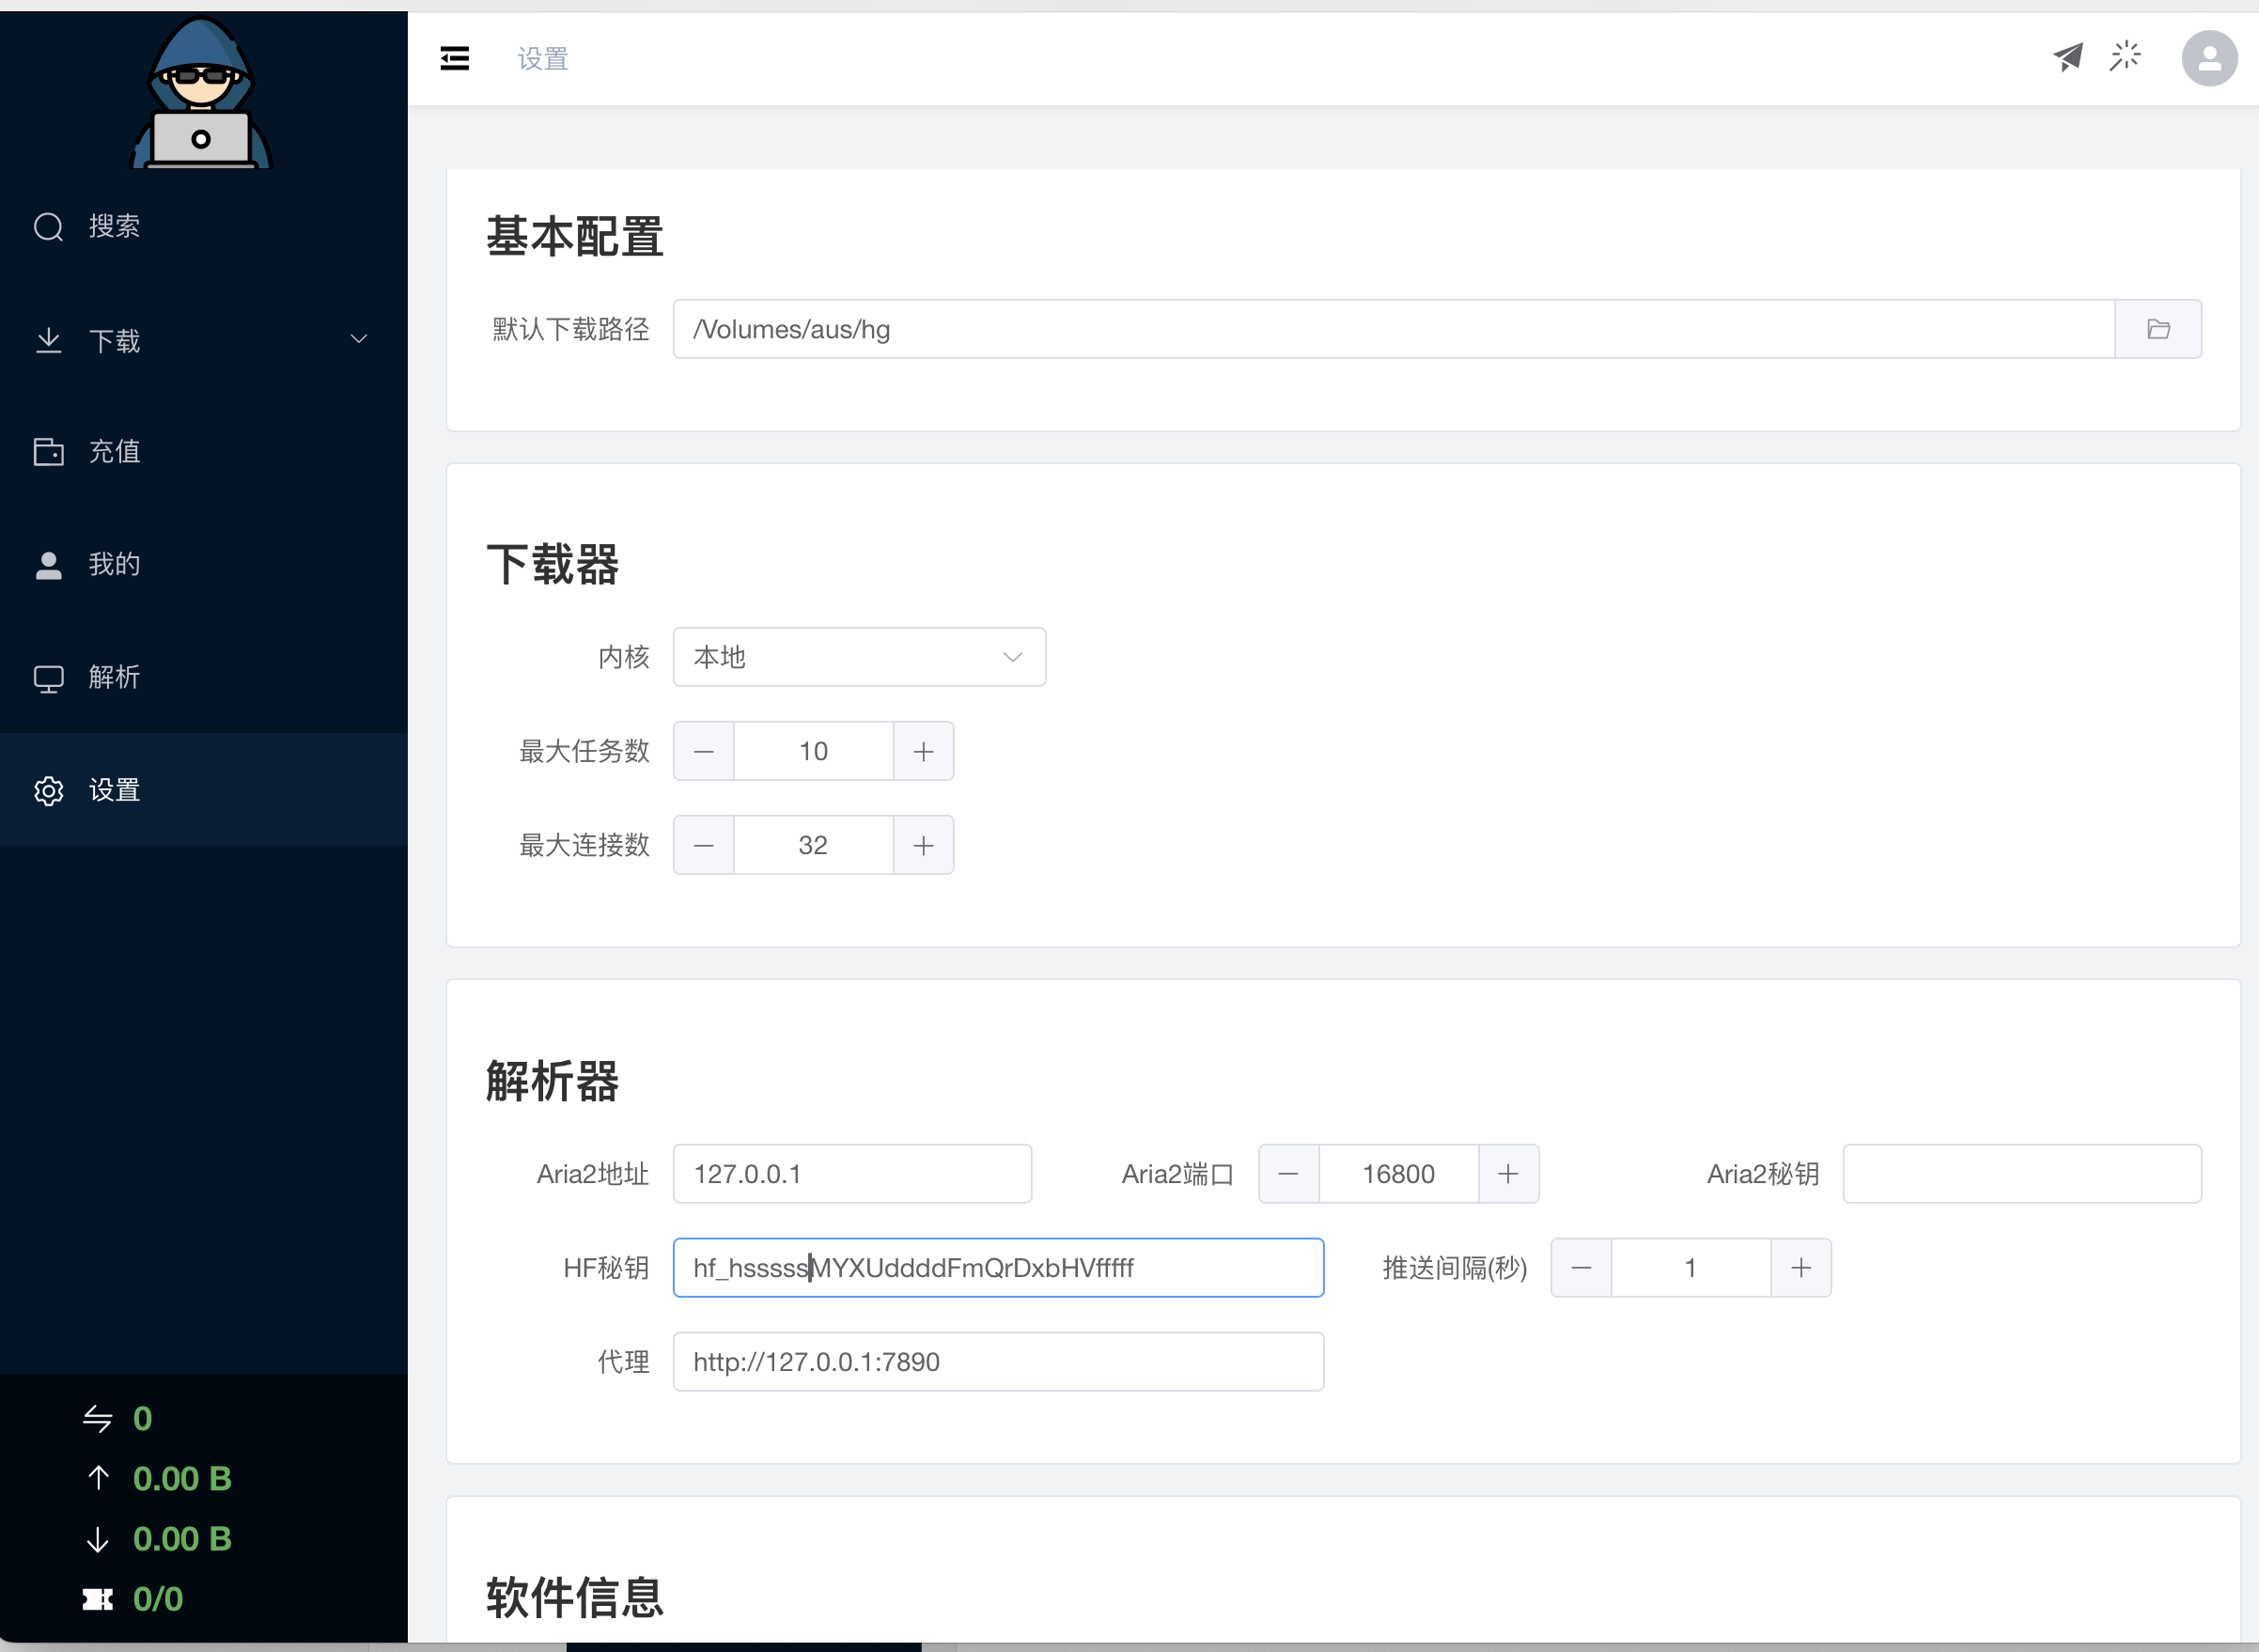
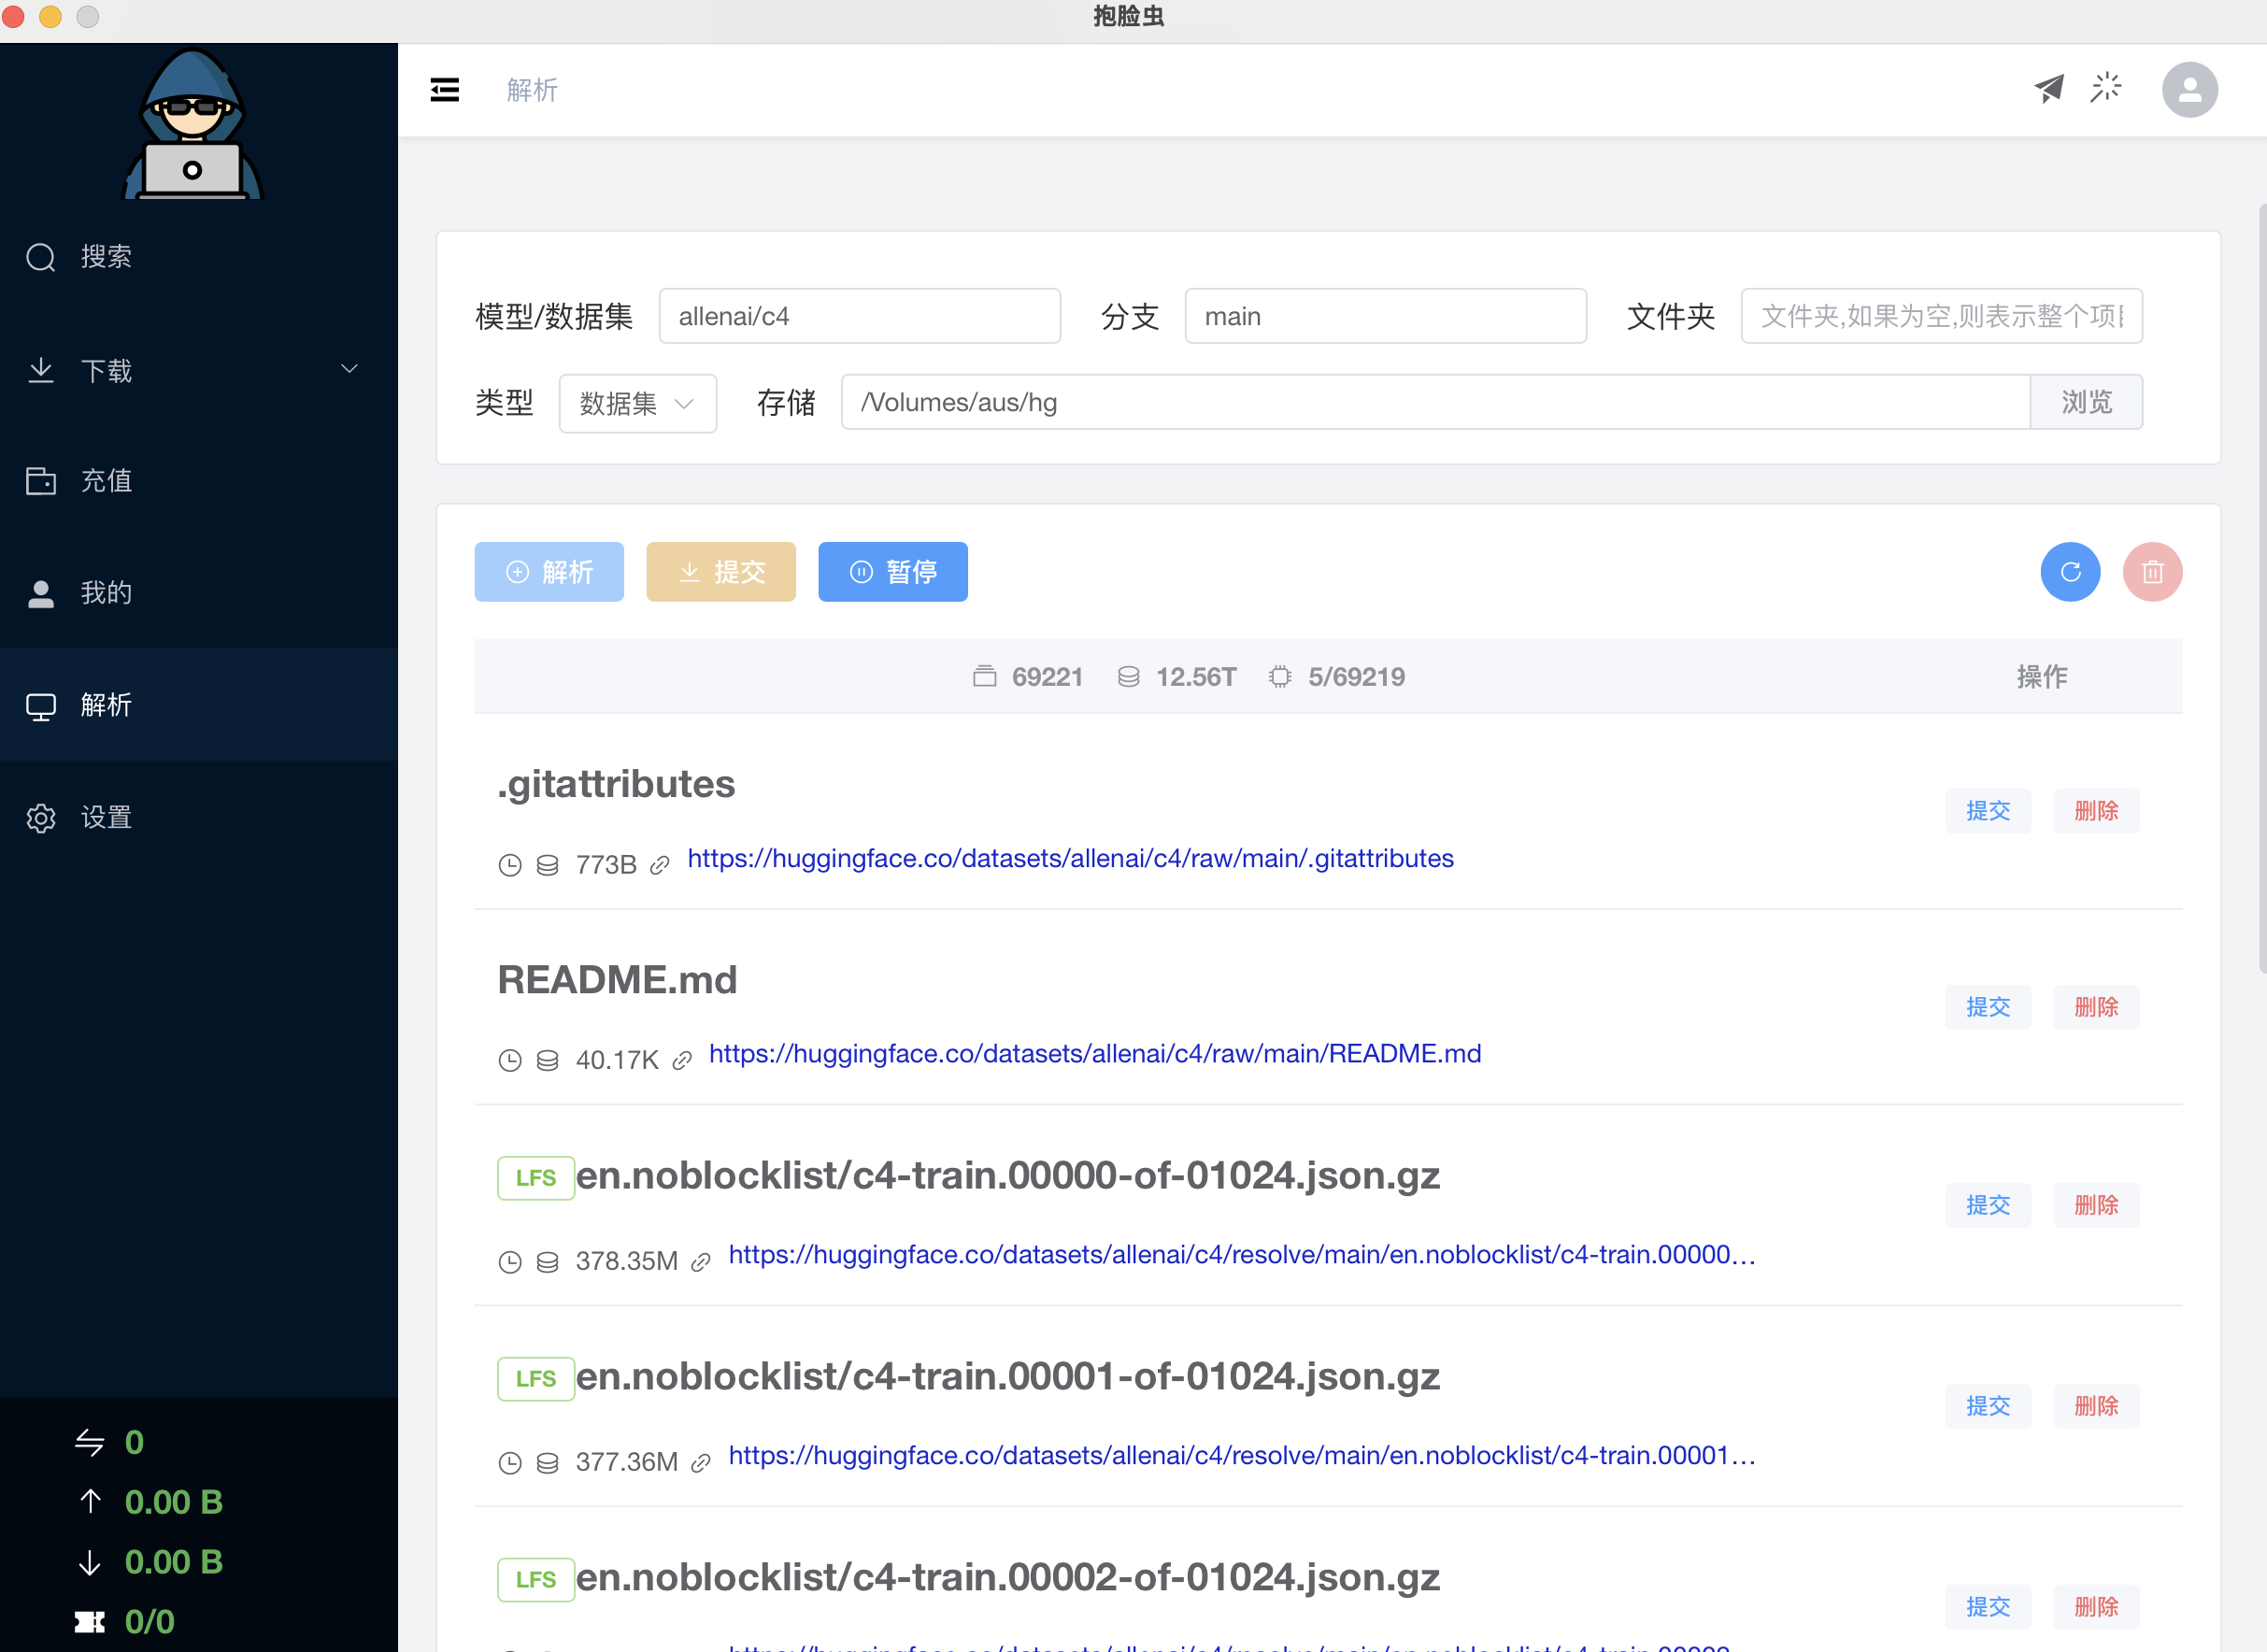
4.1.1 解析项目
有些项目需要 huggingface token
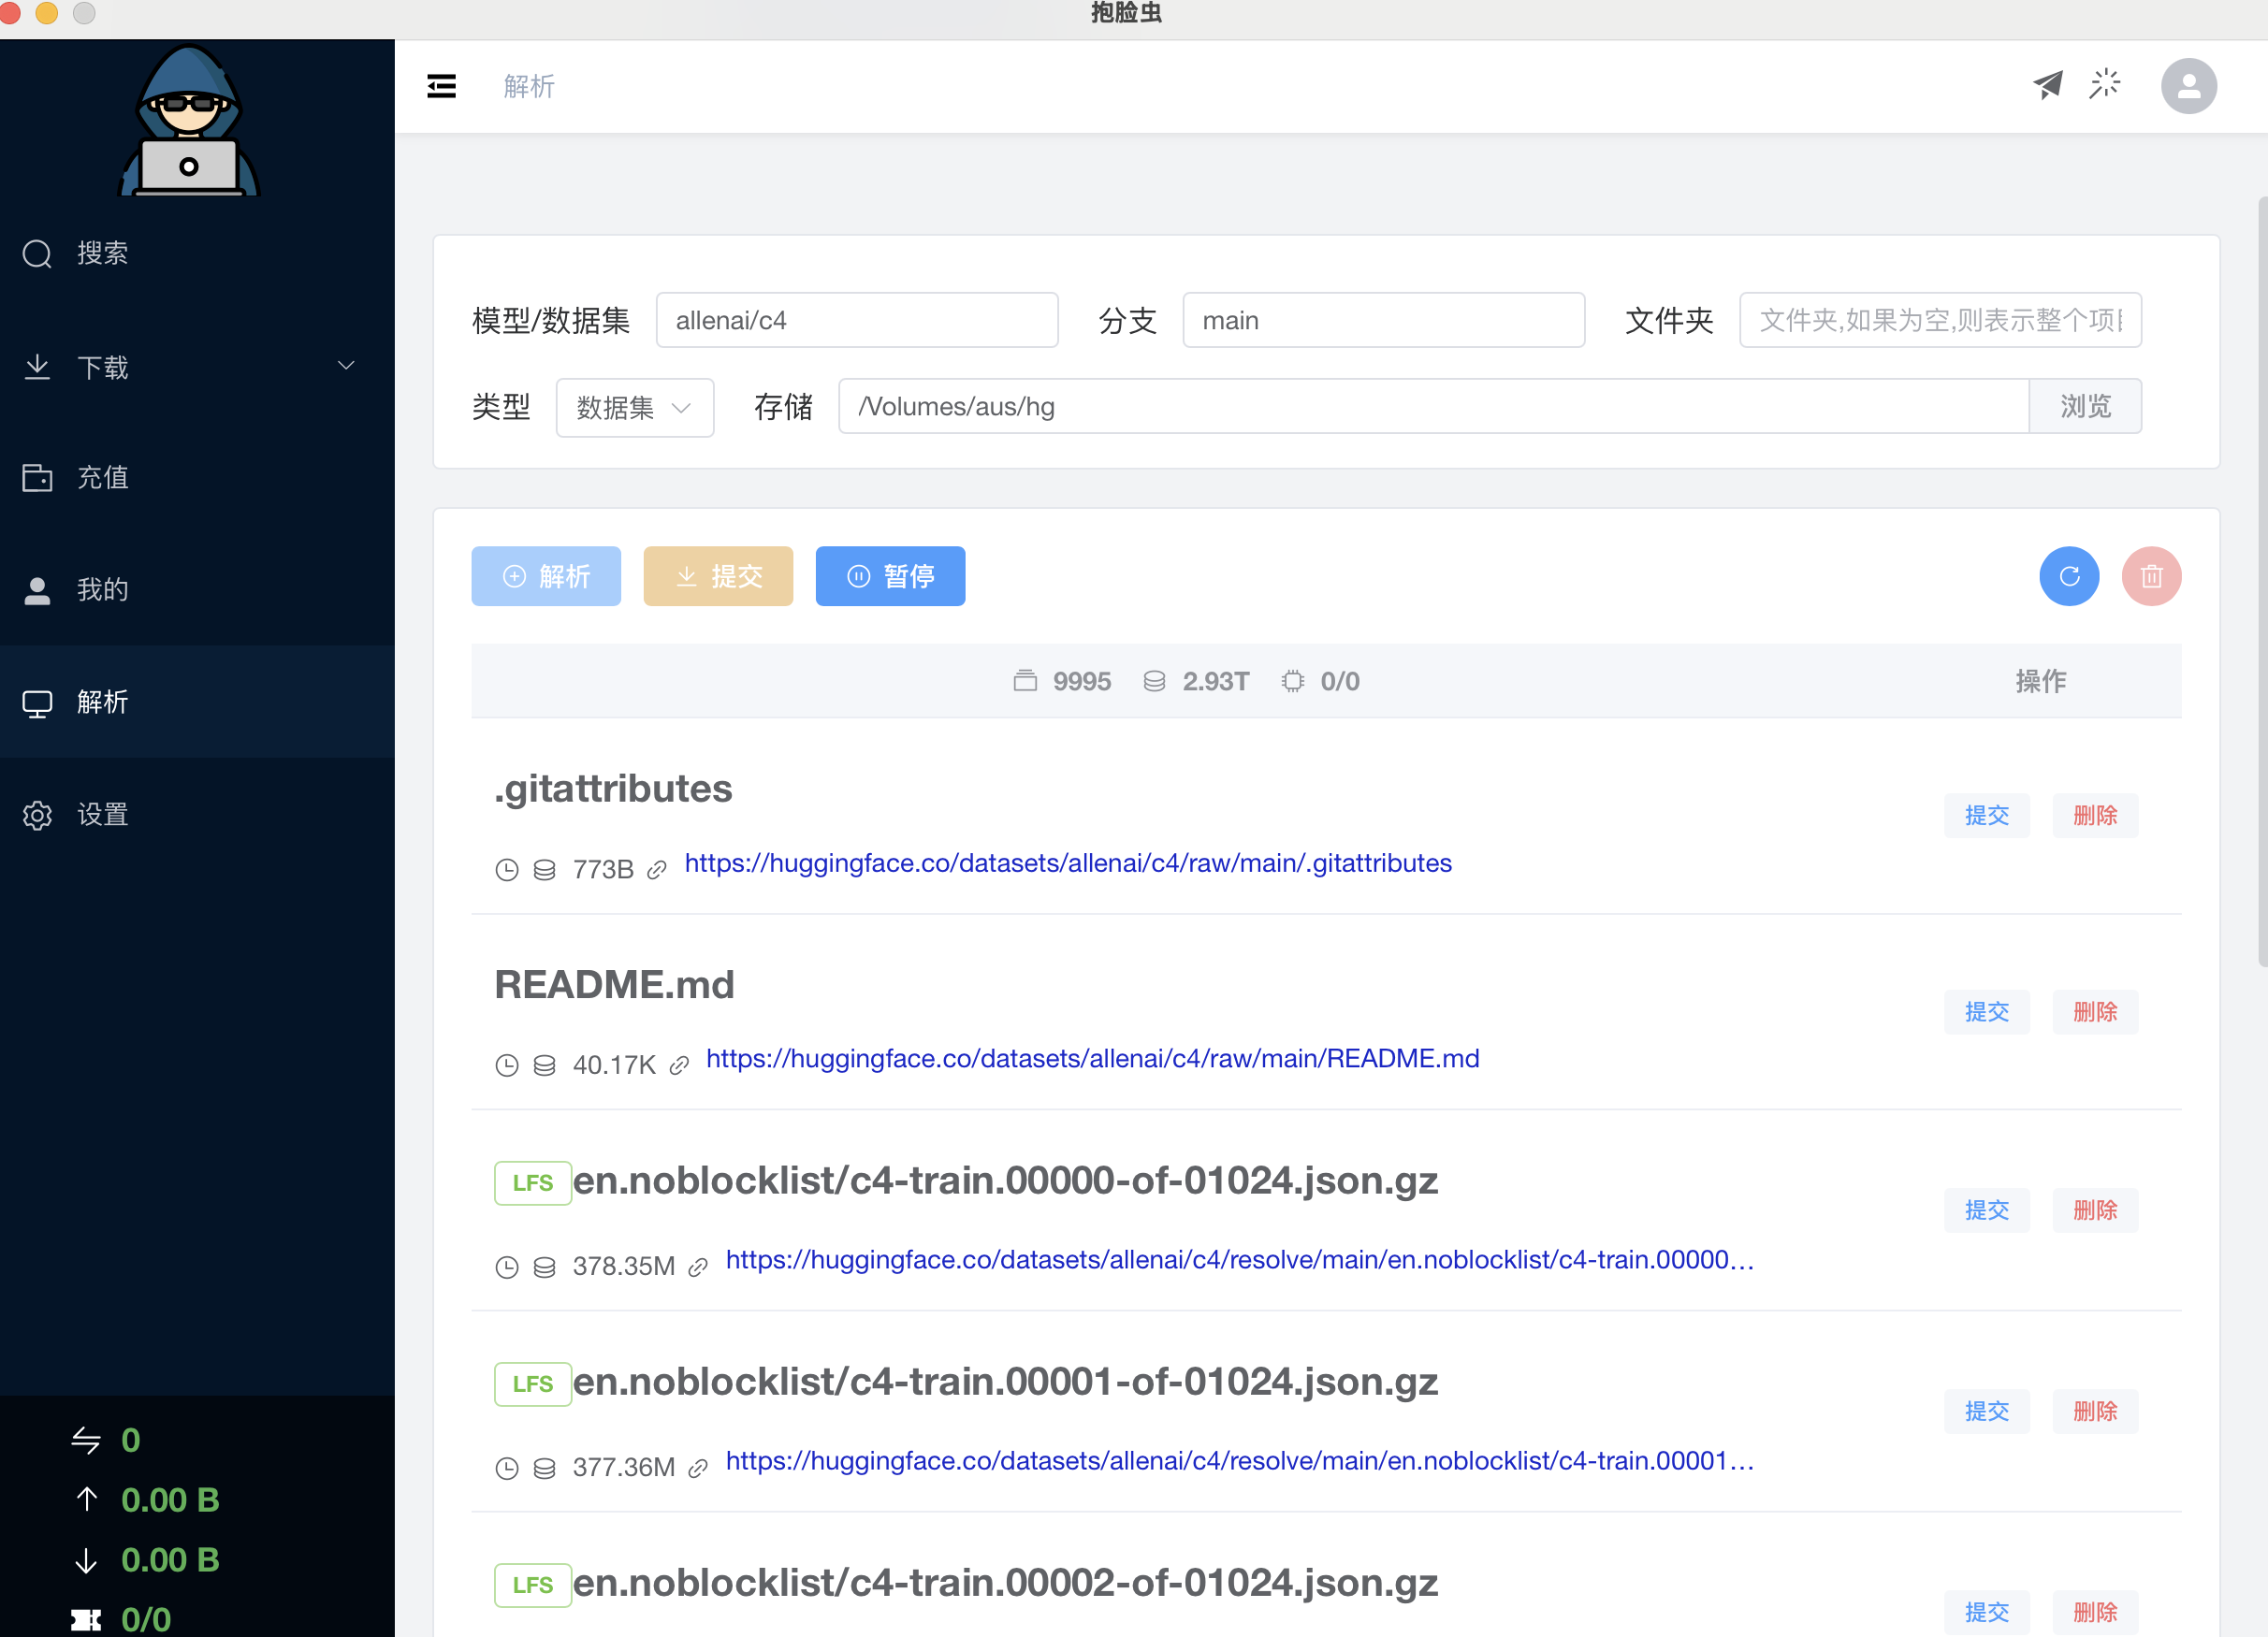
4.1.2 提交下载任务
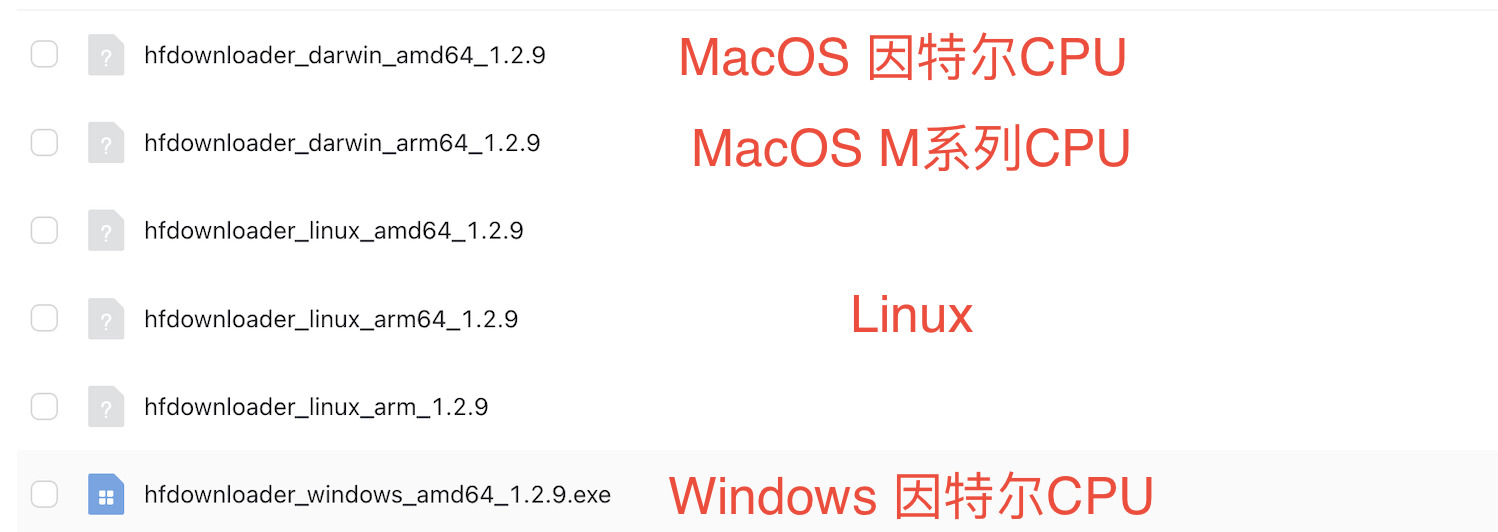
4.2 HuggingFaceModelDownloader(命令行工具)
下载自己系统对应文件
4.1.1 获取 hg 的 token(非必须,有些项目需要)
Settings
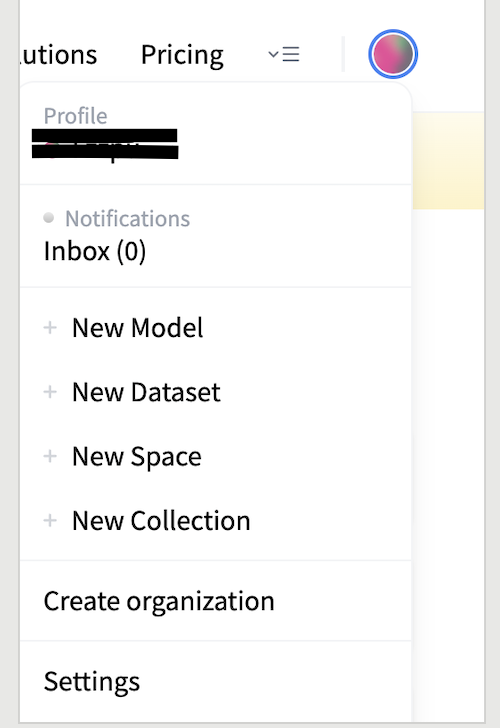
Access Tokens
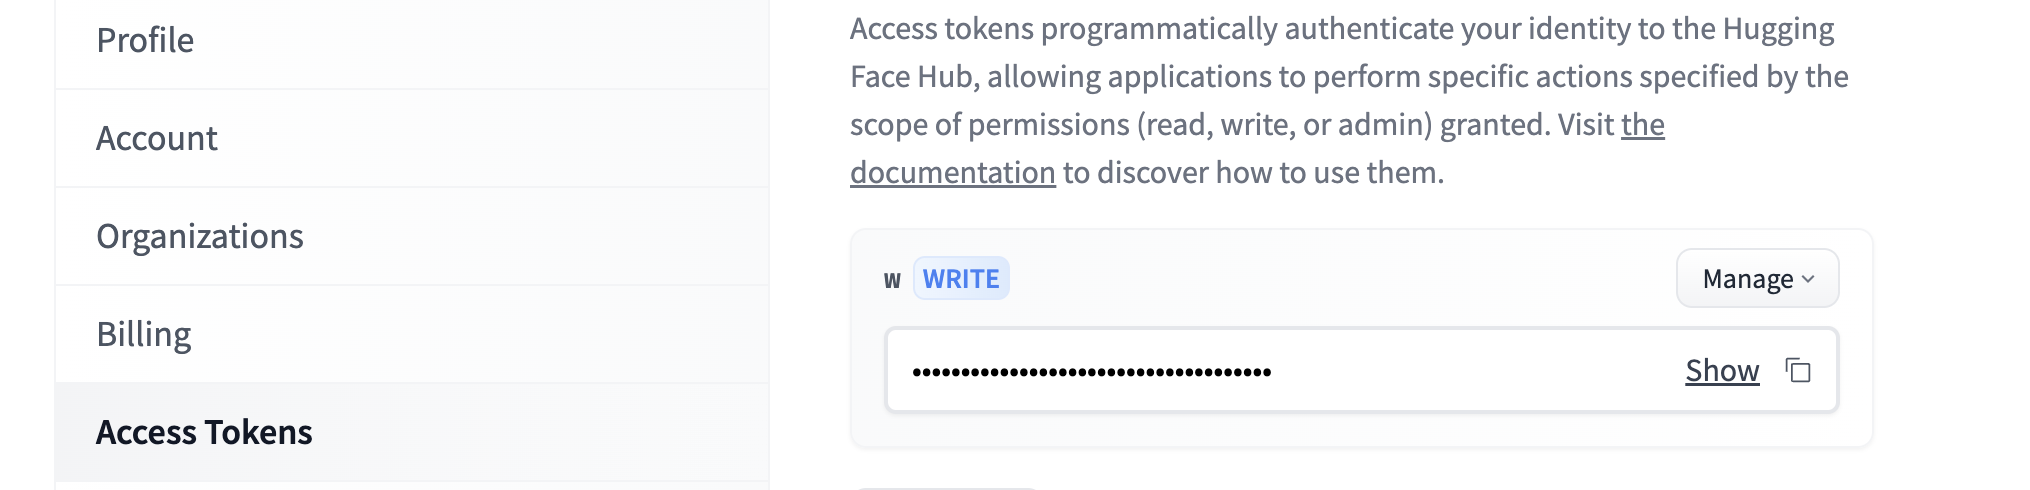 4.1.2 打开 powershell 等,执行执行命令
如下载程序放到目录:C:\Users\abc>
参数-m:指定下载模型
参数-d:指定下载数据集
参数-s:指定保存路径,建议用全路径,否则会保存在 Motrix 默认目录下
bash
# 非系统盘,如D盘,需要先切换到D盘,执行 D:\
cd C:\Users\abc
# 下载模型 参数-m 参数-s指定保存路径,建议用绝对路径,否则会下载到
hfdownloader_windows_amd64_1.2.9.exe -m TheBloke/WizardLM-13B-V1.0-Uncensored-GPTQ -c 10 -s MyModels
# 下载数据集 参数-d
hfdownloader_windows_amd64_1.2.9.exe hfdownloader -d facebook/flores -c 10 -s MyDatasets
#有些项目需要带token下载,token_xxxx替换为4.1.3中获取的token
hfdownloader_windows_amd64_1.2.9.exe hfdownloader -d facebook/flores -c 10 -s MyDatasets -t token_xxxx
如果成功则会有类似打印
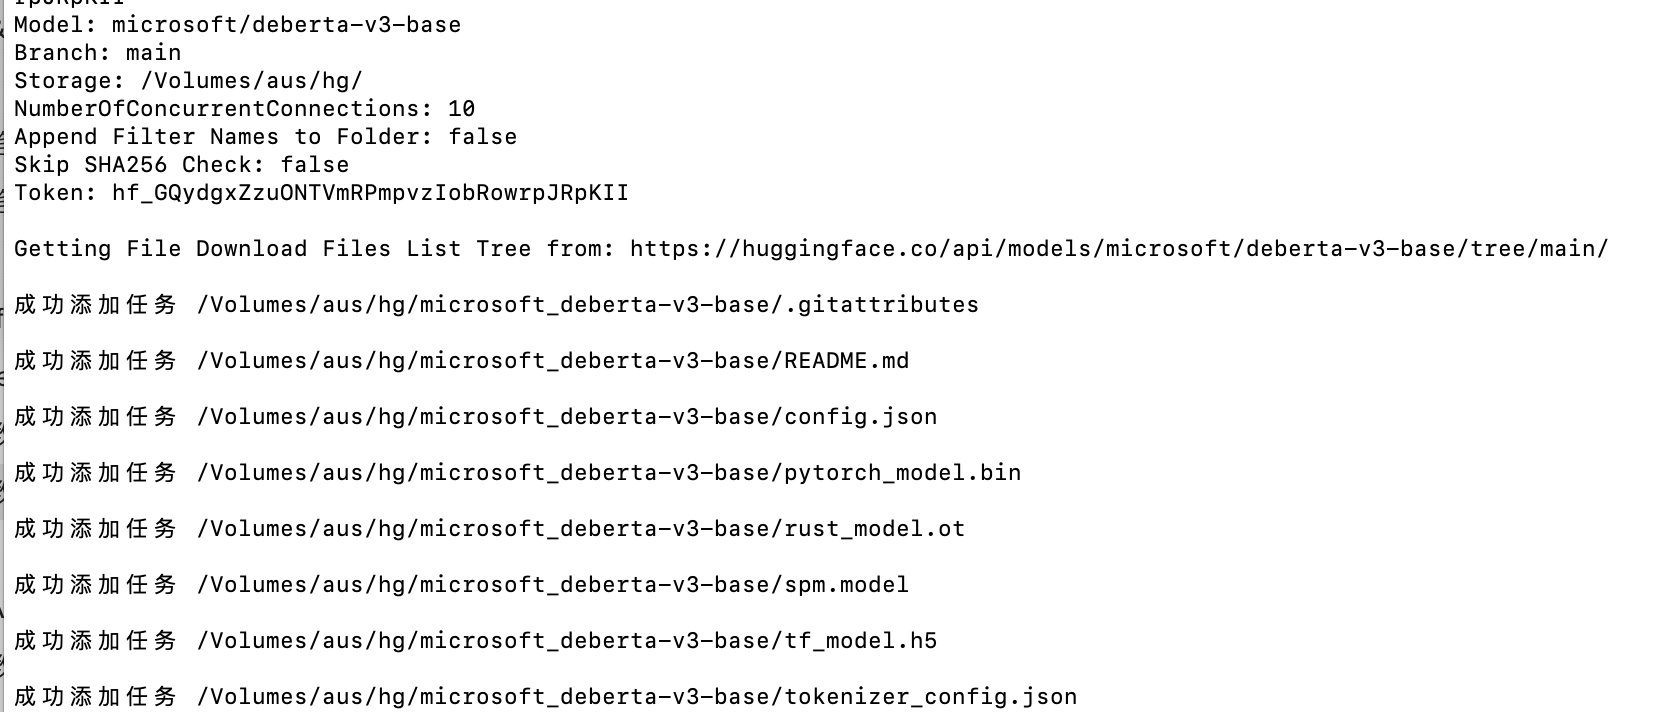 而且 Motrix 下载工具中,有相应的任务添加
而且 Motrix 下载工具中,有相应的任务添加 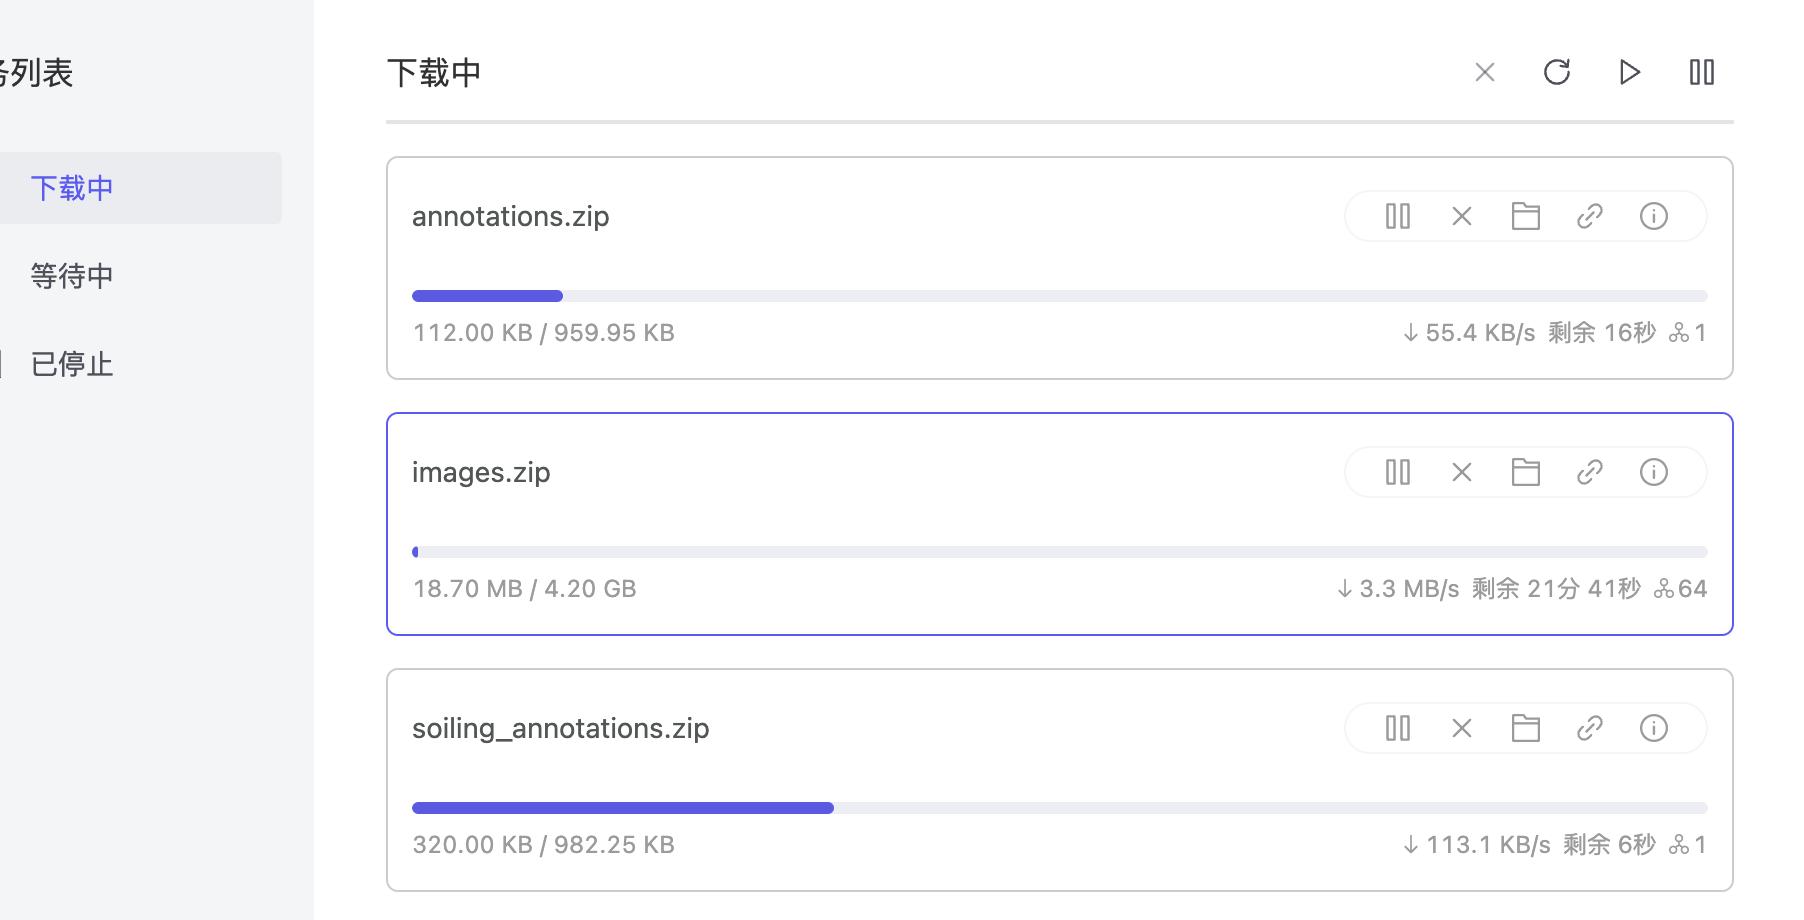
5 git 工具(适用于数量多小文件)
下载地址 https://git-scm.com/
5.1 git 工具设置代理
打开命令行工具(cmd 或 powershell)
bash
git config --global https.proxy http://127.0.0.1:7890
git config --global http.proxy http://127.0.0.1:7890
git config --global http.sslverify false
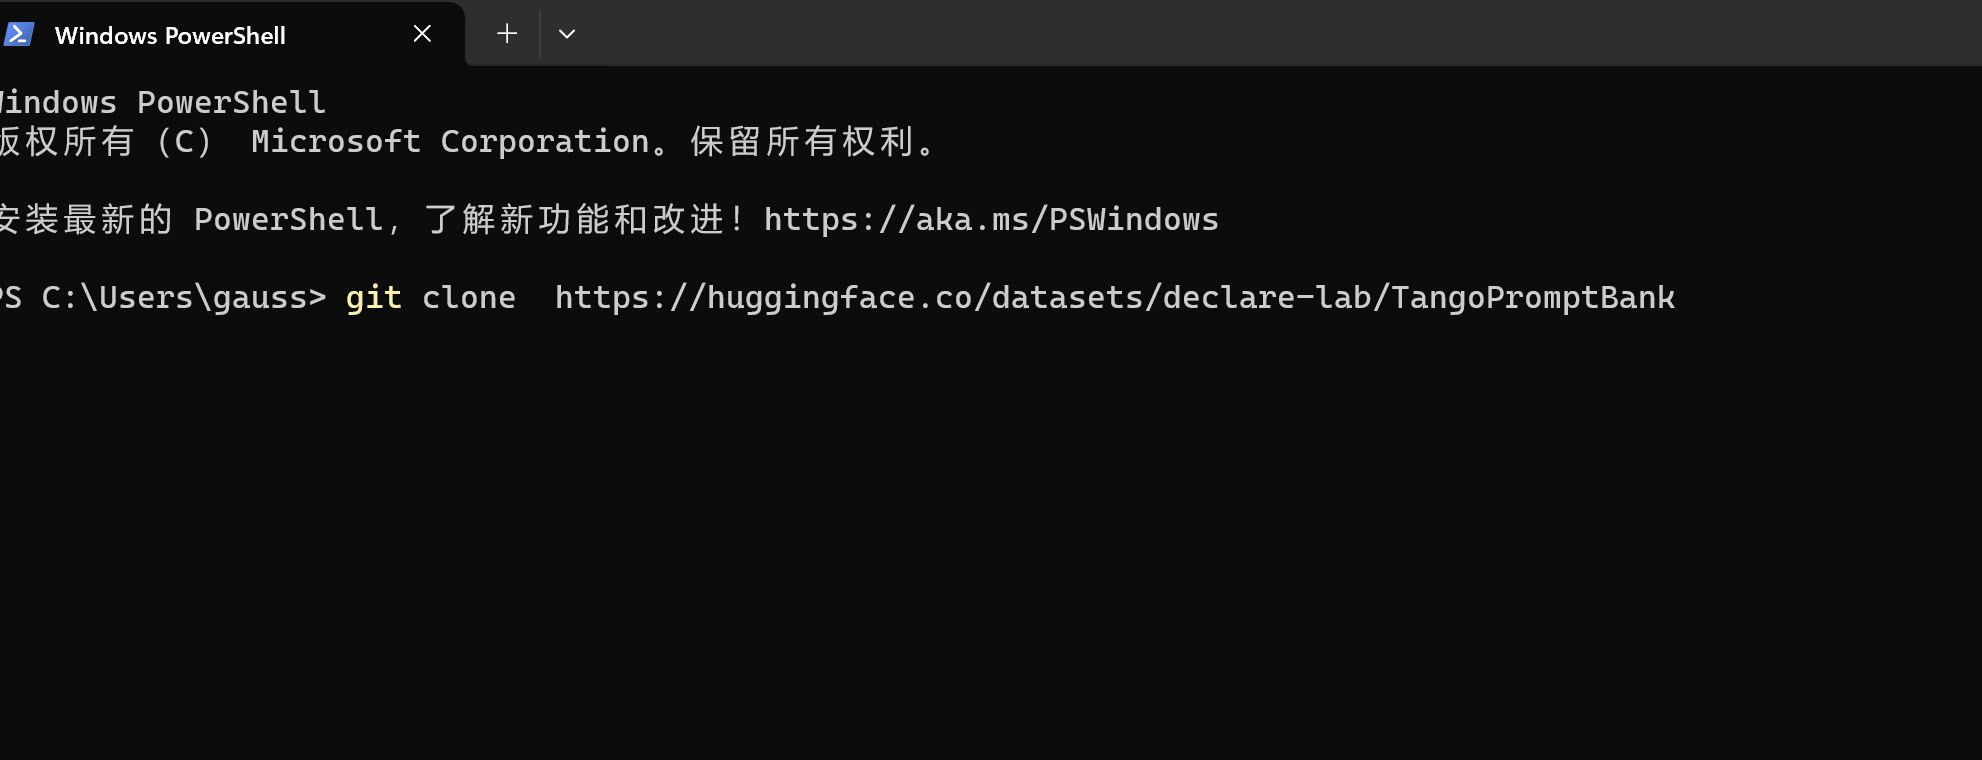
5.2 打包下载 hg 项目
如:
bash
git clone https://huggingface.co/datasets/declare-lab/TangoPromptBank
6 代码测试
6.1 开启 tun mode
6.2 代码测试
js
from transformers import AutoTokenizer
checkpoint = "distilbert-base-uncased-finetuned-sst-2-english"
tokenizer = AutoTokenizer.from_pretrained(checkpoint)
7 加速器 Linux 终端版
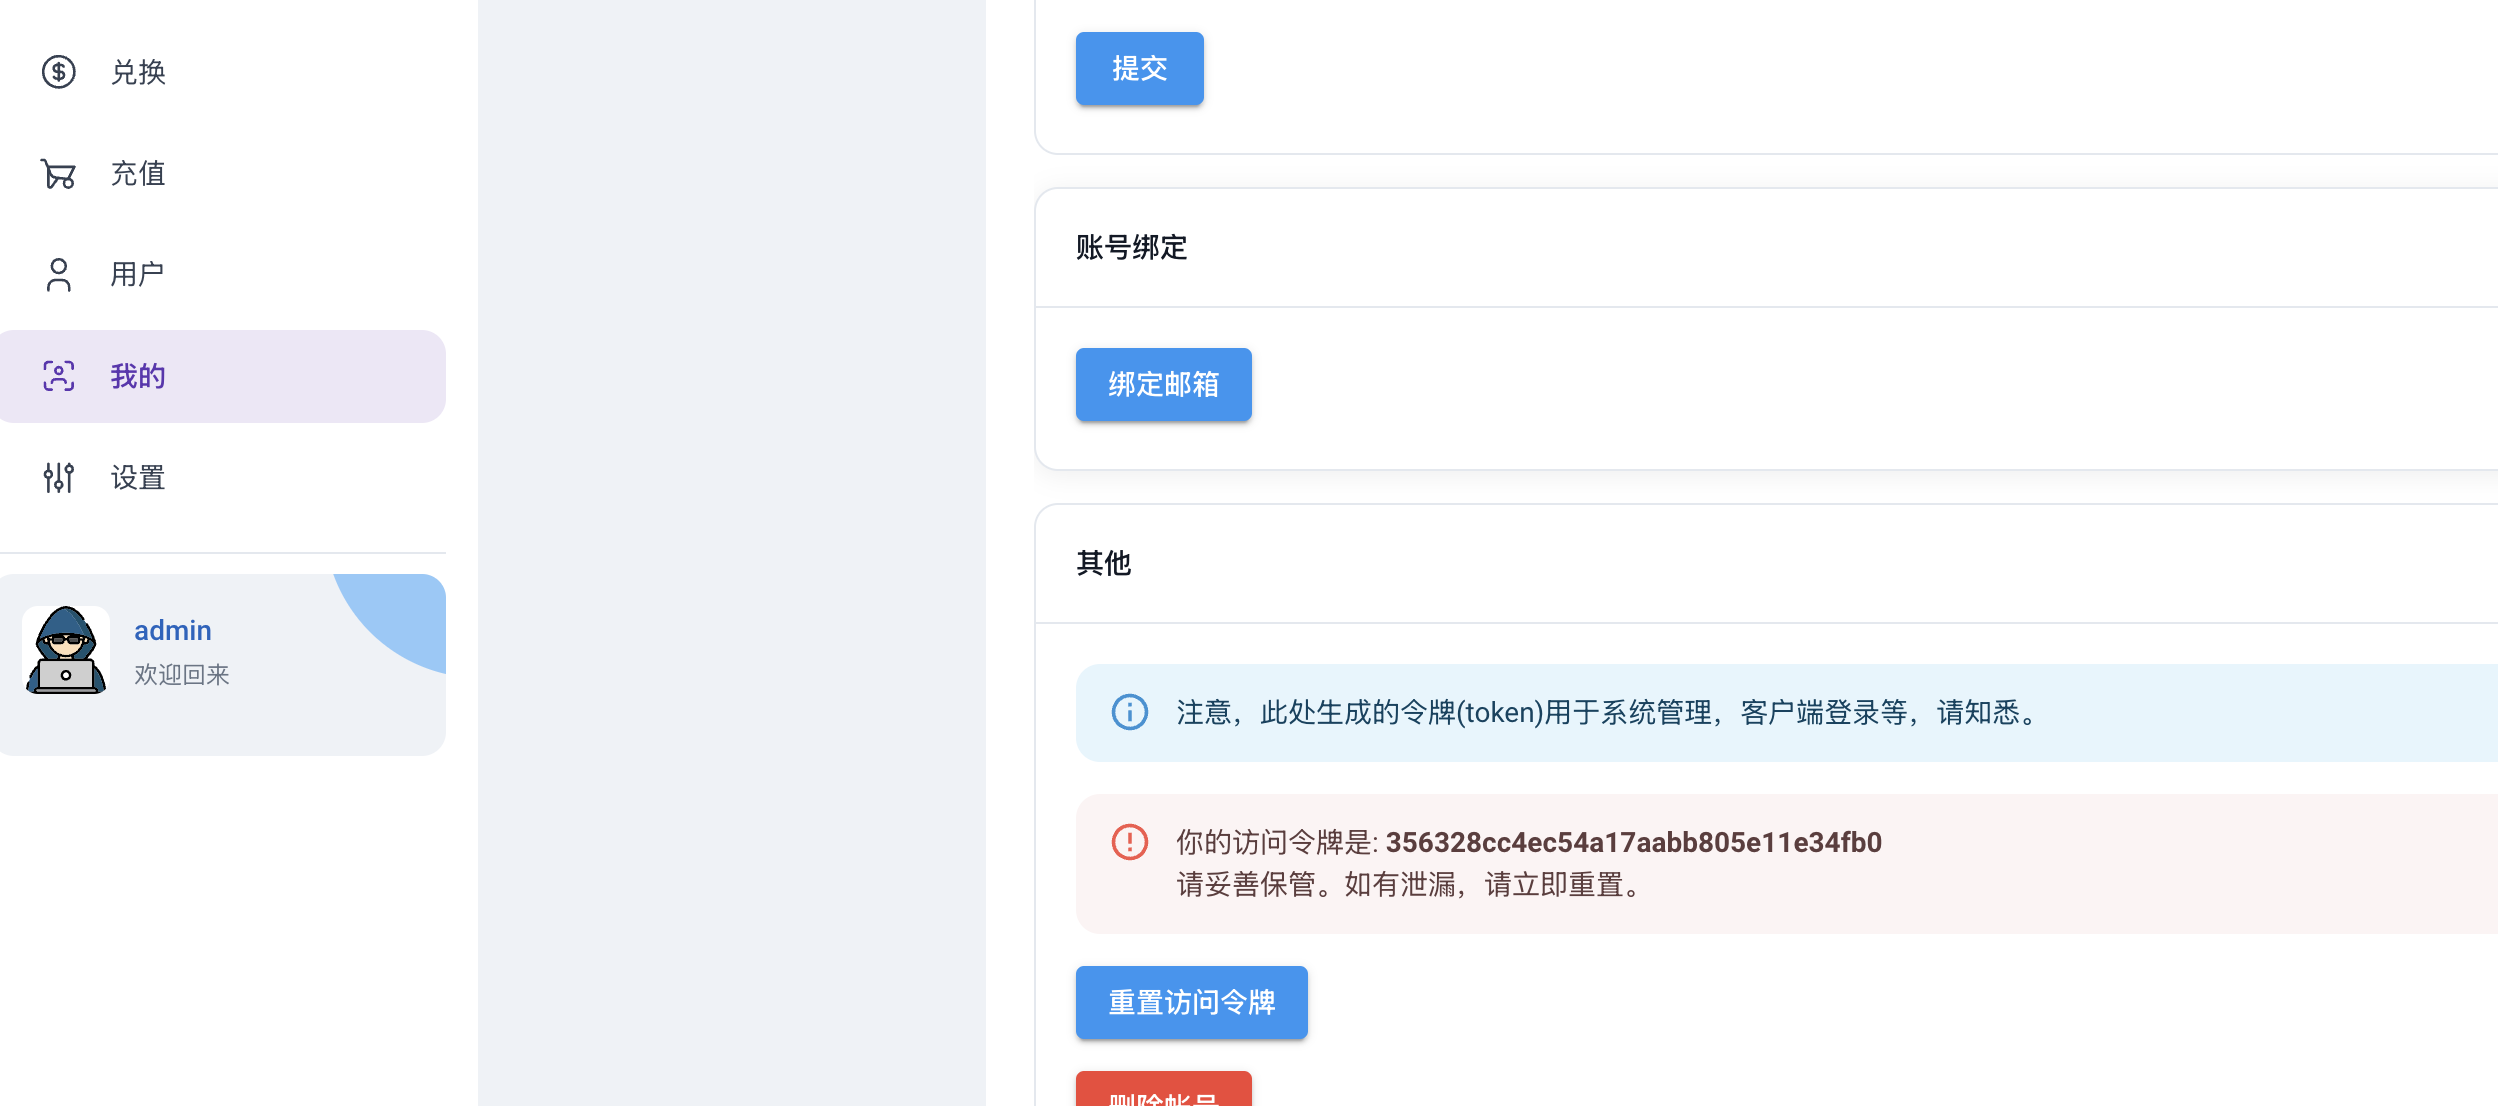
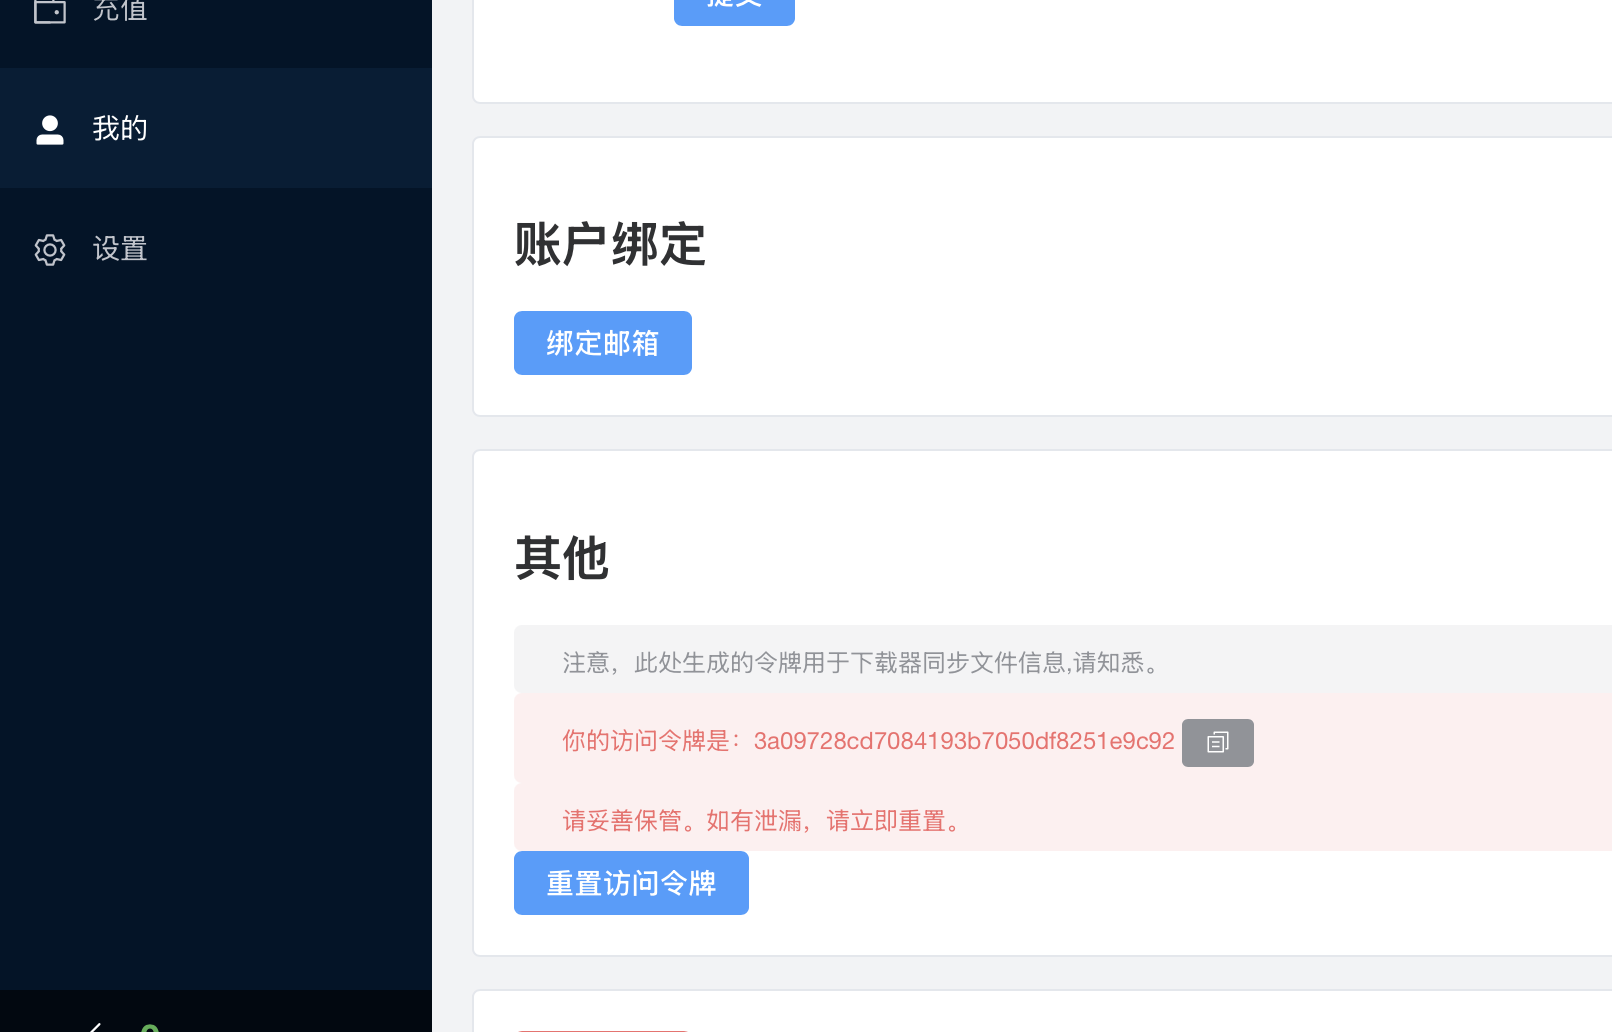
7.1.1 获取 token
方法 1 网页版获取
方法 2 桌面版获取
7.1.2 安装
7.1.2.1 x86 架构(英特尔处理,AMD 处理器)
js
wget https://cors.isteed.cc/github.com/cauyy/matui/releases/download/alpha/tpclash-mat-linux-amd64
chmod +x tpclash-mat-linux-amd64
# 例子中的token替换成自己的token,要查看token到https://www.aider.host/panel/profile
# 如果不想tpclash接管网卡,可以去掉参数-f,去掉参数-f后,需要自行设置代理,类似7.1.3测试那样
# 例子
sudo ./tpclash-mat-linux-amd64 install -f -t 46eb213ffeeb426cafd1043c71426542
sudo systemctl daemon-reload
sudo systemctl start tpclash
#查看是否启动成功
sudo journalctl -fu tpclash
#或者
sudo netstat -apn | grep 7890
👌 TPClash 安装完成, 您可以使用以下命令启动:
● 启动服务: systemctl start tpclash
● 停止服务: systemctl stop tpclash
● 重启服务: systemctl restart tpclash
● 开启自启动: systemctl enable tpclash
● 关闭自启动: systemctl disable tpclash
● 查看日志: journalctl -fu tpclash
● 重载服务配置: systemctl daemon-reload
7.1.2.2 ARM 架构(树莓派,英伟达 json,海思服务器等)
js
wget https://cors.isteed.cc/github.com/cauyy/matui/releases/download/alpha/tpclash-mat-linux-arm64
chmod +x tpclash-mat-linux-arm64
# 例子中的token替换成自己的token,要查看token到https://www.aider.host/panel/profile
# 如果不想tpclash接管网卡,可以去掉参数-f,去掉参数-f后,需要自行设置代理,类似7.1.3测试那样
# 例子
sudo ./tpclash-mat-linux-arm64 install -f -t 46eb213ffeeb426cafd1043c71426542
sudo systemctl daemon-reload
sudo systemctl start tpclash
#查看是否启动成功
sudo journalctl -fu tpclash
#或者
sudo netstat -apn | grep 7890
 👌 TPClash 安装完成, 您可以使用以下命令启动:
● 启动服务: systemctl start tpclash
● 停止服务: systemctl stop tpclash
● 重启服务: systemctl restart tpclash
● 开启自启动: systemctl enable tpclash
● 关闭自启动: systemctl disable tpclash
● 查看日志: journalctl -fu tpclash
● 重载服务配置: systemctl daemon-reload
👌 TPClash 安装完成, 您可以使用以下命令启动:
● 启动服务: systemctl start tpclash
● 停止服务: systemctl stop tpclash
● 重启服务: systemctl restart tpclash
● 开启自启动: systemctl enable tpclash
● 关闭自启动: systemctl disable tpclash
● 查看日志: journalctl -fu tpclash
● 重载服务配置: systemctl daemon-reload
👌 TPClash 安装完成, 您可以使用以下命令启动:
● 启动服务: systemctl start tpclash
● 停止服务: systemctl stop tpclash
● 重启服务: systemctl restart tpclash
● 开启自启动: systemctl enable tpclash
● 关闭自启动: systemctl disable tpclash
● 查看日志: journalctl -fu tpclash
● 重载服务配置: systemctl daemon-reload对于 centos 等老系统,或者内核被阉割的,无法实现 tun 全局接管的,可以试试 proxychains
conf
yum install epel-release
yum install -y proxychains-ng
vi /etc/proxychains.conf
# 将socks4 127.0.0.1 9095改为
http 127.0.0.1 7890
#测试
proxychains wget https://www.google.com
7.1.2.3 容器
conf
wget https://cors.isteed.cc/github.com/cauyy/matui/releases/download/alpha/tpclash-mat-linux-amd64
chmod +x tpclash-mat-linux-amd64
# 例子中的token替换成自己的token,要查看token到https://www.aider.host/panel/profile
#
# 如果提示/data目录没有权限,通过-d xxxx修改程序目录,比如/home/xxxx(不要傻傻的直接用,只是举例)
# 大概率会报错不用管
./tpclash-mat-linux-amd64 -t 46eb213ffeeb426cafd1043c71426542 -d /home/xxxx
#.eg 启动代理(通过-d xxxx修改程序目录的要用具体目录替换/data)
/data/clash/xclash -f /data/clash/xclash.yaml -d /data/clash
#然后其他窗口设置代理
export HTTP_PROXY=http://127.0.0.1:7890
export HTTPS_PROXY=http://127.0.0.1:7890
#或者
netstat -apn | grep 7890
sudo ./tpclash-mat-linux-amd64 install -f -t ba576870665e4939b809b9cf545abb8c
如果./tpclash-mat-linux-arm64 -t 46eb213ffeeb426cafd1043c71426542 -d /home/xxxx 报错,类似,不用管

如果文件 tpclash-mat-linux-arm64 下载有问题可以本地下载完再上传
7.1.3 测试
conf
#如果内核支持tun模式,可以直接接管网卡,无需设置代理参数
wget -c -r -np -k -L -p https://www.youtube.com
#如果内核不支持tun模式,需设置代理参数
wget -c -r -np -k -L -p -e "https_proxy=http://127.0.0.1:7890" https://www.youtube.com
-c -r -np -k -L -p -e "https_proxy=http://192.168.199.174:7890"
7.1.4 查看代理详情,切换节点
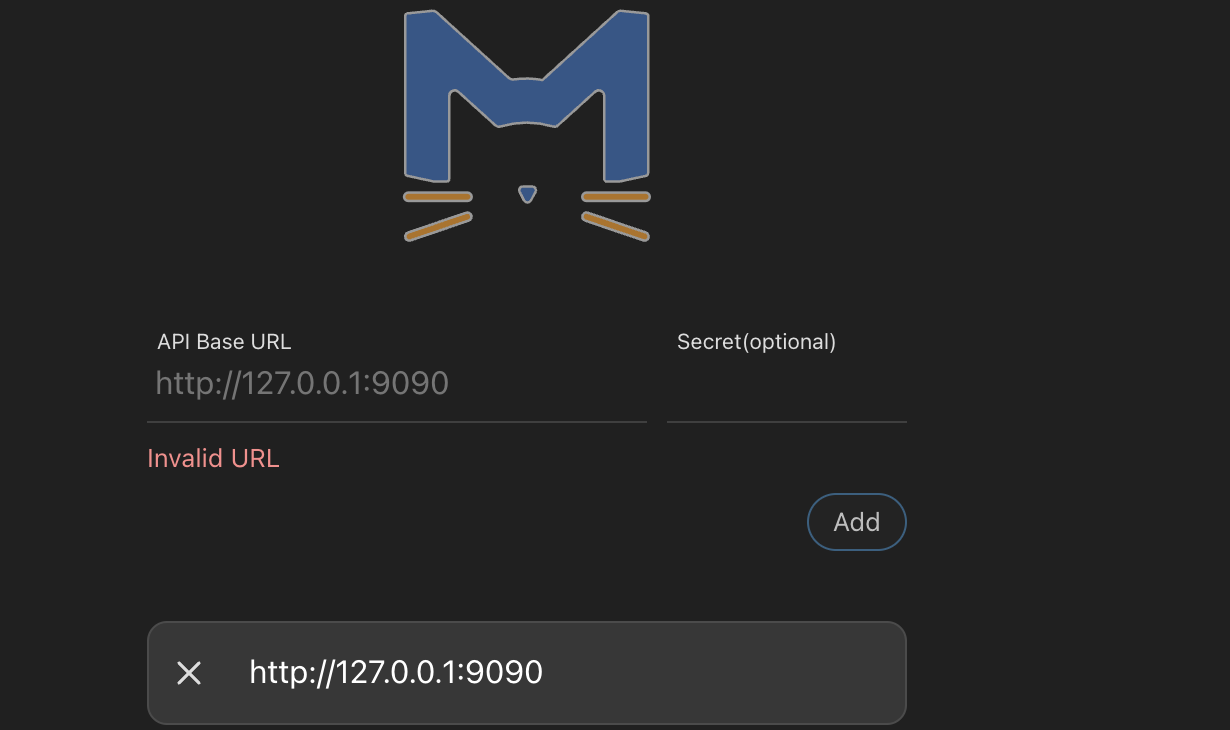
如果操作,进入 http://ip:9090/ui -> ip 改为具体的地址
7.1.4.1 如本机访问,浏览器访问 http://127.0.0.1:9090/ui
API Base 填 http://127.0.0.1:9090,点击 Add
7.1.4.2 如果其他机器,比如 IP 为 192.168.1.111,则浏览器访问 http://192.168.1.111:9090/ui
API Base 填 http://192.168.1.111:9090,点击 Add
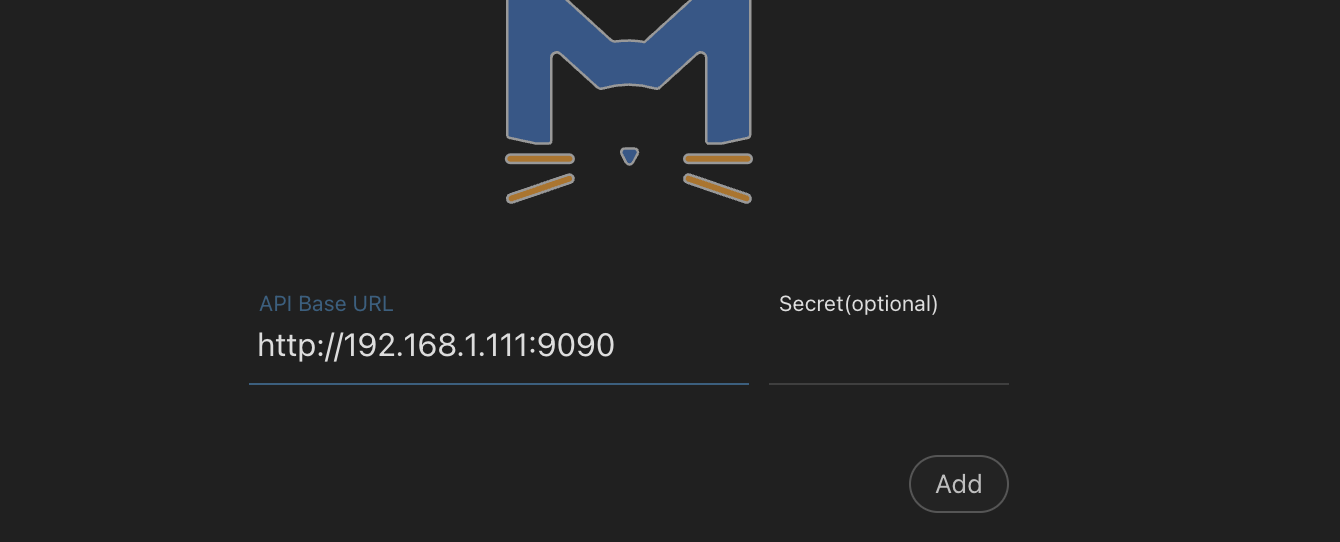
注意!!!!!!!!!!!!
7.1.4.2.1 如果不能访问,请检查端口(9090)访问是否开放,放开端口参考
对于 ufw 防火墙(Ubuntu/Debian):
conf
sudo ufw allow 9090
对于 firewalld(CentOS/RHEL/Fedora):
conf
sudo firewall-cmd --zone=public --add-port=9090/tcp --permanent
sudo firewall-cmd --reload
对于 iptables:
conf
sudo iptables -A INPUT -p tcp --dport 9090 -j ACCEPT
7.1.4.2.2 不想放开端口,参考 SSH 转发
conf
ssh -L 9090:远程主机地址:远程端口 用户名@远程主机
例如:ssh -L 9090:192.168.1.100:9090 user@remote_host
7.1.4.3 选择 「自动选择」或 「自动选择(低延时)」
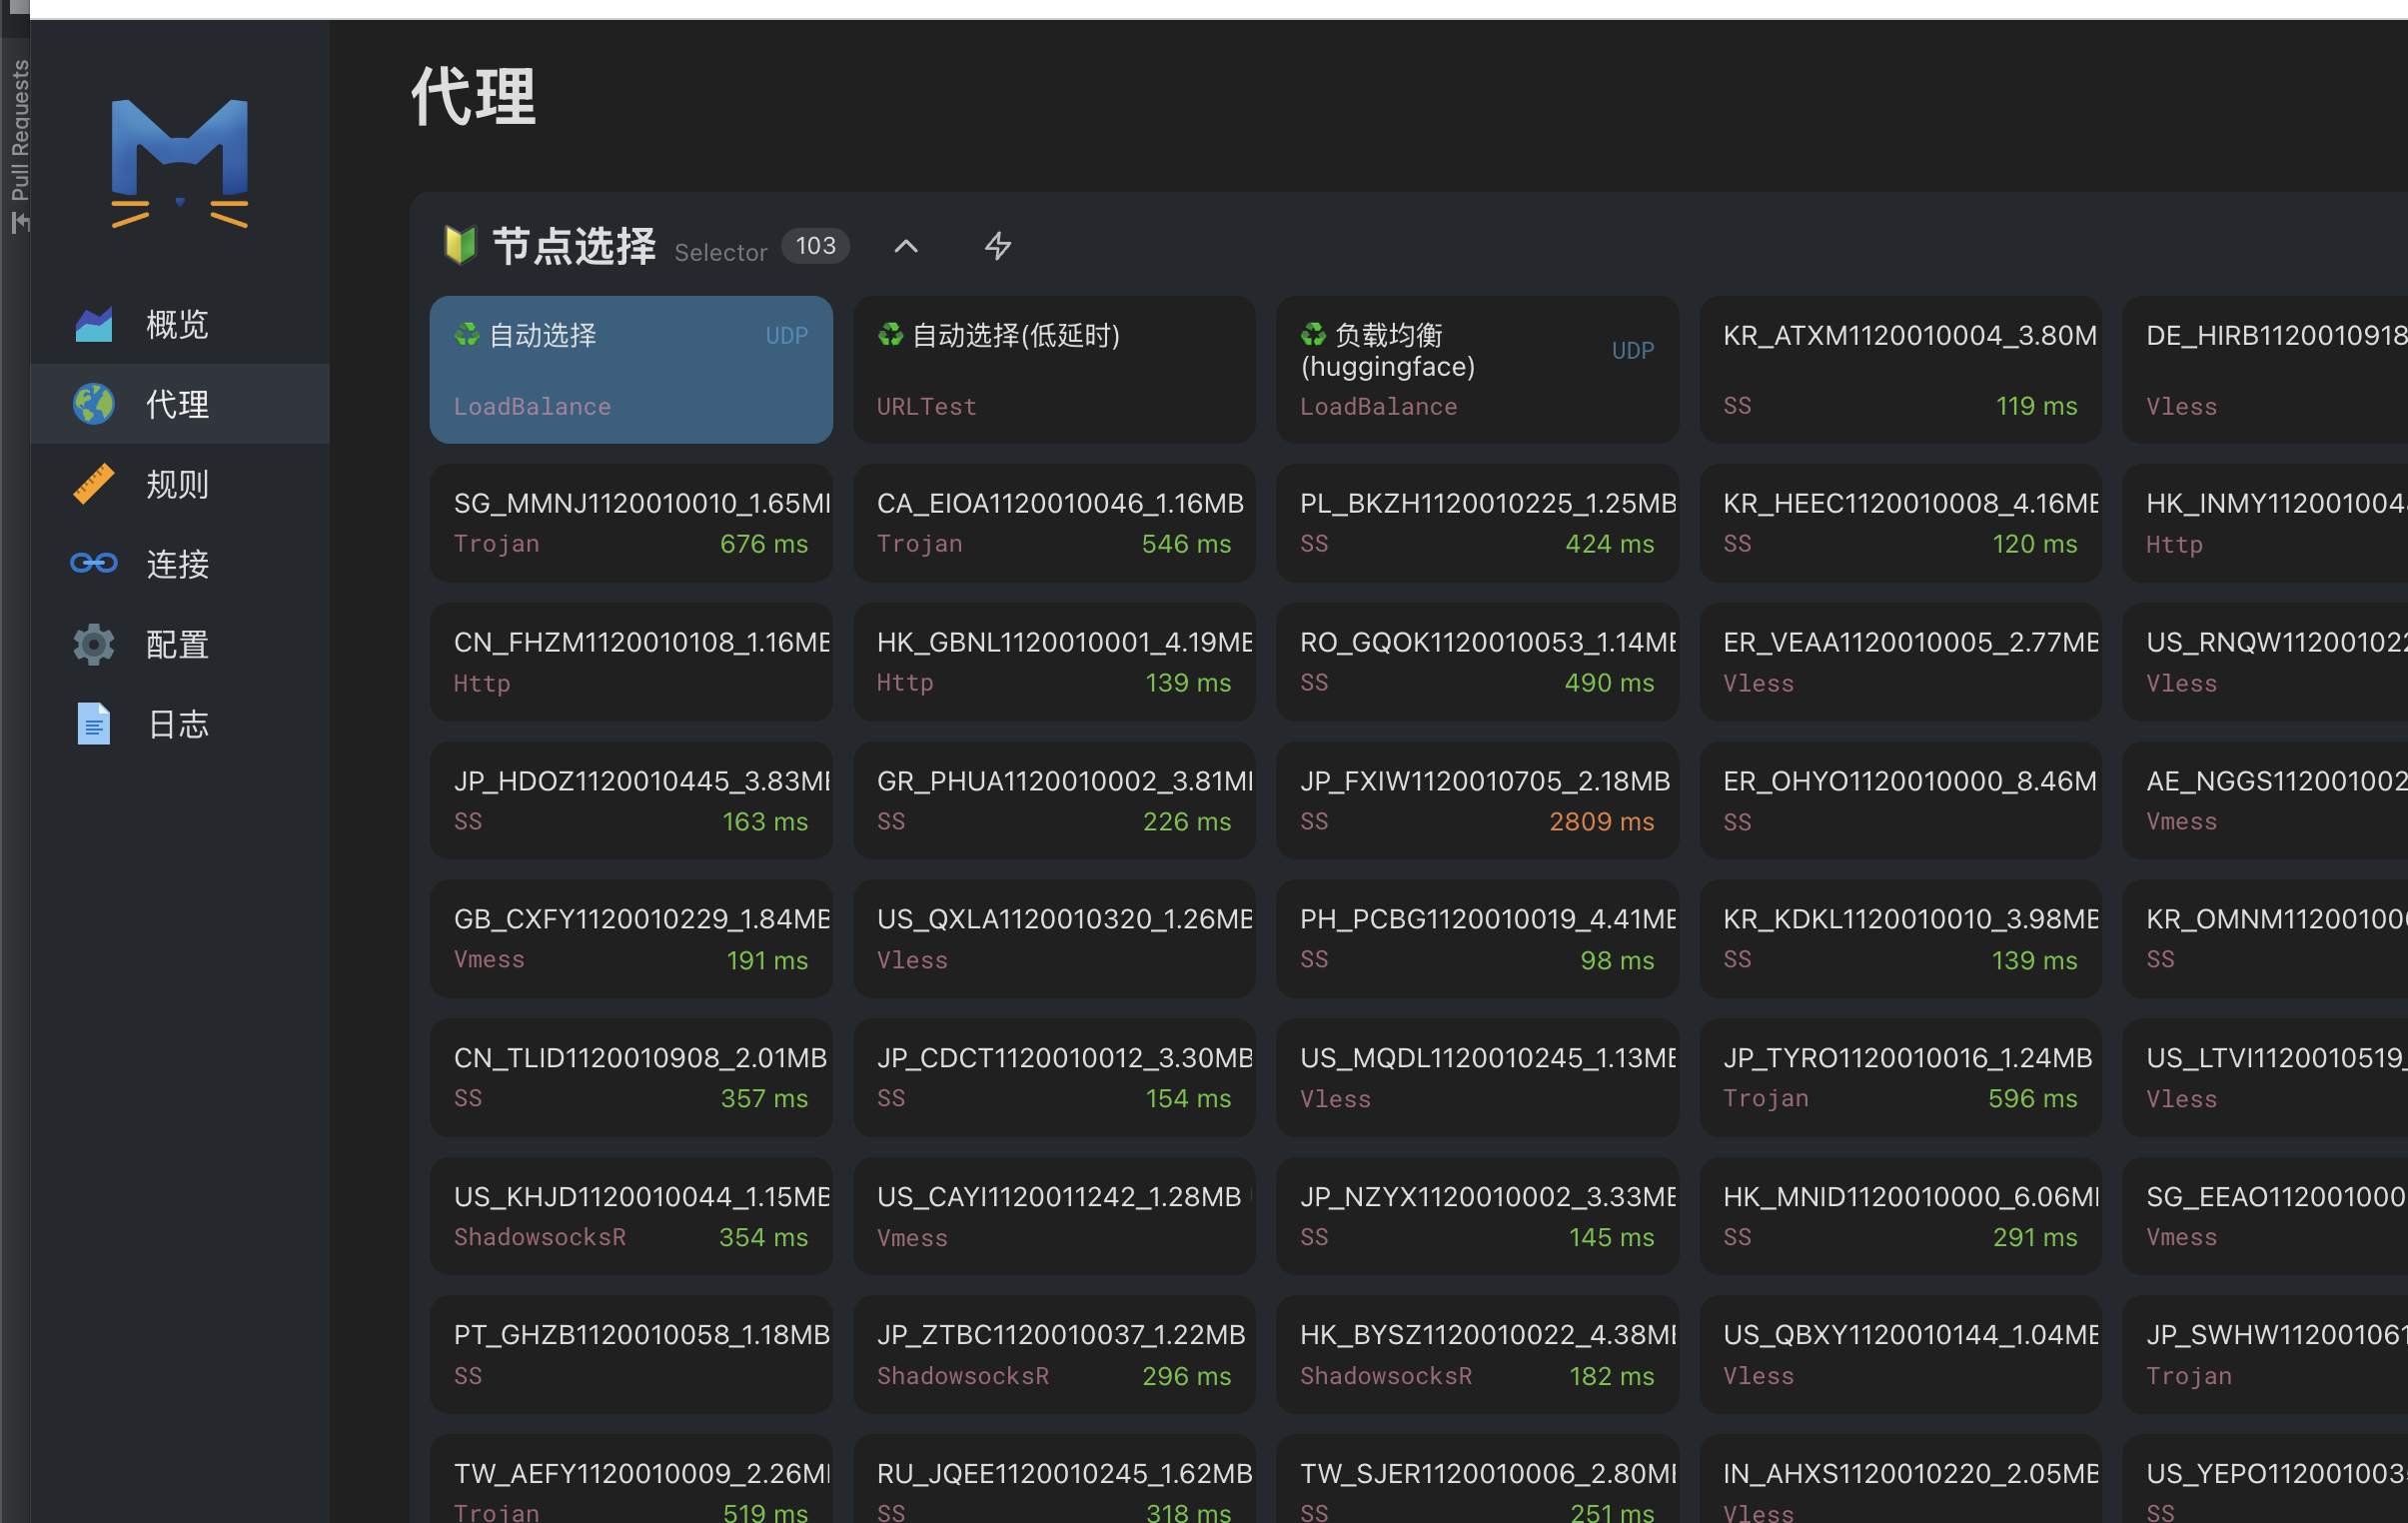
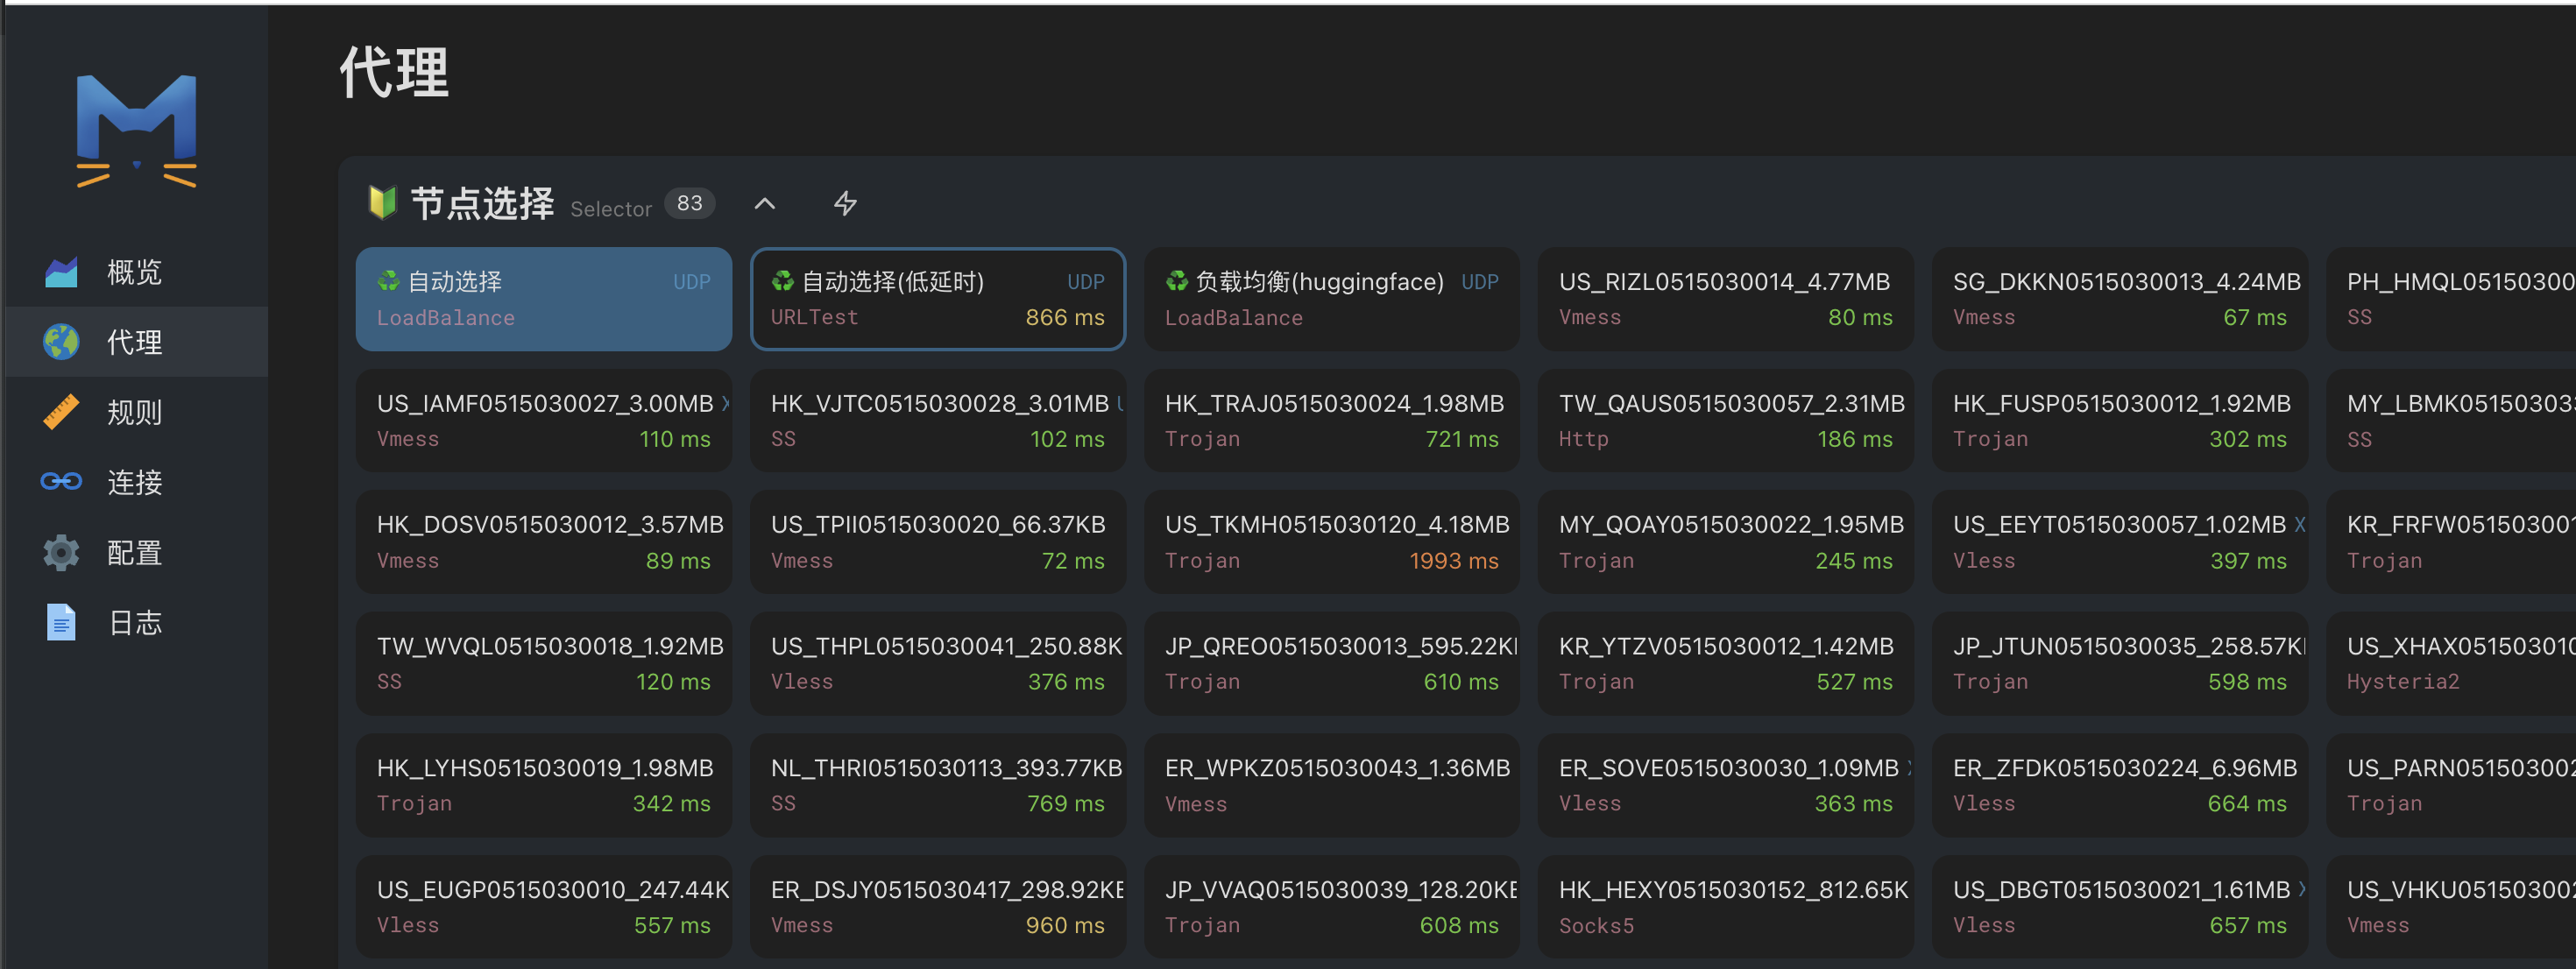
7.1.4.4 对于 centos 等,可能不成功,配置里面 TUN IP Stack 切换下(gVisor,System,LWIP 都试试) 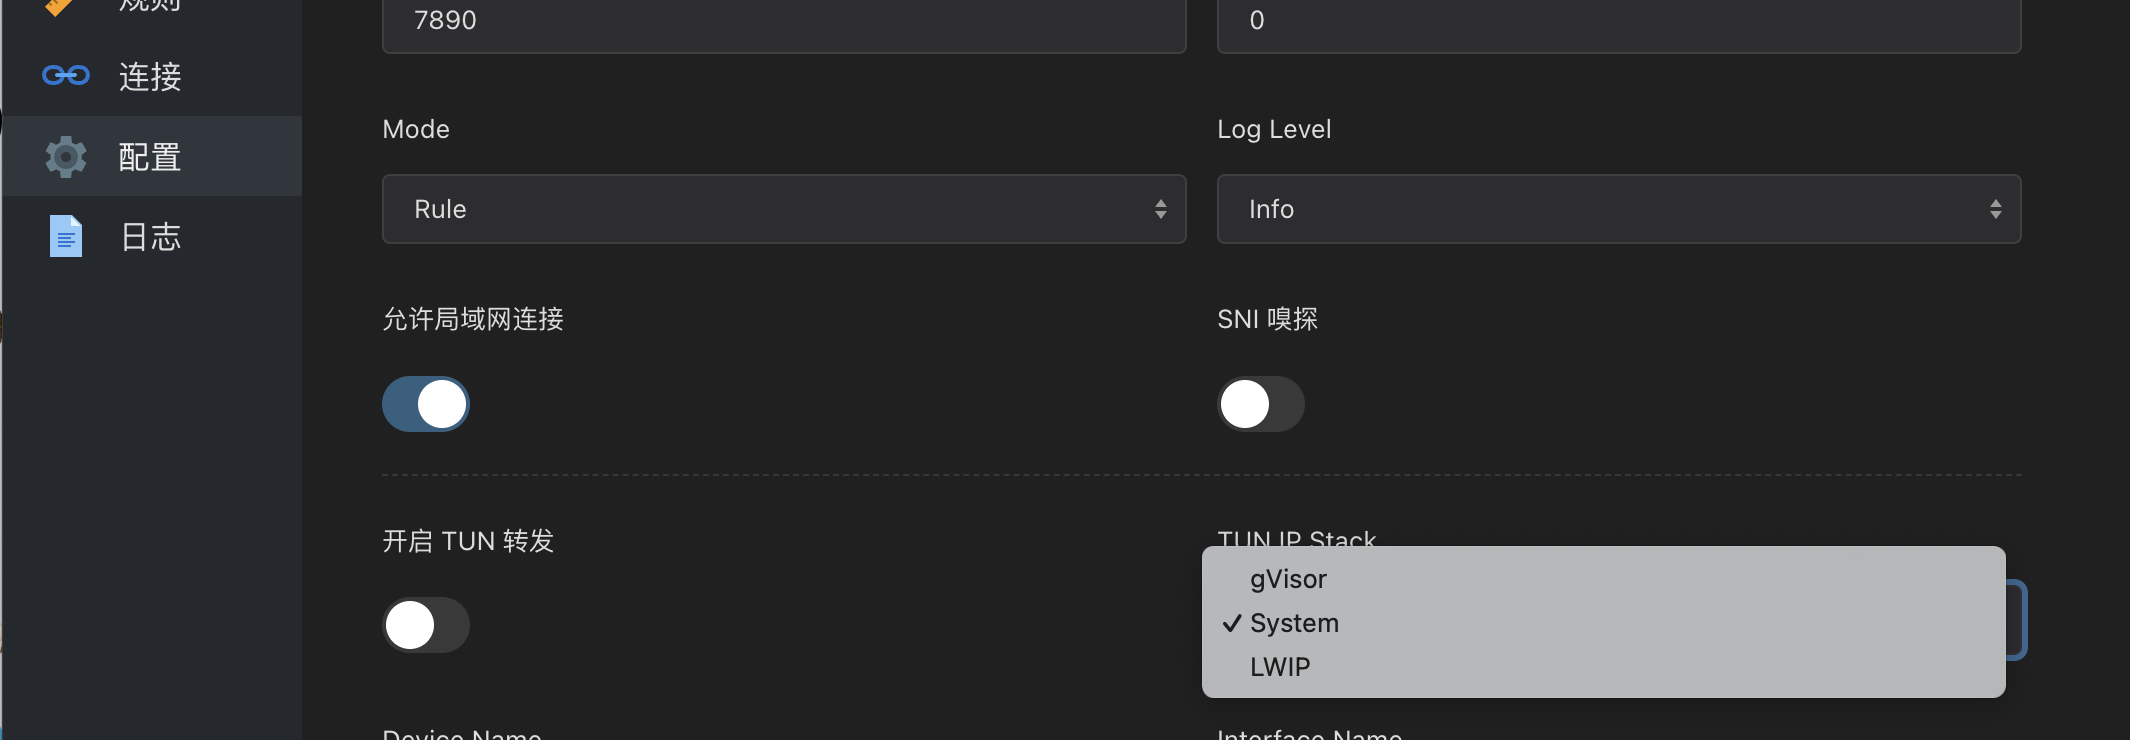
7.1.4.5 更新节点集
如果没有拉取到节点,点击「代理」拉倒最后,点击更新按钮
8 附录(问题和解决方案)
8.1 neatdownloadmanager 下载工具
对于 MacOS 系统可能会被 Motrix 不稳定困扰,如果不需要批量下载可以用这个工具
8.1.1 设置代理
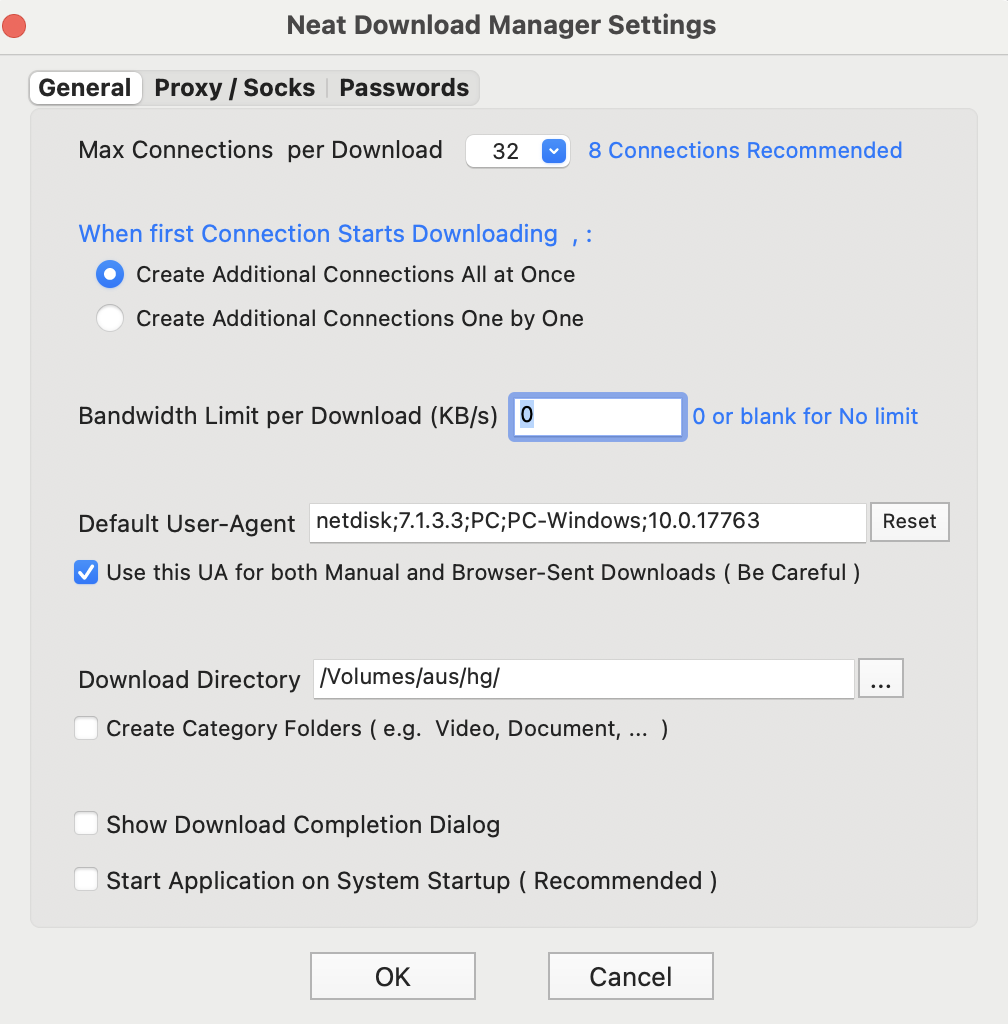
8.1.2 设置缓存路径和文件保存路径,以及默认并发线程
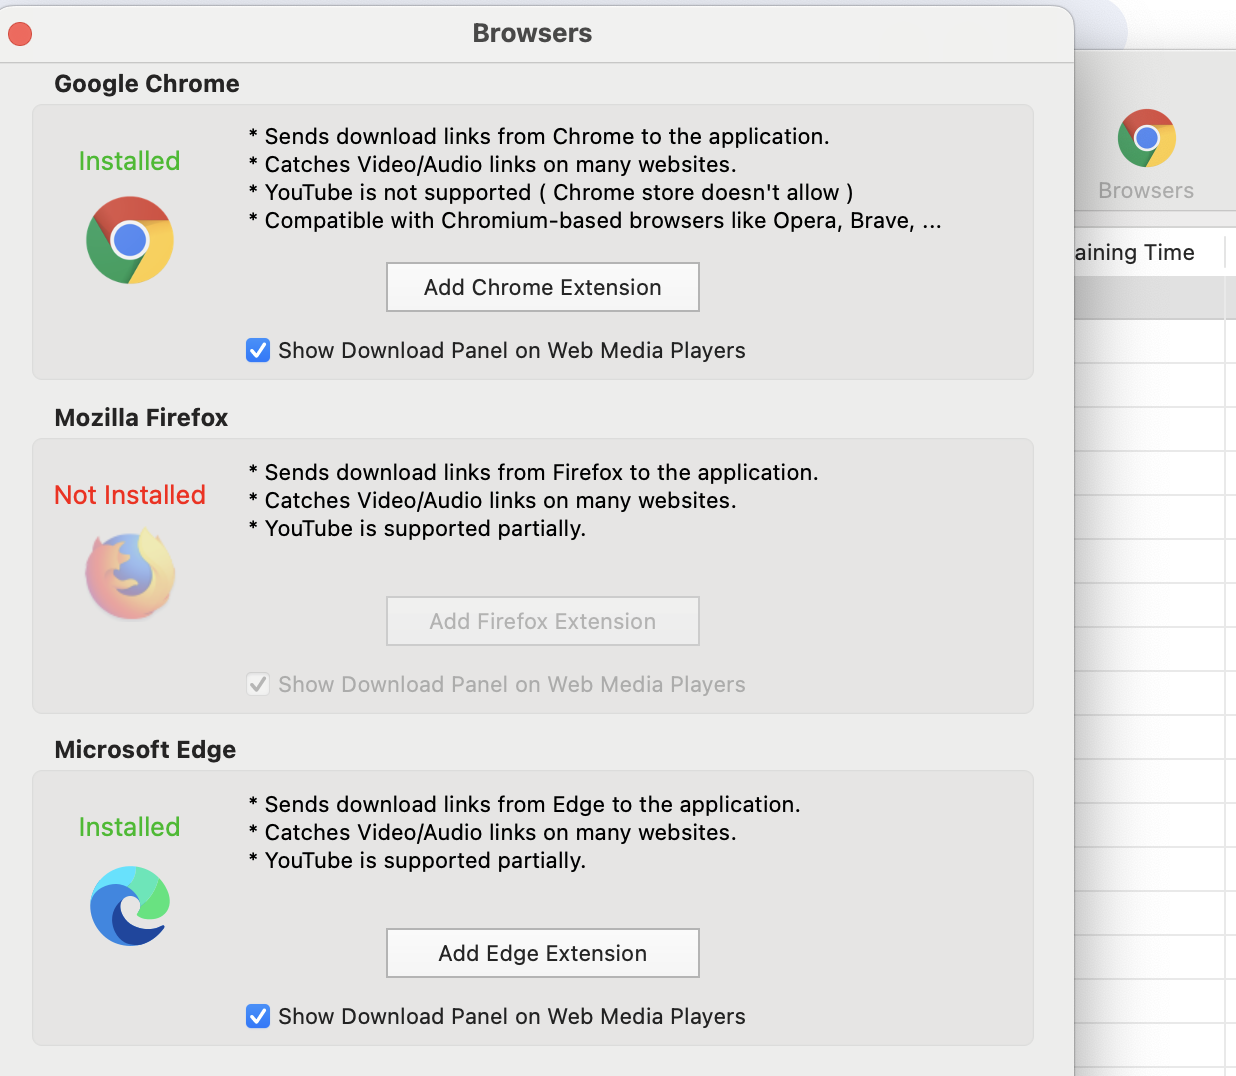
8.1.3 浏览器插件安装(可选)
可以让 neatdownloadmanager 接管浏览器下载
8.2 浏览器插件 SwitchyOmega 3(ZeroOmega)安装(可选)
系统有时可能各种原因设置系统代理不生效,可以直接浏览器安装代理切换插件,浏览器建议使用微软的Edge
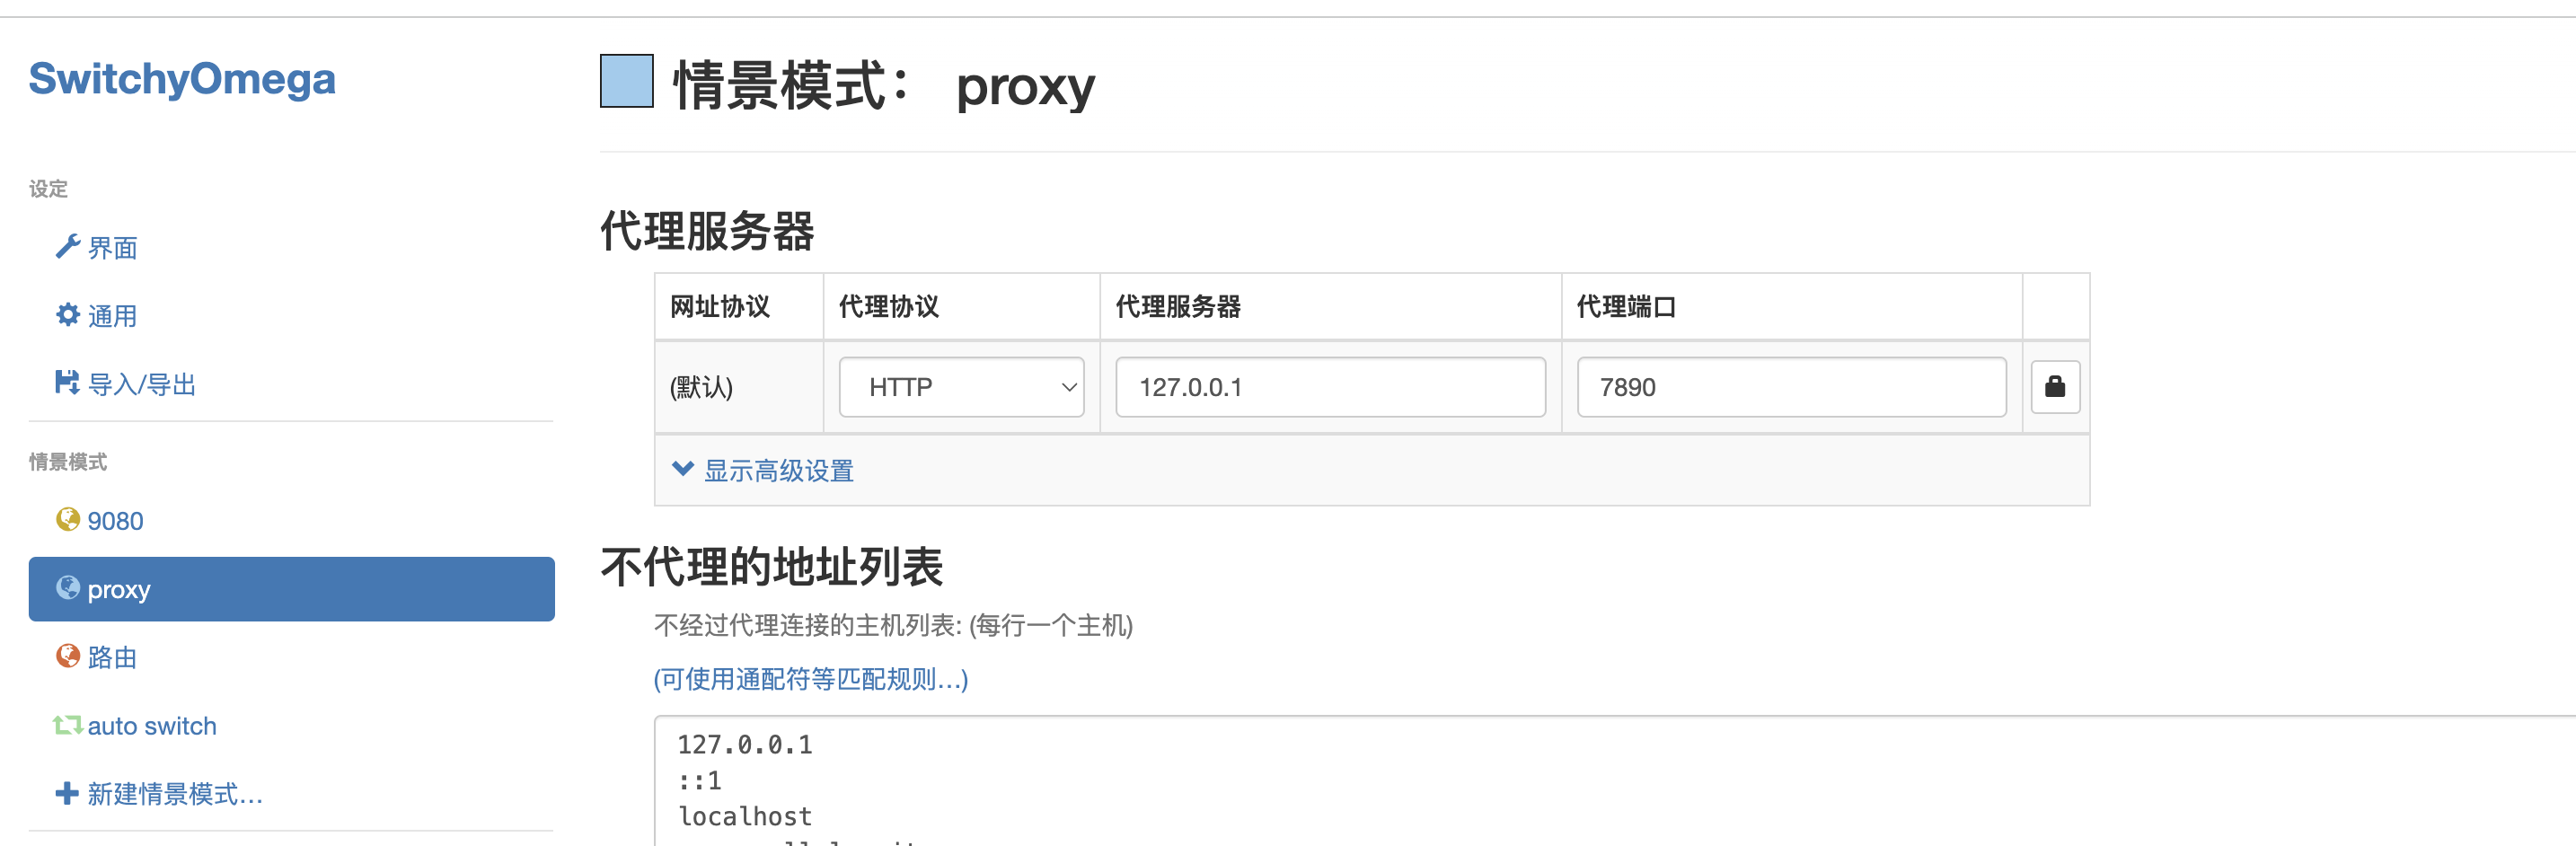 设置好代理地址和端口后保存,然后就可以切换浏览器代理为 proxy
设置好代理地址和端口后保存,然后就可以切换浏览器代理为 proxy 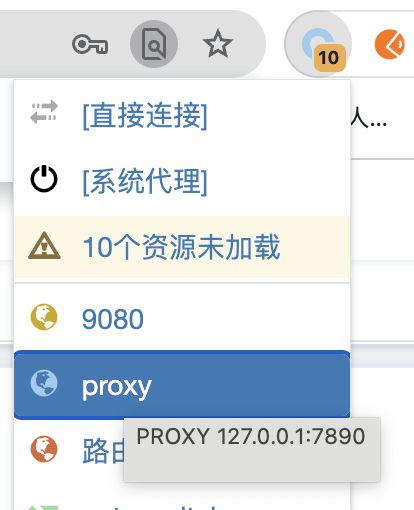
8.3 删除老版本数据
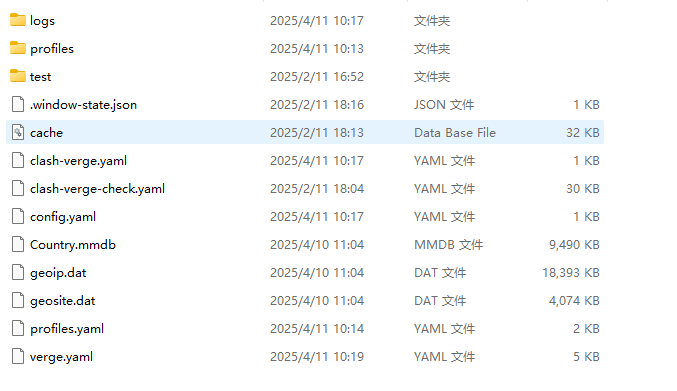
如果遇到类似这种情况(配置不兼容,混乱),执行删除所有配置文件
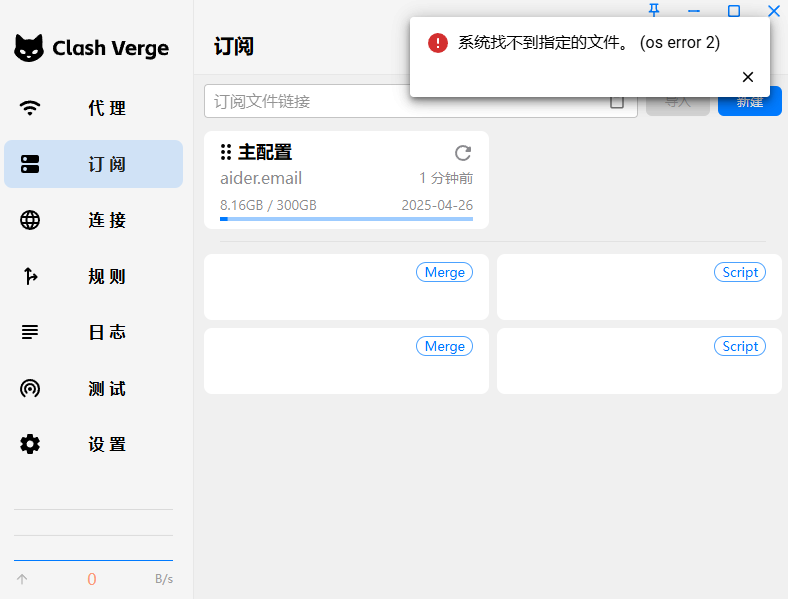
点击「应用目录」,打开配置文件目录,退出 app 后,删除里面的所有东西
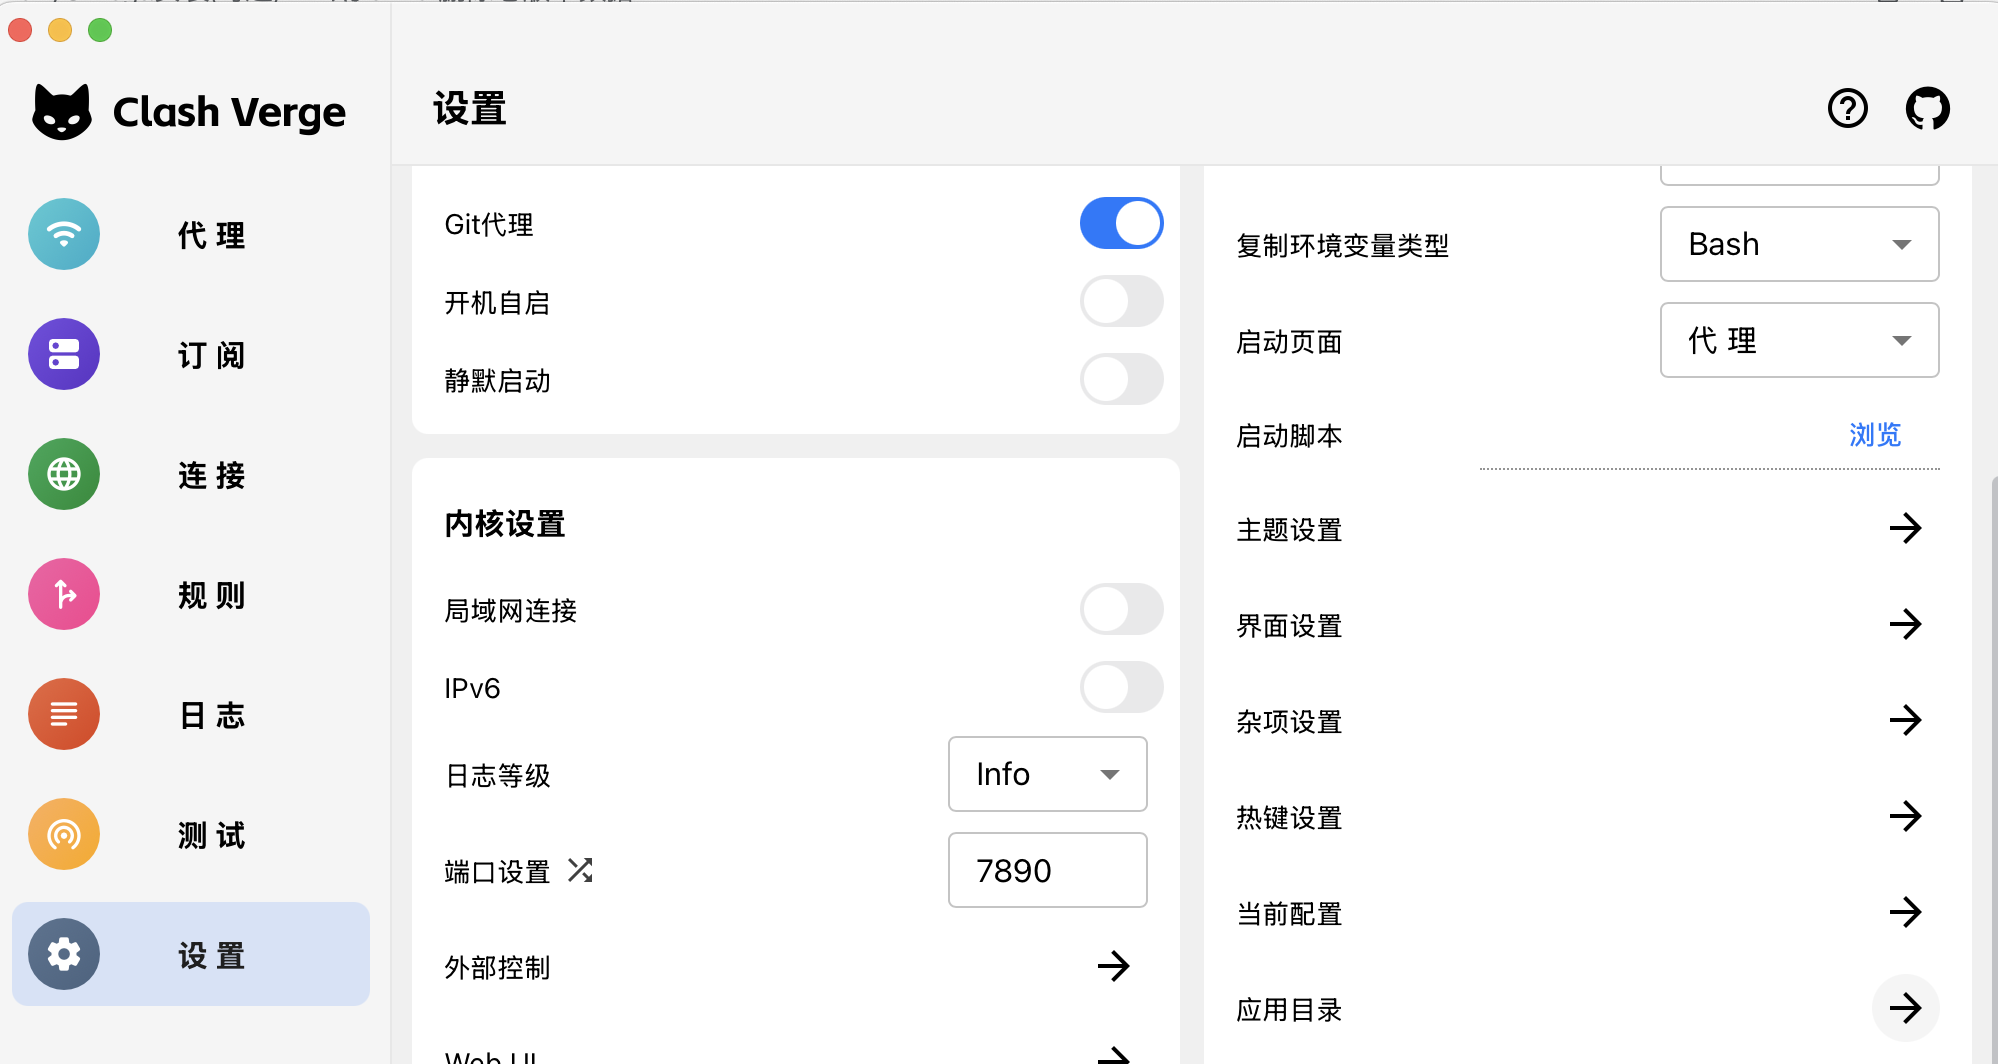
8.4 WSL 使用代理
WSL 有两个版本,WSL1 和 WSL2,在终端执行,可以得到 WSL 版本信息
conf
wsl -l -v
WSL1 和宿主机试共享网络的,直接开启 tun 模式就行
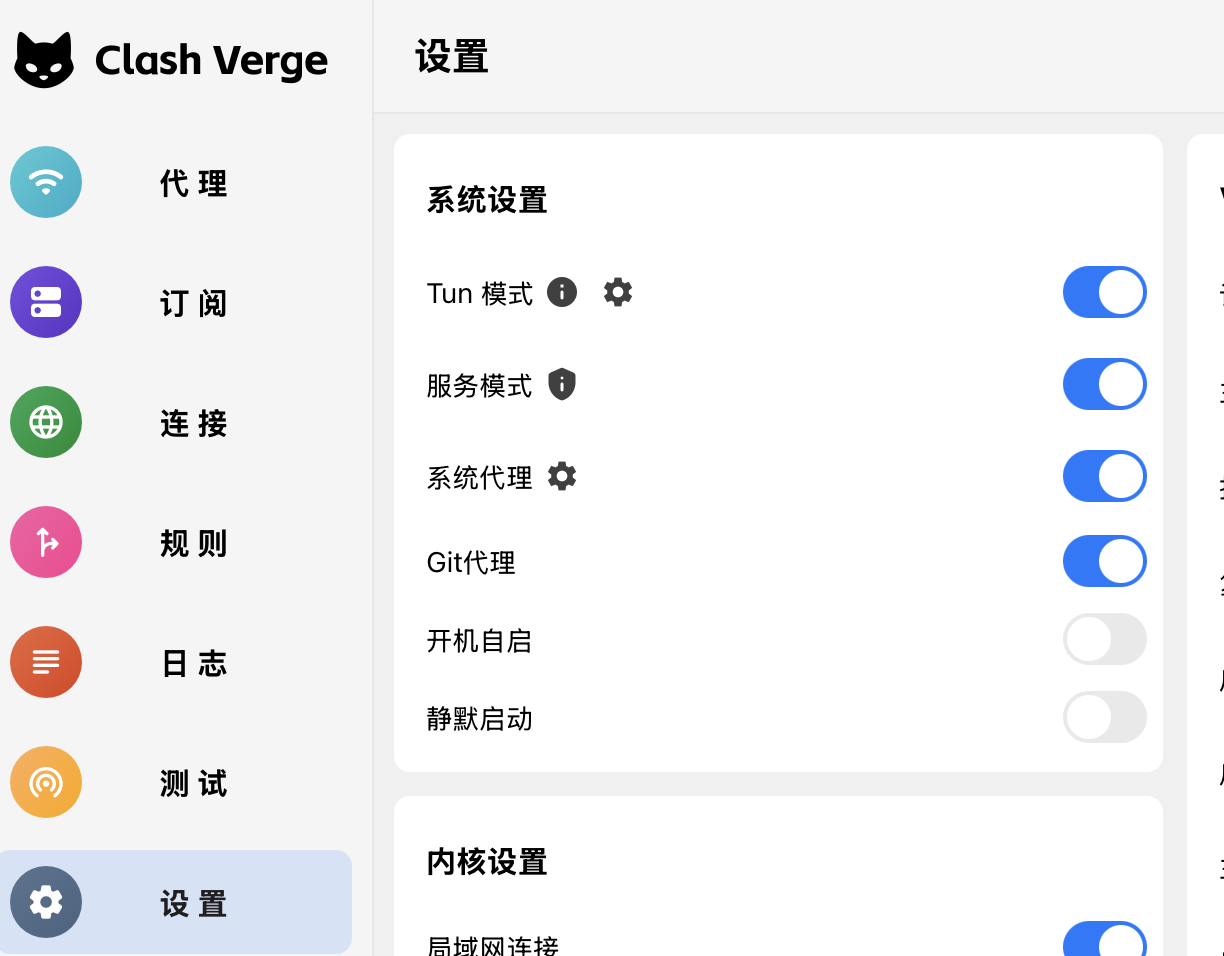
WSL2 和宿主机网络隔离
8.5 MacOS 系统下自动定时覆盖系统的 DNS 为 223.5.5.5
在终端执行
conf
echo Empty > /Applications/Clash\ Verge.app/Contents/Resources/resources/original_dns.txt
8.6 docker 设置代理
nano /etc/docker/daemon.json
、
{
"registry-mirrors": ["https://registry.docker-cn.com"],
"proxies": {
"http-proxy": "http://127.0.0.1:7890",
"https-proxy": "http://127.0.0.1:7890",
"no-proxy": "localhost,127.0.0.1"
}
}
8.7 内核被360等流氓软件误杀排查
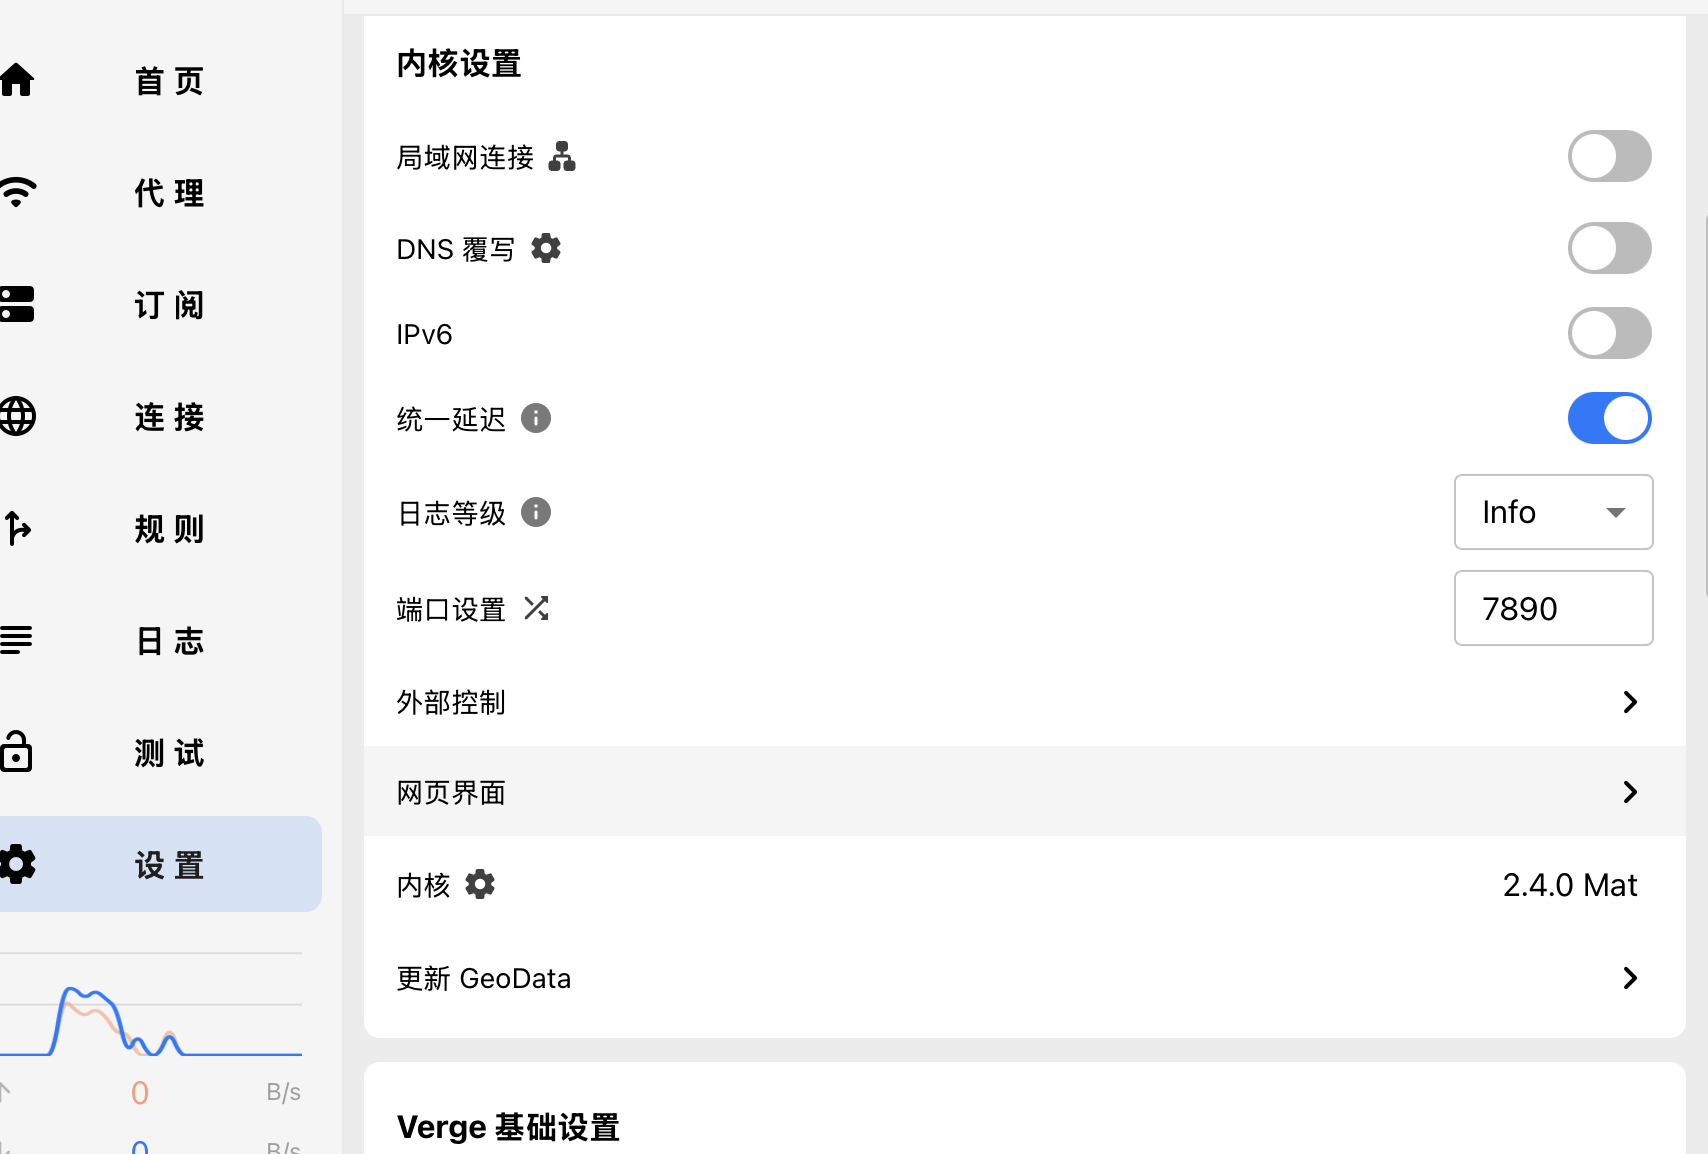
设置里面,内核设置,如果不能看到内核版本号(类似例子中:2.4.0 Mat),说内核被误杀了,重新安装App即可,强烈建议卸载360等这类流氓软件
8.8 ChatGPT报国家地区限制
一般是IP数据库与openai的数据库不一致导致的,进入代理页面,右上角 代理集合 ,更新全部